12
Preparing For Installation
1. Check the loader or tractor and attachment hydraulic couplers to be
sure the surfaces are clean before connecting.
2. Inspect the couplers for damage or wear and replace if needed for
proper connection.
Installing the Attachment
1. Follow the instructions in the loader operator’s manual to install the
attachment and exit the operator station safely.
2. Fully lower the loader lift arms.
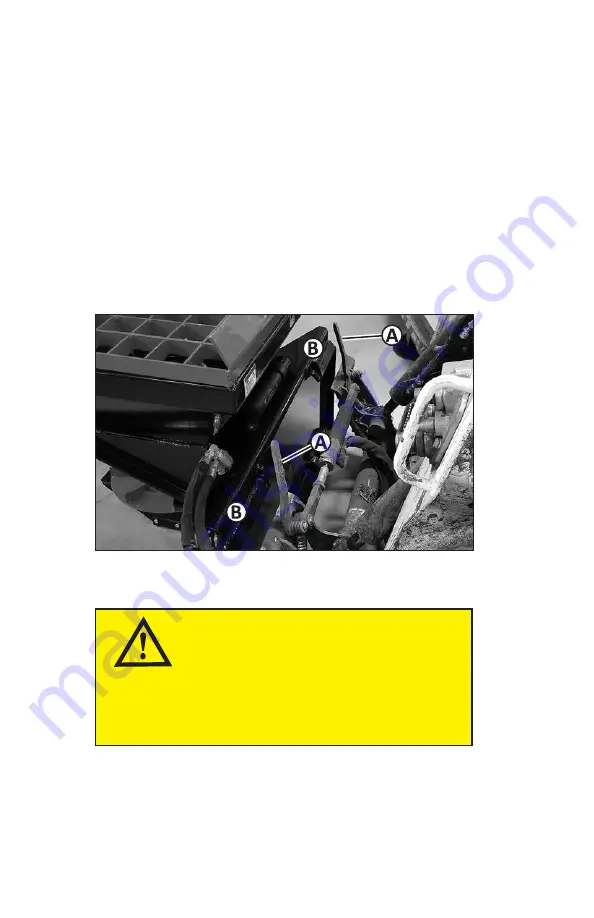
3. Move the loader attaching plate levers (A) to the unlocked (up) posi-
tion either manually or by using the loader controls.
IMPORTANT
AVOID DAMAGE!
Attaching plate levers may be damaged if they
strike the attachment. Be sure the attaching plate
levers do not hit the attachment during installation.
4. Tilt the loader attaching plate forward, and drive the loader forward
until the top edge of the loader attaching plate is under the top flange
(B) of the attachment mounting frame.
5. Raise the loader lift arms slightly until the attaching plate is fully
seated under the top flange.
Installing and Removing
Summary of Contents for 13216
Page 28: ...28 Replacement Parts...


