


PAGE 18 — STXDF TROWEL • SETUP, ADJUSTMENTS AND CALIBRATIONS — REV. #0 (11/05/18)
LAPTOP CONFIGURATION
CONNECTION PROCEDURE
1. Plug the CAN Gateway cable to the trowel at the service
port (Figure 18). Do not connect laptop at this time.
Figure 18. CAN Gateway Cable to Service Port
2. On the trowel, turn the ignition key to the ON position
(Figure 19). This will turn on the MCU. It is not
necessary to crank or turn on the engine.
Figure 19. Ignition Key ON
3. Connect the USB connector of the CAN Gateway cable
to the USB port of the laptop (Figure 20).
Figure 20. Connecting the Laptop
NOTICE
Make sure that the Sauer Danfoss Plus+1 Software
and Whiteman Service Tool (WST) are installed before
proceeding with the connection procedure.
42948
22881
22882
Whiteman Service Tool Application
Connecting Laptop to Trowel
24
•
Turn the Key to the ON position, Cranking or turning on the
engine is not required.
CRANK
ON
ACC
OFF
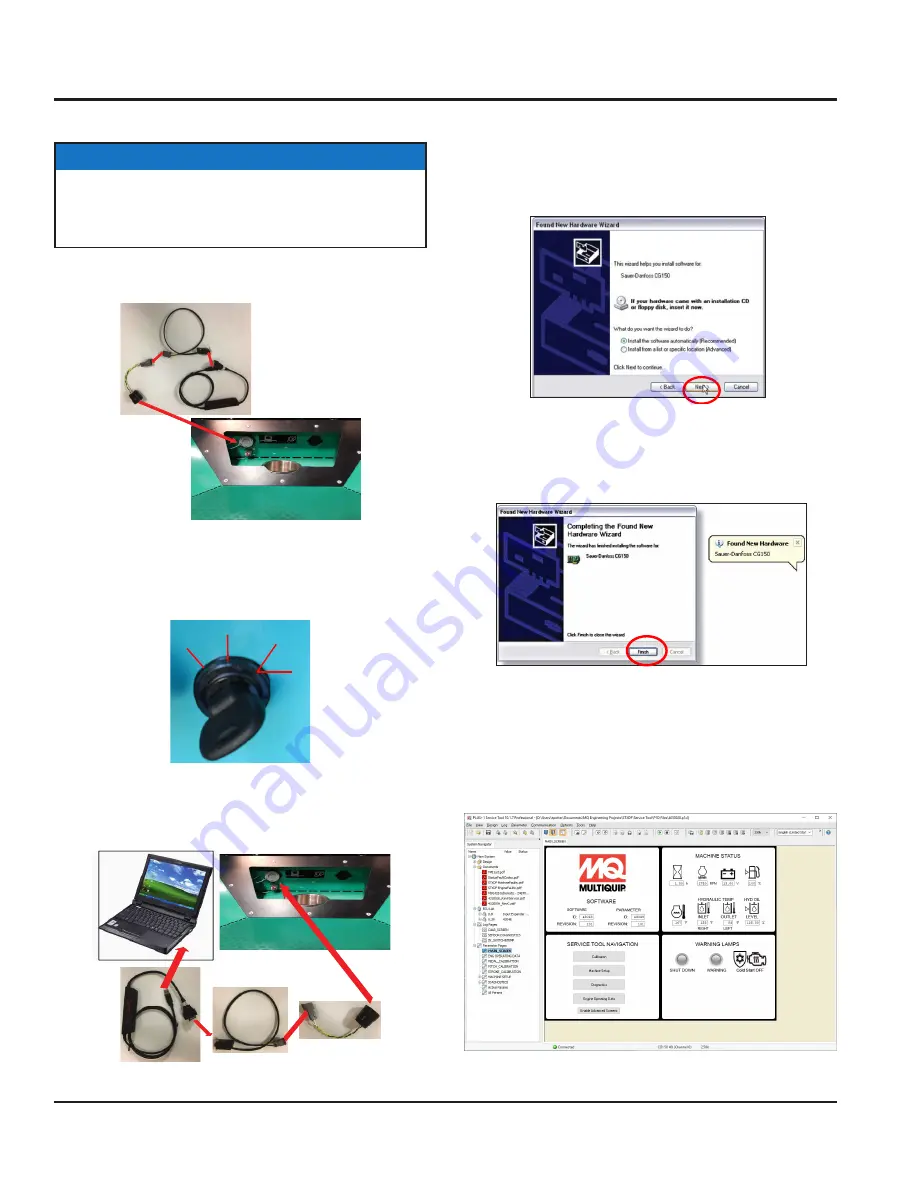
4. When the CAN Gateway cable is connected to the
laptop for the first time, it is necessary to install the
CAN driver software. The installation screen will
appear (Figure 21). Click "Next" to install the software
automatically (default).
Figure 21. CAN Driver Installation
5. Click "Finish" on the next screen (Figure 22) to
complete installation.
Figure 22. CAN Driver Installation Complete
6. On the Service Tool software on your laptop, the main
screen should show Software info loaded from trowel
MCU and the Machine Status box shows lamps lit
(Figure 23).
Figure 23. Service Tool Main Screen
Connecting Laptop to
Trowel
26
•
First time connected.
•
CAN Driver Software install.
WST – Whiteman Service Tool
Connecting Laptop to
Trowel
26
•
First time connected.
•
CAN Driver Software install.
WST – Whiteman Service Tool


