successful, the radar will respond with a “PAS” message. Otherwise the radar will indicate a “fail” condition
by displaying “ERR”.
Immediately after passing the internal test, the letter “F” will be momentarily displayed in the target window.
The “F” indicates that the radar is in the tuning fork test mode. See page __ for details on the tuning fork
tests. The unit will stay in the tuning fork mode for approximately 30 seconds.
The Ranger EZ periodically tests itself while the radar is operating. If no errors are detected, the radar will
give indication of this by lighting the OK LED, located in the lower right-
hand side of the Patrol speed window. If an error is detected, the Ranger EZ
will immediately indicate this by displaying “ERR” and ceasing to display
target speeds. In the event of a test failure, the radar should be removed from
service until the problem can be remedied. In no case will the Ranger EZ
process speeds when an error condition is present.
Select the operating mode
with a beep, letting you know the Ranger EZ understood and executed the
action. Now press the OPP button, putting the radar in Opposite Direction
mode.
The selected mode will be illustrated in the Mode window, which is located
on the Ranger's front panel. The green car is lighted (meaning that you are
not in Standby), and since you are in opposite direction mode on the front
antenna, the arrow in the opposite lane of traffic ahead of the patrol car is
lighted. In all cases, the arrows indicate the traffic that is being monitored.
Press the “Stnby” (Standby) button on the remote. Notice that the red X is
lighted, indicating that the unit is not transmitting. None of the arrows are
lighted since no traffic is being monitored. You’ll also notice that the radar
reads either “Ci”, “Hi”, or “Aut” in the Patrol window; we’ll address this later.
Press the “Rear” button on the remote (if the radar is equipped with a rear
antenna). The arrow that is behind the patrol car in the opposite lane of traffic is lighted, since the radar is in
opposite direction moving mode and transmitting on the rear antenna.
Press the “Same” button on the remote. The lighted arrow behind the car moves from the opposite lane of
traffic because the same direction traffic behind the patrol vehicle is being monitored.
Press the “Front” button. The lighted arrow moves to the front of the green patrol car since same direction
traffic in front of the patrol vehicle is being monitored.
Try out Stationary mode
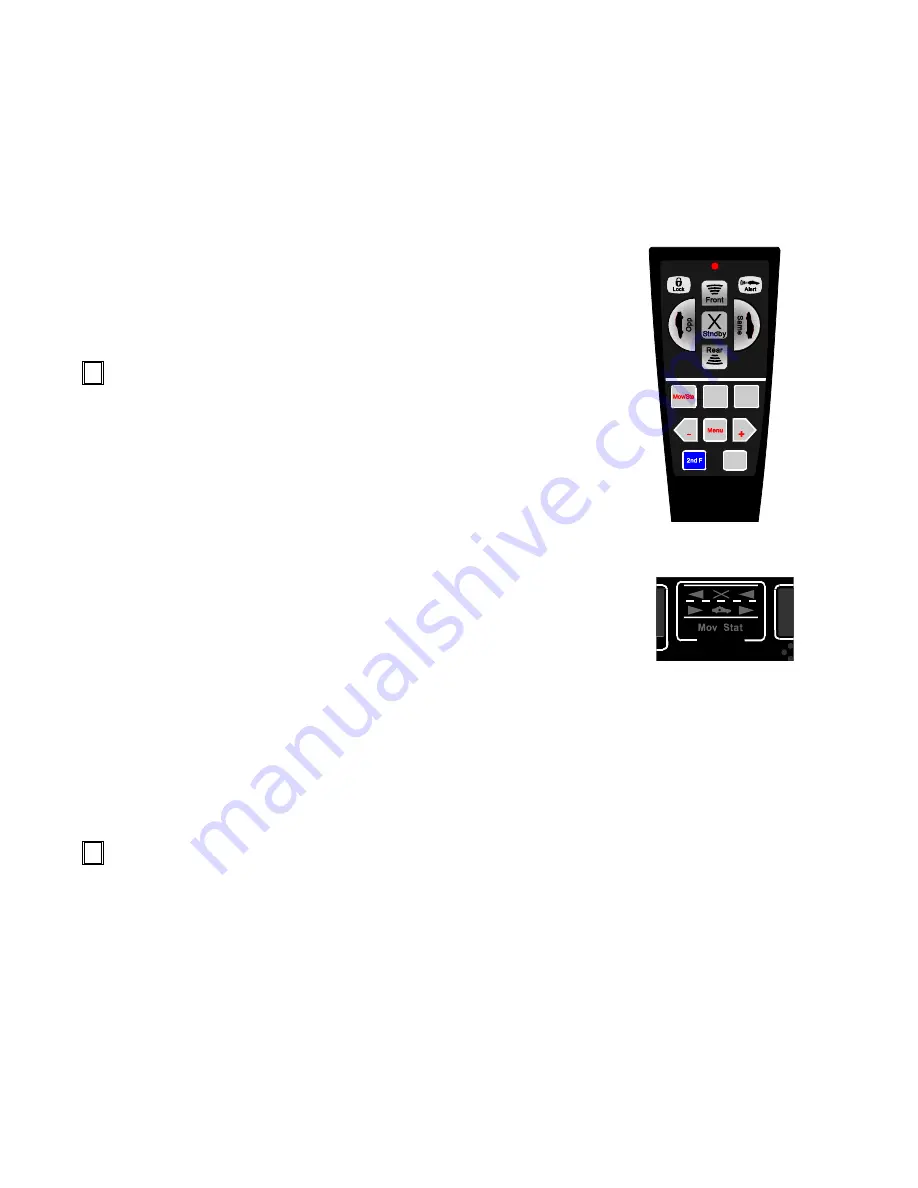
The operator can toggle between moving mode and stationary mode using the “Mov/Sta” button on the
remote control. This button is located in the upper left side of the flat keypad. This button can also be used to
access the stopwatch mode, which will be discussed later.
Press the “Mov/Sta” button. The radar will enter stationary mode. You can tell this because the “Sta” icon is
lighted below the middle window and the Patrol window is filled with dashes. In moving mode, the “Mov”
indicator would be lighted.
In stationary mode, you can select the direction of the targets that you want to monitor. When you first enter
stationary mode, you will notice that both arrows in the display’s Mode window are lighted in the direction of
Standard Remote
Range
Test
Lo
Hi
Pat Bl
Fork
Backlt
Mode
5


