PRODUCT INSTALLATION
5.2.3 De-aeration
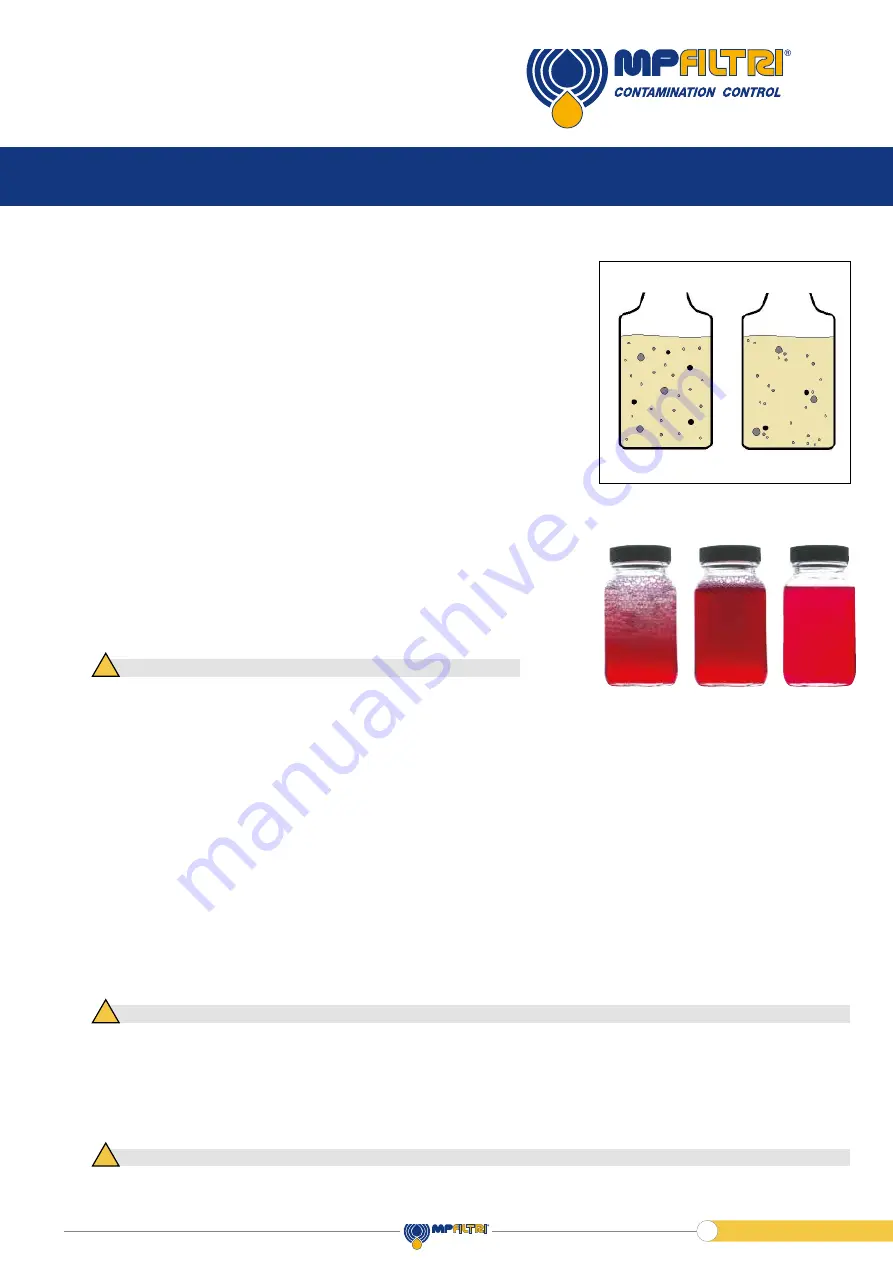
It is important when analysing samples for the particles to be evenly distributed
within the sample volume. This is achieved by agitating the sample.
This improves the accuracy of readings from the contamination monitoring
products as particles do not settle in the bottom of the bottle due to gravity.
This also causes aeration in the sample which can interfere with the sensitivity of
the monitor. The bottle sampler creates a small vacuum within the chamber.
Over a short period of time, depending on the viscosity, the air bubbles work their
way out of the sample.
1. Agitate sample for minimum 60 seconds, we would always recommend
using a paint shaker, on the highest frequency, to agitate the sample.
If a paint shaker is not available, we would recommend 2 to 3 minutes
by hand with random direction movements.
2. Remove the pressure cap from the bottle sampler.
3. Place the sample bottle into the bottle sampler.
4. Fit the vacuum cap onto the Bottle Sampler
5. Turn the right hand dial so that vacuum is selected
NOTE: the intermediate position between vacuum and sample performs no function
6. Switch ON the bottle sampling unit by turning the dial to ON
7. Leave running for several minutes, until all air bubbles have been removed from the fluid sample
8. Switch OFF the Bottle Sampler - This will automatically vent the chamber to atmosphere.
ALWAYS switch the bottle sampler unit to OFF before turning the Vacuum / Sampling Dial.
1. Agitate sample for minimum 3 minutes, we would always recommend using a paint shaker, on the highest frequency, to agitate
the sample. If a paint shaker is not available, we would recommend 4 to 5 minutes by hand with random direction movements
2. Remove the top chamber from the base of the bottle sampler
3. Place the sample bottle into the bottle sampler
4. Replace the top chamber. The silver spot on the top chamber should be aligned with the centre of the smallest groove
The top chamber can then be lowered, and the top should be lined up with the silver line between the two lines on the base
5. Screw top valve clockwise until slight resistance is felt, to close valve
6. Turn the selector handle to Vacuum, the position nearest the yellow disc marked V
7. Switch ON the bottle sampling unit and leave running for several minutes, until all air bubbles have been removed from the fluid sample.
This is done by turning the selector handle to Pressure, the position nearest the red disc marked P.
DO NOT pour fluid sample directly into the chamber.
DO NOT pour fluid sample directly into the chamber.
It may be necessary to vent the chamber on occasion, to stop spill over due to foaming.
!
!
!
BS110
BS500
Contamination distribution in a sample
Homogeneity
Heterogeneity
16
As a policy of continual improvement, MP Filtri reserves the right to alter the specification without prior notice.
201.010 REV X DCR0X
Date of Issue: 18 April 2018
18
Once the test is complete press the flush button until all the fluid has flushed through, if the fluid coming
from the waste is clear the contamination monitoring product and bottle sampler are ready for testing. If
the fluid is not clear repeat the flushing process.
19
Turn off the bottle sampler.
20
Turn the selector handle to Vacuum, towards the yellow disc with V. This will release the pressure in the
chamber.
21
Select Triple or Bottle Test Sampling option on the contamination monitoring product.
22
Draw off a sample of oil (150 ml. minimum) from the system into the bottle provided. If this is impractical
then use the hand pump, clean bottle and hose provided to draw off a sample of fluid.
Note: Please ensure that the pump and hose are cleaned with an appropriate filtered solvent (i.e. Iso-
propyl alcohol) prior to the sample being taken.
Sample bottles and associated products are to be cleaned in accordance with the instructions in section
6.1.3.
6.2.3 De-aeration
It is important when analysing samples for the particles to be evenly distributed within the sample volume. This is
achieved by agitating the sample.
This improves the accuracy of readings from the contamination monitoring products as particles do not settle in
the bottom of the bottle due to gravity. This also causes aeration in the sample which can interfere with the
sensitivity of the monitor.
The bottle sampler creates a small vacuum within the chamber. Over a short period of time, depending on the
viscosity, the air bubbles work their way out of the sample.
Figure 6.2 Contamination distribution in a sample
For full compliance please refer to standard BS11500:2008
Operators Guide
25
Summary of Contents for BS110
Page 1: ...Operators Guide BS110 BS500 Bottle Samplers ...
Page 2: ......
Page 6: ...Operators Guide 4 ...
Page 8: ...Operators Guide 6 ...
Page 11: ...OPERATOR S GUIDE Operators Guide 9 ...
Page 22: ...Operators Guide 20 ...
Page 32: ...Operators Guide 30 ...
Page 35: ......


