Page 19
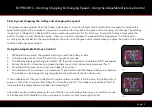
Starting and stopping the trolley and changing the speed
The speed can be adjusted while the trolley is stationary or in motion. Rotate the central button clockwise to increase the
speed setting and anti-clockwise to decrease. You will see the number in the green circle changing accordingly. The settings
range from 1 (slowest) to 9 (fastest). We recommend using setting 3 for the first time. To start the trolley, simply press the
button. To stop it, press the button again - there is no need to decrease the speed before stopping as it is designed to
smoothly accelerate back to the required speed. You will notice the green circle rotates when you press the button, this indicates
that the trolley has been started
Using the Adjustable Distance Control
1. Whilst stationary, select the speed at which you wish the trolley to start
2. Hold down the central ‘on/off’ button for a couple of seconds
3. The Distance Display will change to indicate ‘05’ (5 yards or metres) and the letters ‘ADC’ will appear
4. Rotate the button clockwise to increase the distance and anti-clockwise to decrease (fig. 1)
5. Press the button down once to set the trolley off in motion
6. The distance will count down in increments of 1 yard/metre until the desired distance is reached.
The trolley can be stopped at any stage by pressing the central button down once
In the unlikely event that your trolley fails to register distance whilst in ADC mode, the trolley will cut
power to the motor to prevent the trolley from travelling too far. The trolley screen will flash ‘dist’ to
indicate that this safety feature has been activated (fig.2).
The trolley can be reset by pressing the on/off button once, thereby allowing you to continue to use
the trolley with ADC disabled until you are able to contact our technical support team.
S3 PRO DHC - Starting, Stopping & Changing Speed / Using the Adjustable Distance Control
Fig 1
Fig 2

