3
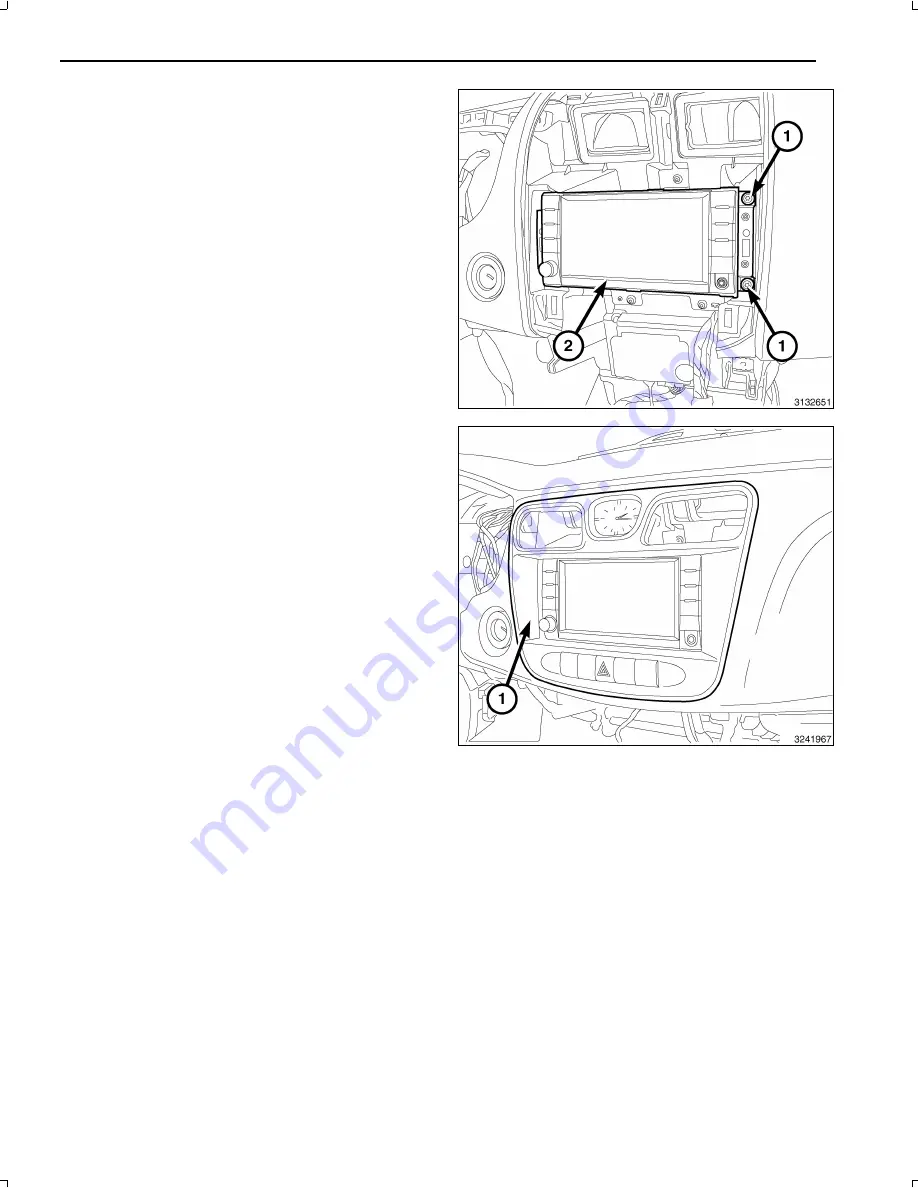
15. Install and tighten the radio mounting fasteners (1).
16. Position the center bezel (1) to the instrument panel.
17. Reach behind the bezel and connect all electrical con
nections.
18. Press firmly and evenly around the perimeter of the
bezel to engage the retaining clips.
19. Connect the negative battery cable.
UPDATE VEHICLE CONFIGURATION
NOTE: The wiTECH software level must be at the latest release to perform this procedure.
1.
VIN must be updated with the sales code of the added accessory in order to enable system functionality. Using the
DealerCONNECT website and the wiTECH diagnostic application, complete the vehicle configuration.
2.
Log on to https://dealerconnect.chrysler.com.
3.
In the "Vehicle Option" screen under the "Global Claims System" category in the "Service" tab, enter the vehicle
VIN, four digit pin number obtained from the dealership parts department and add sales code(s) noted below as a
"Dealer Installed Option".
RHR (AM/FM/DVD/HDD with SDARS)
4.
Confirm that the new sales code has been successfully added to the VIN.
5.
With the wiTECH diagnostic application, perform the following steps form the Initial Start Up Screen:
• Select the "DIAGNOSTIC PROCEDURES" tab
• Select "RESTORE VEHICLE CONFIGURATION"
• Select the "Run Diagnostic" button
• Select "CONTINUE"
• Verify that the vehicle VIN number is correct
• Once verified, select the "Correct VIN" button
Dec 31, 2010
K6861192


