modway EEI-3860 Manual Download Page 10

Customer Service 908-368-1025


Page 10 of 10 

STEP 15:

STEP 16:

www.modway.com                                                                             

DETAIL HOLE FOR 

WALL FIXING

Assembly is complete and ready for sink installation.

EEI-3860

Cabinet

NOTE :

Hammer, fisher and screw

not included

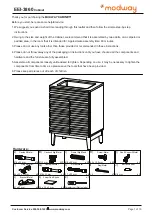
15.1- Using spirit / water levelling tool, adjust the Cabinet level by adjusting the leg leveler.

15.2- Based on type of Wall structure, drill the holes and secure the Vanity Cabinet.

Securing the Vanity Cabinet (Professional Installer Required)

Summary of Contents for EEI-3860

Page 1: ...the packaging or instructions until you have checked all the components and hardware and the furniture are fully assembled 5 Assemble all components loosely until advised to tighten Depending on use...

Page 2: ...Front Panel x1 3 Right Side Panel x1 7 Top Back Rail x1 4 Adjustable Shelf Panel x1 8 Middle Back Rail x1 9 Front Back Leg Apron x2 10 Leg Apron Side Rail x2 11 Middle Front Rail x1 12 Left Wooden Doo...

Page 3: ...de of the pre drilled hole 1 3 Insert 4pcs of Wooden Dowel to the pre drilled holes on both of the Leg Apron Side Rail 10 ends and top edges ensure each dowel inserted is in the inner side of the pre...

Page 4: ...wdriver not included Dx8 2 D C C A C C A 3 EEI 3860 Cabinet C C D D D D C D D D D C G A A A A C C D DD DD DD Carefully insert all hardwares as mentioned in the list to the respective components as sho...

Page 5: ...insert the Camlock B to secure all Rails to the Left Side Panel 2 Carefully insert the Camlock B to the pre assembled Rails and carefully align the Right Side Panel 3 and secure the Panel by tighteni...

Page 6: ...m Panel 1 pre drilled holes to the pre assembled Dowel on both of the Side Panels Left Right edges and secure it by tightening 4 nos of Hex Screws H with the provided Allen Key I Ensure the Cambolt A...

Page 7: ...nd tighten the Camlock B to secure both structures 10 1 From STEP 9 carefully turn the Cabinet with Leg Apron upright 10 2 Insert the Camlock B to both Side Panels 2 3 10 3 Align the Front Panel 6 wit...

Page 8: ...op Back Rail 7 Continue to place it on another 3 corners 11 2 Carefully tighten all protruded Screws D 12 1 Align the protruded dowel on Shelf Back Panel 5 edge to the pre drilled holes on Shelf Panel...

Page 9: ...F on each of the pre cut cup 2 cups on each door 13 3 Secure each Hinge F with 2 nos of Screws D 14 1 Carefully align each Door 12 13 to the edge of the Side Panel 2 3 and secure each Hinge F with 4...

Page 10: ...nd ready for sink installation EEI 3860 Cabinet NOTE Hammer fisher and screw not included 15 1 Using spirit water levelling tool adjust the Cabinet level by adjusting the leg leveler 15 2 Based on typ...

Reviews: