Mobidiag Novodiag NVD-BCS-A NVD-TSCA-A User Manual Download Page 39

Novodiag® System User Manual (NVD-SYST-UM)


V4-0 – April 2020 

35


Instrument not starting up 

Make  sure  the  instrument  is  plugged  in.  Check  fuse  at  the  back  of  the 
instrument. 

10.3.


Novodiag® Software troubleshooting 

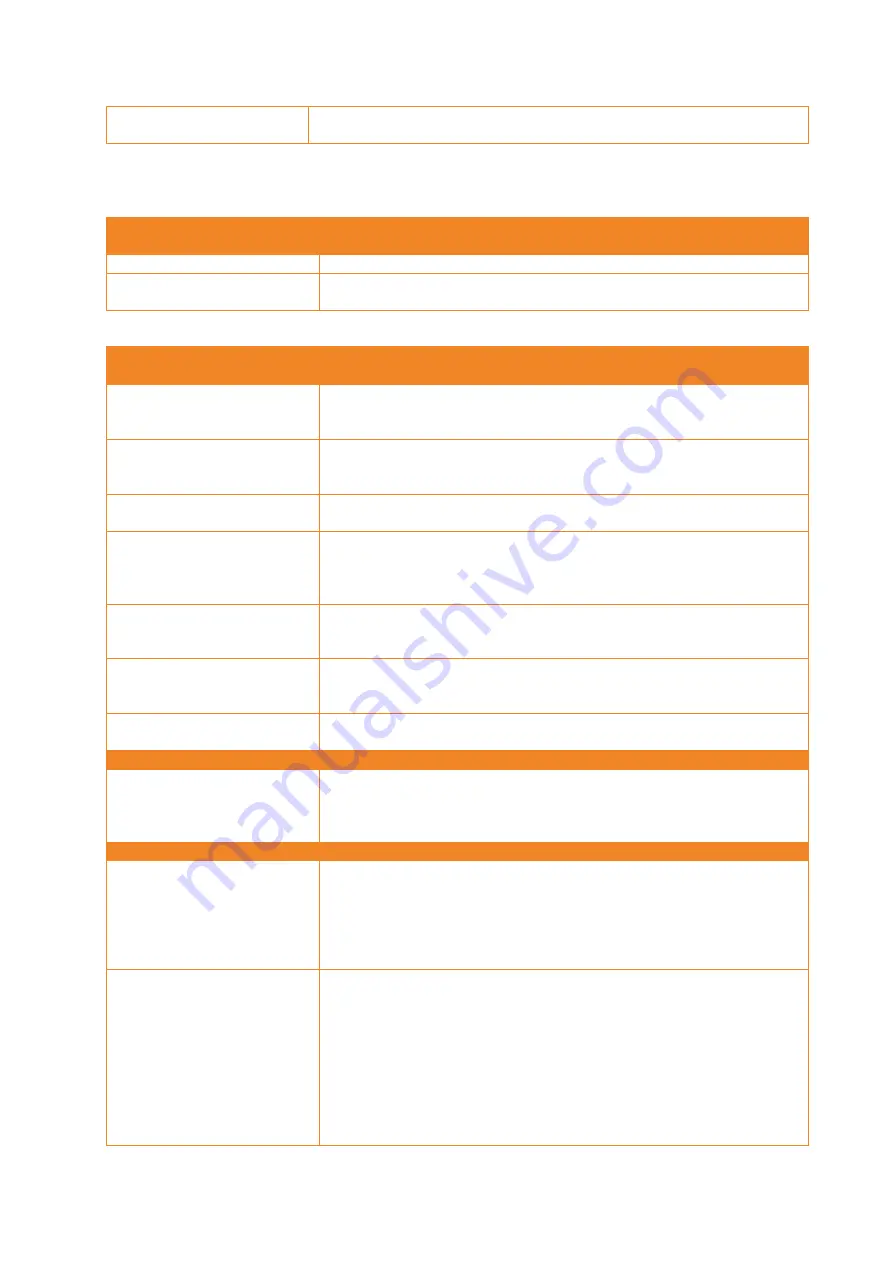
Table 10. Actions required for warnings with the Novodiag® Software 

Before the run 

Warnings 

Action required 

All slots taken 

Eject cartridge of completed runs. 

Insert cartridge is prompted 
even if cartridge is present 

Make sure the cartridge has been properly placed in the tray. Try inserting it 
again. If the problem persists, contact Mobidiag representative. 

 
Table 11. Actions required for errors with the Novodiag® Software 

Before the run 

Errors 

Action required 

Failure to detect instrument 

Check Ethernet cables and restart instrument. If the instrument is in a stack, 
restart  the  whole  stack.  If  the  problem  persists,  contact  Mobidiag 
representative. 

Failure to detect slot 

Try  to  reactivate  the  slot  through  the  Novodiag®  Software,  following  the 
instructions in Chapter 5.6.4, and restart the instrument and software. If the 
problem persists, contact Mobidiag representative. 

Test creation failed 

Please  ensure  there’s  nothing  physically  blocking  the  slot  from  opening. 
Retry. If the problem persists, contact Mobidiag representative. 

No protocol found for cartridge  Ensure  that  the  related  test  has  been  installed.  If  not,  contact  Mobidiag 

representative.  Retry  to  read  the  barcode.  If  the  barcode  seems  damaged, 
enter  the  barcode  manually.  If  the  problem  persists,  contact  Mobidiag 
representative. 

Invalid cartridge barcode 

Make  sure  you  are  aiming  at  the  cartridge  barcode  (and  not  to  another 
barcode). Retry to read the barcode. If the problem persists, type the barcode 
manually. If the problem persists, contact Mobidiag representative. 

Not enough disk space 

Remove  any  large  files  such  as  run  reports  from  desktop,  downloads  and 
documents. To display the windows taskbar, swipe finger from bottom of the 
Touchscreen. If the problem persists, contact Mobidiag representative. 

Cartridge expired 

Check  cartridge  expiration  date  and  use  a  new  cartridge  if  needed.  If  the 
problem persists, contact Mobidiag representative. 

During and after the run 

Failed run 

Rerun  the  sample  with  a  new  cartridge.  If  the  error  is  not  cleared  during 
cartridge ejection, the instrument (or whole stack) should be rebooted. 
If the same slot gives failed result more than once, disable the slot following 
the procedure in Chapter 5.6.4 and contact Mobidiag representative. 

Anytime


Error message “Temperature 
out of range” 

The  temperature  sensors  in  the  instrument  detect  that  the  temperature  is 
too high or low. Make sure the ventilation is properly working and sufficient 
space is reserved for air circulation. Check that the temperature in the room 
is  within  the  operating  conditions.  If  the  instrument  is  just  moved  from  a 
higher  or  lower  temperature,  wait  until  the  instrument  reaches  room 
temperature. If the problem persists, contact Mobidiag representative. 

Software is not responsive 

Software can be restarted using the following steps: 


Logout from Novodiag® Software if not already logged out. 


Tap the close button in the top right corner of the software. 


Select  “Close  application”  and  tap  “OK”.  The  dialog  prompts  to 
confirm the action, tap “OK”. 


Restart the Novodiag® Software from the icon on the desktop. 

If this is not successful, end the Novodiag® Software process: 


Swipe  finger  from  the  bottom  of  the  Touchscreen  to  display  the 
taskbar. 

Summary of Contents for Novodiag NVD-BCS-A NVD-TSCA-A

Page 1: ...Novodiag System NVD INST B NVD DSW For in vitro diagnostic use For use with Novodiag Tests User Manual English Version 4 0 Issued in April 2020...

Page 2: ......

Page 3: ...xtraction 7 3 3 Amplification 7 3 4 Microarray hybridisation 7 3 5 Detection and analysis 7 4 Configuration and setup 7 4 1 Environmental requirements 7 4 2 Installation requirements 8 4 3 Packaging c...

Page 4: ...rument maintenance 31 8 4 Disposal 32 9 Precautions limitations and safety hazards 32 9 1 Precautions and limitations 32 9 2 Safety Information and warnings 32 9 3 Electromagnetic compatibility 33 9 4...

Page 5: ...denotes a hazard It calls attention to an operating procedure or practice which if not performed correctly could damage the instrument or invalidate results NOTE A note provides important helpful or...

Page 6: ...f symbols These symbols can be found on the Novodiag System its associated components or throughout this manual Use the definitions below to interpret the symbols see Table 2 Table 2 Definitions for s...

Page 7: ...and microarray hybridisation to detect and identify multiple nucleic acid targets from clinical samples providing qualitative result which is then displayed on the Novodiag Software The device s func...

Page 8: ...ht below each slot allows to monitor the Novodiag Instrument slots status see Chapter 4 5 1 for light status correspondence Up to four Novodiag Instruments can be stacked and controlled by a single To...

Page 9: ...ed users only For further information about Novodiag Software see Chapter 5 2 4 4 Additional components Barcode Scanner ref NVD BCS A Arm ref NVD TSCA A Post ref NVD TSCP A fixtures and strip The Barc...

Page 10: ...time PCR and microarray detection Each one amplifies and detects a set of targets or is a duplicate for targeted test 3 Principle of operation Novodiag System uses a combination of real time PCR and...

Page 11: ...red based on a proprietary optical module 3 4 Microarray hybridisation For Novodiag Test panels the amplified material is transferred to the microarray for hybridisation Amplicons bind to a set of com...

Page 12: ...x 50 x 50cm stack 40 x 20 x 30cm computer 45kg 600x2 65 computer 2 1 Two instruments Arm 125 x 50 x 50cm 50kg 600x2 65 computer 2 1 Three instruments Arm 125 x 50 x 75cm 70kg 600x3 65 computer 2 1 Fou...

Page 13: ...yellow cartridges Power cables and connection cables The Touchscreen Computer the Barcode Scanner and the Post or Arm are delivered in separate packages CAUTION The Novodiag Instrument unpacking must...

Page 14: ...the whole stack and disconnect it from the power supply 4 5 2 Adjusting the Touchscreen Computer on Post or Arm You can adjust the orientation of the Touchscreen Computer on the Post or on the Arm by...

Page 15: ...nts Do not change screensaver settings 4 5 4 Starting up the Novodiag Software To start up the Novodiag Software double tap the Novodiag Software icon on the desktop The Novodiag Software can be start...

Page 16: ...min user are displayed in Table 5 See chapter 5 6 2 user management for details on how to create users and modify their permissions Mobidiag retains one admin user account for service personnel to use...

Page 17: ...m Also before starting a run please check the username on the screen to make sure that you are the right user logged in The Home View reflects the physical setup of the Novodiag Instrument and is divi...

Page 18: ...iew Instrument in stack not displayed on instrument view Instrument not connected Instrument disabled Test creation Slot empty ready for run Test creation Slot selected next run will be created to thi...

Page 19: ...by the symbols inside the circle as explained in Table 7 Table 7 Instrument view symbols Slot view Status Slot empty Slot initialising Run in progress 31min remaining Slot disabled Slot view Status Ru...

Page 20: ...w tap the View test results button on the bottom of the slot pane see Figure 14 This brings you to the Results view Alternatively result history is available by tapping the Results button at the top o...

Page 21: ...Sample ID Test type Date time and user Main Result POSITIVE NEGATIVE INVALID FAILED List of targets detected No targets detected Remarks if related to the targets Figure 15 Result view By tapping the...

Page 22: ...selected run see Figure 15 Runs can also be filtered by tapping the Edit filters button on the Filter pane see Figure 17 The filters are Test type drop down menu Result type drop down menu Operator d...

Page 23: ...file Mobidiag representative may request you to deliver log files for troubleshooting failed runs see Chapter 10 Figure 19 Result View Exporting options As a default the exported files csv PDF or log...

Page 24: ...ew user tap the User Management button Create a new user by tapping the Add new user button on the bottom of the user list Add username pin code and credentials The credential details are indicated in...

Page 25: ...he results The time for logout can be adjusted by tapping the wanted logout time see Figure 22 Figure 22 System Setup view Settings tab As a default setting the Novodiag Software saves all exported fi...

Page 26: ...use by tapping ENABLED If a default printer is set the result is sent to the printer in PDF format Contact Mobidiag representative for setting up the default printer 5 6 4 Slot Management You can ena...

Page 27: ...rformed Once installed test plugins can be enabled and disabled from the Test Management view by selecting the test and tapping the ADD TEST or REMOVE button see Figure 26 Enabled test plugins go from...

Page 28: ...n the Novodiag Instrument by switching on the power switch behind the instrument Turn on the Touchscreen Computer by using the button on the bottom right of the screen Login to Windows occurs automati...

Page 29: ...Test Cartridge Do not place any stickers or labels directly on the cartridge Do not write outside the cartridge label and do not impede barcode reading see Figure 4 6 4 Starting a run Bring the Novod...

Page 30: ...g the code and tapping Enter NOTE The Novodiag Software recognises automatically the Novodiag Test Cartridge barcode and uses the relevant Test plugin to apply the right protocol The Novodiag Software...

Page 31: ...es the information about previously used slot and offers the next available slot for the run NOTE The Novodiag Instrument detects the cartridge presence and ejects the tray if the cartridge has not be...

Page 32: ...e 33 NOTE The estimation of the remaining time is based on the run history for a given test In case the type of test is run for the first time the remaining time displayed may be inaccurate Figure 33...

Page 33: ...R amplification For the test to be successful either process control target s or both need to give a positive result otherwise the test result is invalid 7 2 2 External Controls To ensure the proper f...

Page 34: ...false positive by the Novodiag System WARNING If the cartridge contains potentially infectious material the risk of biohazard contamination exists in addition to DNA RNA contamination 8 1 1 Cleaning M...

Page 35: ...contamination clean the bench tops other used equipment and working areas as follows 1 Wear appropriate PPE such as a laboratory coat and gloves 2 Wet a paper towel with DNA RNA degrading agent and w...

Page 36: ...out an approval from Mobidiag As detection areas on the Novodiag Test Cartridge are sensitive to damage and smear do not touch or get in contact with sharps or dirty material While a run is in progres...

Page 37: ...rds WARNING Breakable glass slide microarray is present inside some of the Novodiag Test Cartridges refer to the Novodiag Test specific Instructions for Use It can expose you to sharp hazards and caus...

Page 38: ...aged during transport Discard cartridge and use a new one Protective cover not fully removed or white membrane damaged Discard cartridge and use a new one White blocker not properly secured before run...

Page 39: ...Retry to read the barcode If the problem persists type the barcode manually If the problem persists contact Mobidiag representative Not enough disk space Remove any large files such as run reports fr...

Page 40: ...ed Screen is black Wake up the Touchscreen from sleep mode by tapping the screen Touchscreen not responsive Force a shut down and restart the Touchscreen Press and hold the power button until the scre...

Page 41: ...6 1000 pixels camera Temperature control Thermocycling devices Operating from 15 110 C Ramp rates heating 7 C s Cooling 5 C s Environmental specifications Indoor only Temperature 18 C 30 C Humidity 15...

Page 42: ...ratio Brightness 220 nits Resolution 1366 x 768 Touchscreen Resistive touch PCAP Storage device HDD 1x 2 5 SATA 500Gt External I O ports USB 4x USB3 0 2x USB2 0 LAN 2x RJ45 Power Power adapter 65 W 1...

Page 43: ...ks or registered trademarks of Mobidiag Oy Other trademarks mentioned in the User Manual or Instructions for Use are the property of their respective owners No rights to use any of the aforementioned...

Page 44: ...1 4 0 Ch 5 5 1 Log file exporting is available for results that are maximum of one year old only Ch 5 6 3 Addition of an automatic printing feature Ch 6 3 Defining of warnings and precautions related...

Page 45: ...catalogue number NVD INST B NVD DSW NVD TSC A NVD BCS A NVD TSCA A NVD TSCP A Go to our website www mobidiag com For more information Mobidiag Ltd Keilaranta 16A FI 02150 Espoo FINLAND www mobidiag c...

Reviews: