- 42 -
Note:
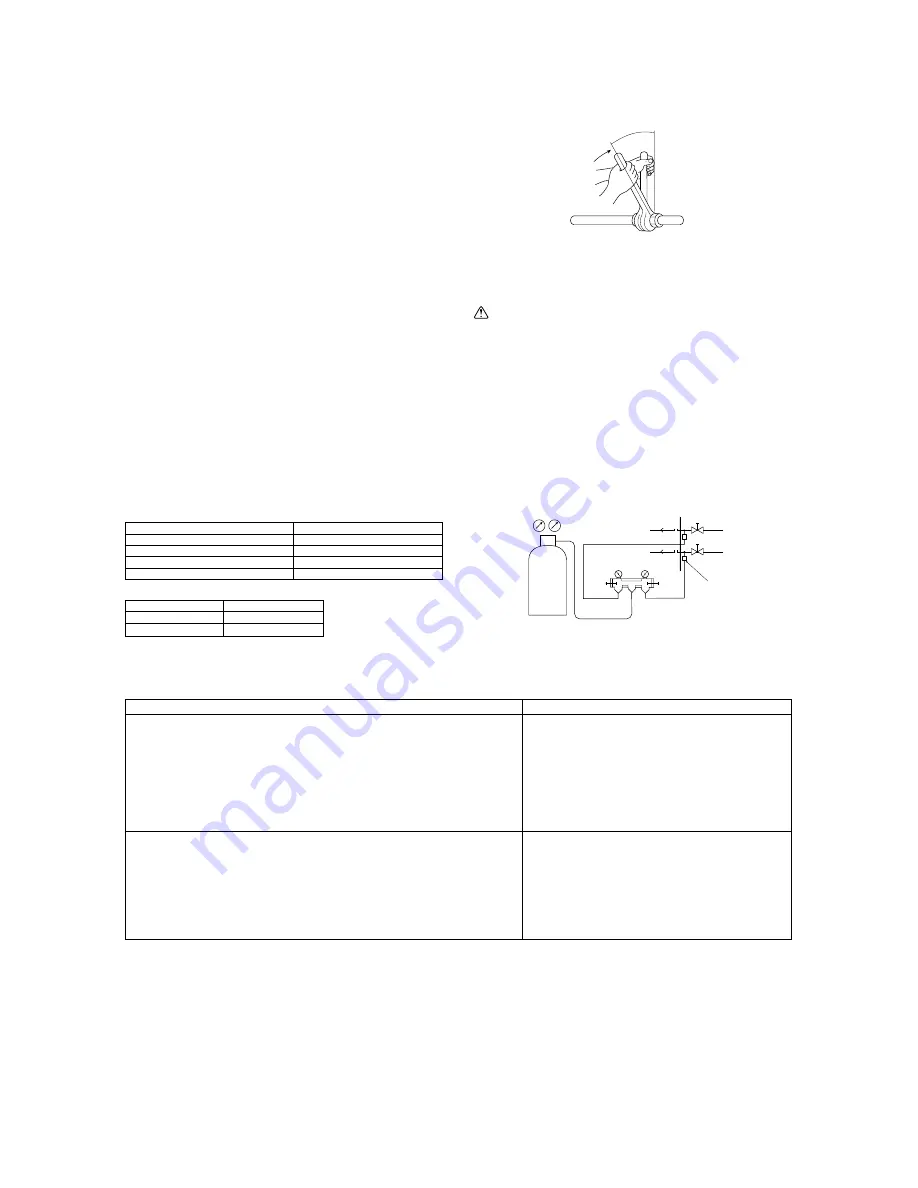
If a torque wrench is not available, use the following method as a standard:
When you tighten the flare nut with a wrench, you will reach a point where
the tightening torque will abrupt increase. Turn the flare nut beyond this point
by the angle shown in the table above.
Caution:
•
Always remove the connecting pipe from the ball valve and braze it out-
side the unit.
- Brazing the connecting pipe while it is installed will heat the ball valve and
cause trouble or gas leakage. The piping, etc. inside the unit may also be
burned.
2
2
2
2
2
-6.3. Airtight test, evacuation, and refrigerant charg-
ing
1
Airtight test
Perform with the stop valve of the outdoor unit closed, and pressurize the con-
nection piping and the indoor unit from the service port provided on the stop
valve of the outdoor unit. (Always pressurize from both the liquid pipe and the
gas pipe service ports.)
A
Valve stem
[Fully closed at the factory, when connecting the piping, when evacuating, and
when charging additional refrigerant. Open fully after the operations above are
completed.]
B
Stopper pin [Prevents the valve stem from turning 90
°
or more.]
C
Packing (Accessory)
[Manufacturer: Nichiasu corporation]
[Type: T/#1991-NF]
D
Connecting pipe (Accessory)
[Use packing and securely install this pipe to the valve flange so that gas leakage
will not occur. (Tightening torque: 25 N·m (250 kg·cm)) Coat both surfaces of the
packing with refrigerator oil (Ester oil, ether oil or alkylbenzene [small amount]).]
E
Open (Operate slowly)
F
Cap, copper packing
[Remove the cap and operate the valve stem. Always reinstall the cap after op-
eration is completed. (Valve stem cap tightening torque: 25 N·m (250 kg·cm) or
more)]
G
Service port
[Use this port to evacuate the refrigerant piping and add an additional charge at
the site.
Open and close the port using a double-ended wrench.
Always reinstall the cap after operation is completed. (Service port cap tightening
torque: 14 N·m (140 kg·cm) or more)]
H
Flare nut
[Tightening torque: 120 N·m (1200 kg·cm)
Loosen and tighten this nut using a double-ended wrench.
Coat the flare contact surface with refrigerator oil (Ester oil, ether oil or alkylbenzene
[small amount]).]
I
ø15.88
J
ø25.4 PUH- 7, 8
ø28.58 PUH- 10
K
Field piping
[Braze to the connecting pipe. (When brazing, use unoxidized brazing.)]
L
Close-packed packing
M
Hollow packing
Appropriate tightening torque by torque wrench:
Copper pipe external dia. (mm)
Tightening torque (N·m) / (kg·cm)
ø6.35
14 to 18 / 140 to 180
ø9.52
35 to 42 / 350 to 420
ø12.7
50 to 57.5 / 500 to 575
ø15.88
75 to 80 / 750 to 800
Tightening angle standard:
Pipe diameter (mm)
Tightening angle (
°
)
ø6.35, ø9.52
60 to 90
ø12.7, ø15.88
30 to 60
[Fig.
2
2
2
2
2
-6.2.3]
D
C
C
B
E
F
G
H
I
J
A
LO
HI
[Fig.
2
2
2
2
2
-6.3.1]
A
Nitrogen gas
B
To indoor unit
C
System analyzer
D
Lo Knob
E
Hi Knob
F
Stop valve
G
Liquid pipe
H
Gas pipe
I
Outdoor unit
J
Service port
Restriction
• If a flammable gas or air (oxygen) is used as the pressurization
gas, it may catch fire or explode.
• Do not use a refrigerant other than that indicated on the unit.
• Do not use a haloid torch. (Leaks cannot be detected.)
Airtight test procedure
1. Nitrogen gas pressurization
(1) After pressurizing to the design pressure (3.3 MPa) using nitrogen gas, let stand for about one
day. If the pressure does not drop, airtightness is good.
However, if the pressure drops, since the leaking point is unknown, the following bubble test
may also be performed.
(2) After the pressurization described above, spray the flare connection parts, brazed parts, flanges,
and other parts that may leak with a bubbling agent (Kyuboflex, etc.) and visually check for
bubbles.
(3) After the airtight test, wipe off the bubbling agent.
2. Pressurization using refrigerant gas and nitrogen gas
(1) Pressurizing to a gas pressure of approximately 0.2 MPa, pressurize to the design pressure
(2.94 MPa) using nitrogen gas.
However, do not pressurize at one time. Stop during pressurization and check that the pres-
sure does not drop.
(2) Check for gas leaks by checking the flare connection parts, brazed parts, flanges, and other
parts which may leak using an R22 electric leak detector.
(3) This test may be used together with bubble type gas leak test.
Summary of Contents for PEH series
Page 2: ......


