


4. DAILY MAINTENANCE AND PERIODIC INSPECTION AND MAINTENANCE
4.3 Replacement Methods
– 46 –
(2) PCMCIA interface PCB (HR841)
The PCMCIA interface PCB is used when connecting commercial PCMCIA cards. Depending on
the hardware specifications, the PCB may be built into the control section.
This PCB is used as a set with the man-machine interface PCB HR121, and is connected with the
F150 cable.
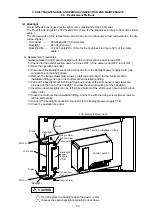
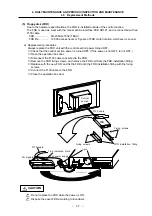
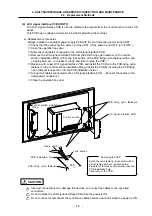
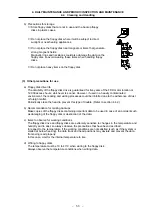
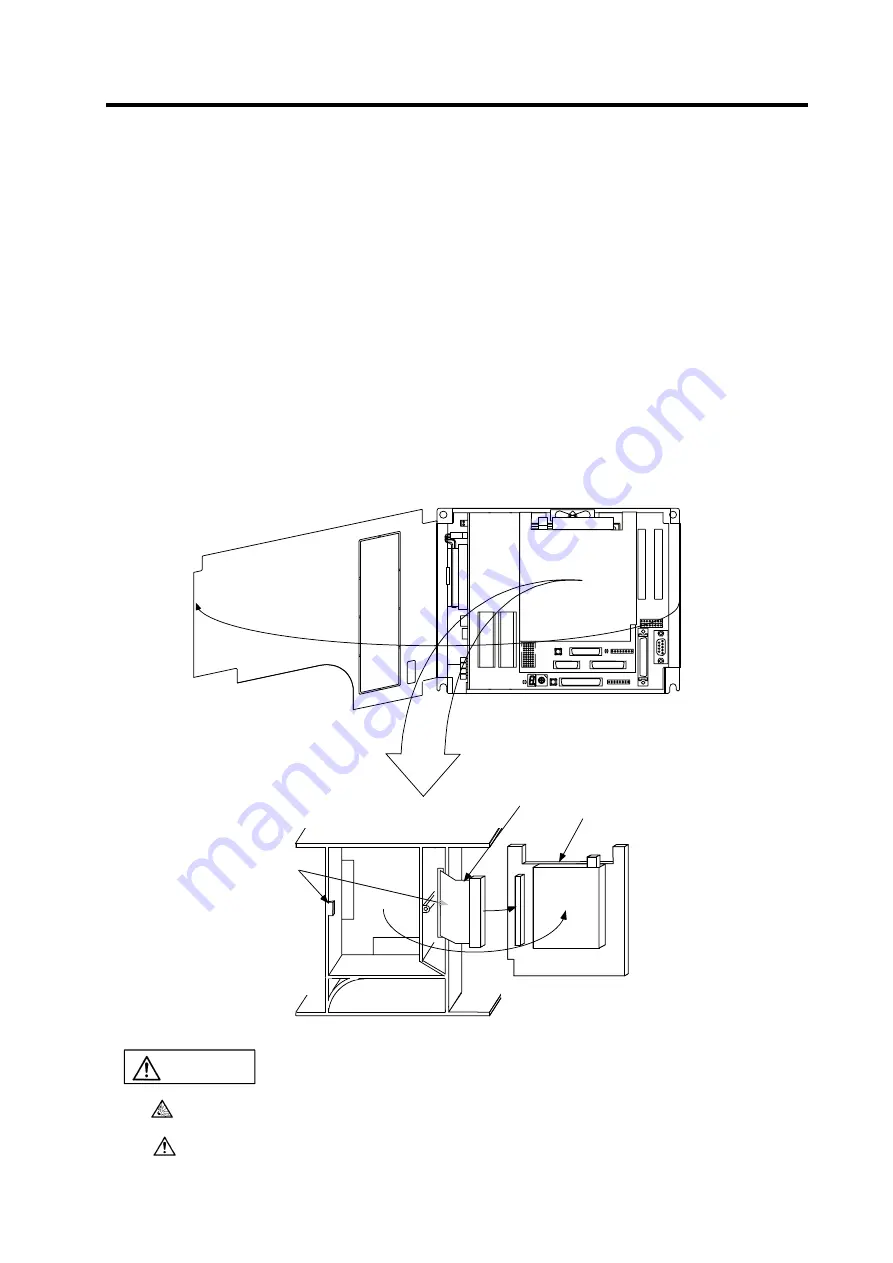
a) Replacement procedures
Always replace the PCMCIA interface PCB with the control section power turned OFF.
①
Check that the control section power is turned OFF. (If the power is not OFF, turn it OFF.)
②
Open the operation box door, and then open the front cover of the control section.
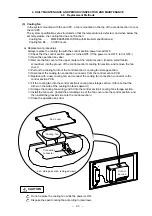
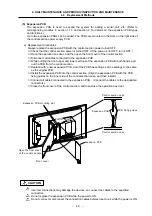
③
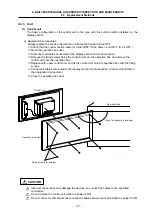
Remove the PCMCIA interface PCB from the control section. (Open the PCB fixing claws on
the left and right of the PCMCIA interface PCB storage section, and remove the PCB.)
④
Disconnect the F150 cable connected to the ISA connector on the PCMCIA interface PCB.
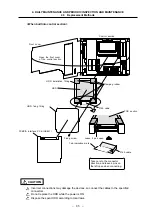
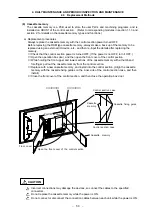
⑤
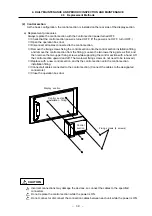
Replace with a new PCMCIA interface PCB, and connect the F150 cable to the ISA
connector.
⑥
Face the ISA connector section of the PCMCIA interface PCB to the back, and install the PCB
in the control section.
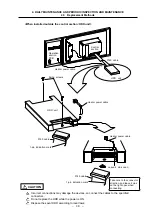
⑦
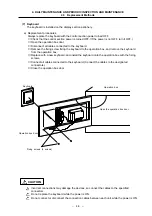
Close the front cover of the control section, and close the operation box door.
Front cover
Control section
Open the front cover
of the control section.
PCB fixing claws
F150 cable
PCMCIA interface PCB
(HR841)
ISA
connector
PCMCIA interface PCB storage area (enlarged view)
Incorrect connections may damage the devices, so connect the cables to the specified
connectors.
Do not replace the PCMCIA interface PCB while the power is ON.
CAUTION