−35−
10 .
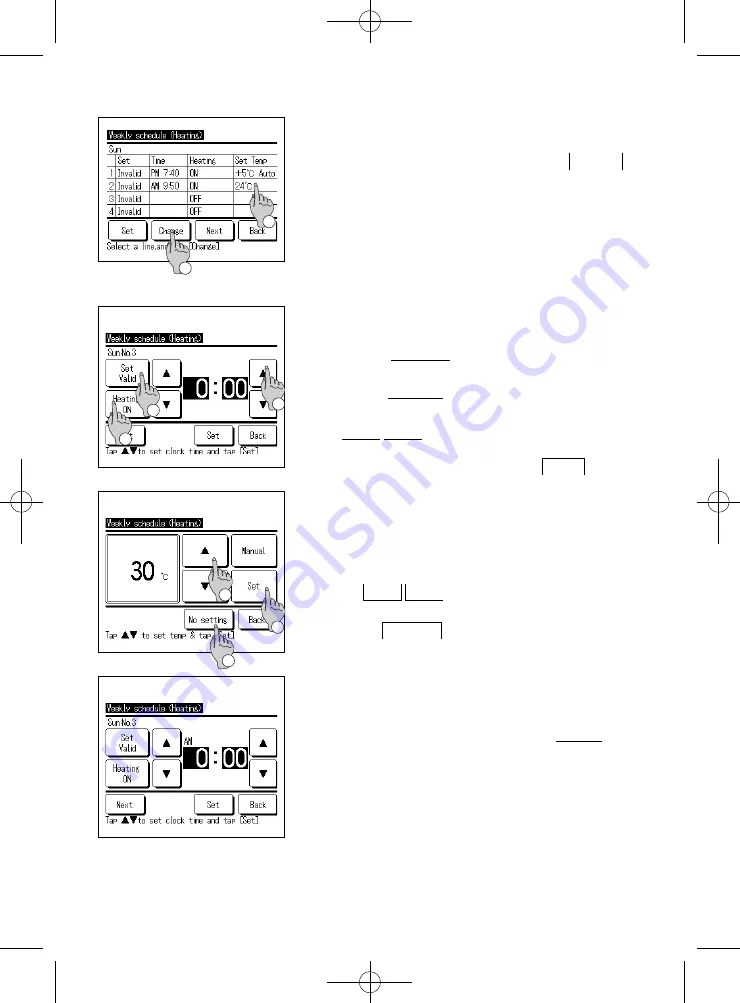
The [Checking of weekly schedule] screen is displayed.
When changing the setting contents,
①
select the column
of the setting No. to be changed
②
and tap Change
button.
■
The setting contents displayed at fi rst may differ depending on the
set day selected (
☞
Go to
3
)
①
Weekdays: Set operation pattern on Monday
②
Sat, Sun: Set operation pattern on Saturday
③
All days: Set operation pattern on Monday
④
Each day: Set the operation pattern on the day selected
1
2
11.
Detail setting screen for the timer setting contents is
displayed.
①
Tap the Set Valid button to switch between “State
Valid” and “State Invalid”.
②
Tap the Heating button to switch between the “OFF
timer” and the “ON timer”.
③
Select a desired time (at 5-min intervals) with the
▲
▼
buttons.
④
In case of “ON timer” when the Next button is
tapped, operating conditions at the start of operation
can be set. (
☞
1 2
)
3
1
2
AM
12 .
Heating temperature setting screen is displayed.
①
Select a desired temperature (at 1°C intervals) with
the
▲
▼
buttons. Or tap the Auto button to
select the Auto temp setting.
②
When No setting button is tapped, “No setting” is
displayed, and it shifts to the [detail setting] screen.
HP unit operates with the same heating operating
mode as the last action.
③
Tap the Set button after the selection. The [detail
setting] screen is displayed.
13 .
After setting desired contents, tap the
Set
button.
■
weekly schedule (heating)
3
1
2
Summary of Contents for ESA30EH2 Series
Page 2: ... 2 ...
Page 85: ... 83 MEMO ...


