- 9 -
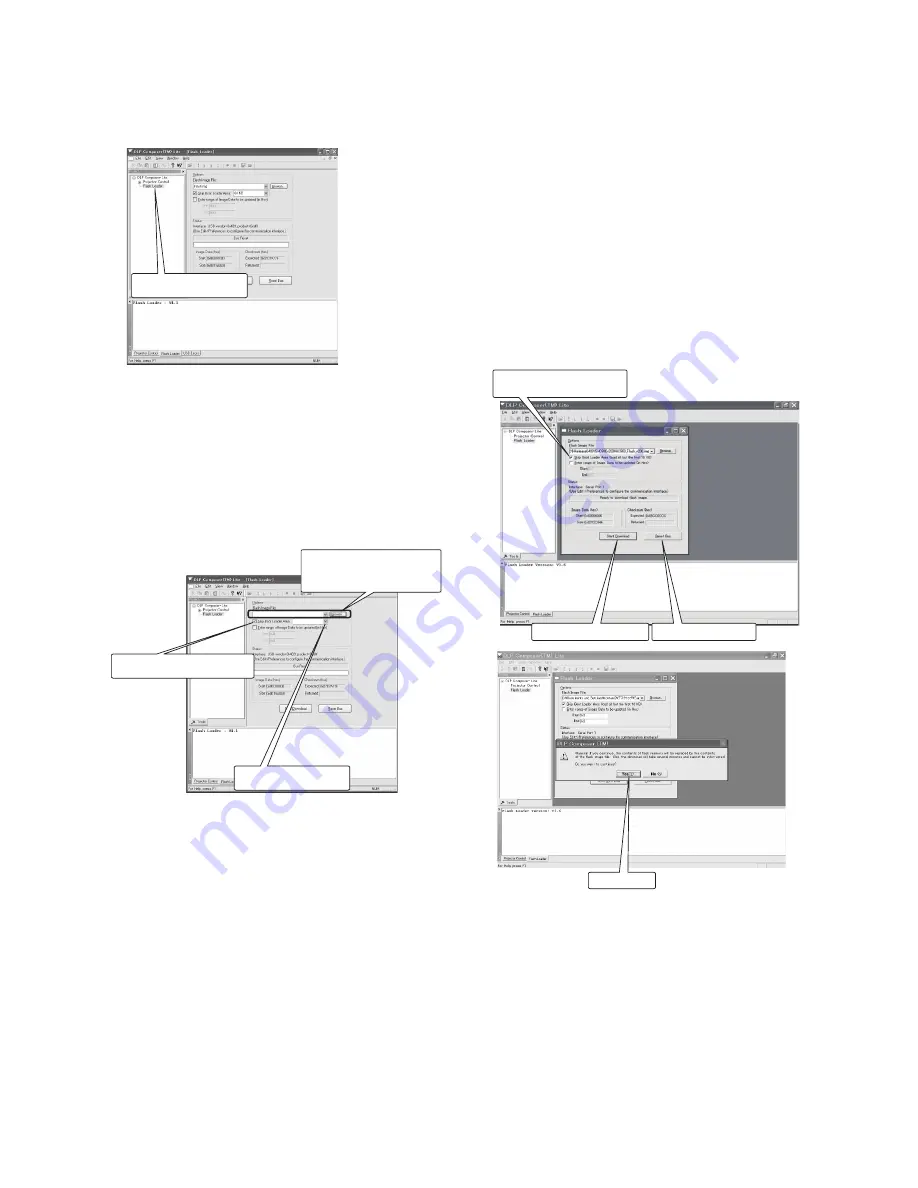
) Unite the cursor to the Flash Loader in the Project window,
which is displayed on the left-hand side in a DLP Com-
poser (TM)Lite window , and left-click.
) Then the window of Flash Loader displayed, at the Options
Flash Image File, "Browse....." chose the File "XD_
Flash _v ***.img" for downloade. ( ***: Version name)
<< important! >>: "Skip Boot Loader Area" should be sure
to keep a check mark put in. Moreover, please set a setup
of a dialog portion as "KB."
For ), ), and ) , once it sets up, DLP Composer (TM)
Lite memorizes a setting value, it is not necessary to re-set
up for every download.
) Within the state where the main power supply was turned
off, connect a projector main part to the personal computer
for adjustment with the USB cable, .
) While holding down the SOURCE button, plug in the power
cord and then keep the button down for about seconds.
The STATUS LED on the projector illuminates green for
about seconds. While the LED is illuminating green, click
[Reset Bus] on the [Flash Loader] screen and then click
[Start Download].
When the dialog box is displayed, click [Yes]. When the
DDP2230 faction projector is connected for the first time,
the beginning screen of the retrieval wizard of new hard
-
ware is displayed. Select [Following] one by one, installs
normally, and then reactivate the computer.When the
retrieval wizard of new hardware should select the driver,
put the check mark in [Display an already-known driver of
this device and select it from the list], and select [Next].
When the list of hardware is displayed, select the [JUNGO]
among that and select [Next] . Confirm that the [Windriver]
is selected, and then select [Next].
Note: When it passes seconds or longer without any opera-
tion after the power cord is connected to the projector,
the STATUS LED goes off, the POWER LED blinks
alternately red and green, and download becomes
impossible. In such a case, connect the power cord to
the projector again and retry download.
Left click
Click [Browse] and select
[XD_Flash_v***.img].
Click and make a check mark
Click and set KB
32 KB
C:\English\XD_Flash_v00.img
Click [Reset Bus].
Click [Start Download].
Put a checkmark next to
[Skip Boot Loader Area].
Click [Yes].
Summary of Contents for XD221U
Page 7: ... 1 2 5 6 OPTICAL UNIT 8 11 14 9 7 10 3 4 12 13 EXPOSED VIEW Fig 1 1 DLP ASSY ...
Page 9: ... Optical unit 2 1 3 4 5 6 7 8 Fig 1 2 ...
Page 11: ... DISASSEMBLY 1 Unscrew the 8 screws a from the bottom cover a a ...
Page 20: ... 17 17 Remove adjuster from the bottom cover Bottom cover Adjuster ...


