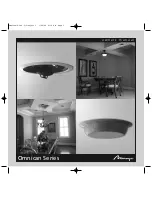
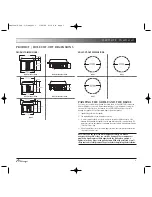
background image

o w n e r s   m a n u a l  

IMPORTANT SAFETY
INSTRUCTIONS -
READ CAREFULLY!

Read Instructions:

All safety and operating instructions should be read before 

the product is operated.

Retain instructions:

Safety and operating instructions should be retained for 

future reference.

Heed Warnings:

All warnings on the product & operation instructions should 

be adhered to.

Follow Instructions:

All operating and use instructions should be followed. 

INTRODUCTION 

Congratulations on your purchase of Mirage Speaker Systems products! Proprietary
technology and high quality manufacturing will allow you to enjoy the most natural and
accurate music reproduction for many years. The advice offered in this manual is aimed at
helping you maximize and maintain peak performance, and therefore, your listening
satisfaction. Please take the time to read all of the instructions contained in this manual to
make certain your system is properly installed and functioning correctly.

BREAK-IN PERIOD

We strongly advise that you resist the temptation to play your Mirage Speaker Systems
speakers to their full capabilities until they have been properly broken in. This process
should last approximately 50 to 100 hours of music playback. This can be easily be done
by putting your compact disc player on Repeat mode, while playing a CD with a wide
dynamic range at average room volume listening levels.

AMPLIFIER REQUIREMENTS

All Mirage speakers are designed to be extremely efficient. All models are designed to be
8-ohm compatible allowing playback on almost any amplifier or receiver on the market.
Most amplifiers with a power rating of 20-100 watts per channel will effectively operate
your Mirage speakers. 

Warning: If an amplifier or receiver is over-driven, the resulting distortion is
actually many times greater than its rated power. Over-driven amplifier
distortion is called “Clipping”, easily identified by its fuzzy, distorted sound,
and can damage any speaker. The volume control of most amplifiers and
receivers is a logarithmic type, which means that full power may be reached
with the volume control set at as little as the halfway point. Operating the
loudness, treble, or bass controls increases power output well beyond rated
levels. The warranty on your speakers is therefore void if the voice coils are
burned or damaged as a result of overpowering or clipping.

LIMITED WARRANTY POLICY 

WARRANTY FOR UNITED STATES AND CANADA 
(SEE BACK COVER)

WARRANTY OUTSIDE OF THE UNITED STATES AND CANADA:

Product warranties may be legislated differently from one country to another. Ask 
your local dealer for details of the LIMITED WARRANTY applicable in your country. 

NOTE: Please retain the carton and packing material for your Mirage Speaker
Systems products to protect them in the event of a move or if they need to
be shipped to a service center. Product received damaged by a service center
that has been shipped by the end user in other than the original packaging
will be repaired, refurbished and  properly packaged for return shipment at
the end user's expense.

CONTENT 

2

o w n e r s   m a n u a l  

Omnican Series

OMNICAN Speaker

OMNICAN Grille

Hole cut-out Template

Grille Removal Tool

Manual

Omnican(8.5x8.5)5:Layout 1  1/28/08  4:19 PM  Page 2

Summary of Contents for OMNICAN 65

Page 1: ...o w n e r s m a n u a l Omnican Series Omnican 8 5x8 5 5 Layout 1 1 28 08 4 19 PM Page 1...

Page 2: ...playback on almost any amplifier or receiver on the market Most amplifiers with a power rating of 20 100 watts per channel will effectively operate your Mirage speakers Warning If an amplifier or rec...

Page 3: ...er into the area where the grille is usually affixed This protective cover can be created by overlapping the ends of a piece of paper approximately 16 inches 40cms long 4 After the protective cover is...

Page 4: ...ions Even though this experiment is not 100 accurate it can offer some valuable insights with regards to how the speakers may perform in your specific room It is important to note that no matter how t...

Page 5: ...set of binding posts is included inside the enclosure to allow the speakers to be easily connected Remove the four screws located on the back of the enclosure and follow the installation instructions...

Page 6: ...hms permettant ainsi leur raccordement presque n importe quel amplificateur ou r cepteur La plupart des amplificateurs avec une puissance nominale de 20 W 100 W par canal seront ainsi en mesure de pre...

Page 7: ...nner un couvercle cylindrique protecteur et de le glisser entre le cadre et le haut parleur dans l espace o la grille est normalement fix e Ce masque peut tre confectionn en repliant les extr mit s d...

Page 8: ...rents arrangements et diff rentes rotations d OMNIGUIDE pour comprendre comment les enceintes OMNICAN se comportent lorsqu elles sont plac es dans diff rentes positions M me si cette exp rience n est...

Page 9: ...t brancher les haut parleurs Retirez les quatre vis situ es l arri re de l enceinte et suivez les directives susmentionn es concernant l installation Sch ma 12 UTILISATION L EXT RIEUR OU DANS UN LIEU...

Page 10: ...or o receptor existente en el mercado La mayor a de los amplificadores con una potencia de salida de 20 100 vatios por canal impulsar n eficientemente a los altavoces de Mirage Advertencia Si un ampli...

Page 11: ...tor que deber ser insertado entre el cuadro y el altavoz en el rea donde normalmente se fija la rejilla Se puede hacer el cilindro superponiendo las extremidades de una hoja de papel de aproximadament...

Page 12: ...Experimente coloc ndolos en diversos lugares y cambiando la orientaci n del m dulo OMNIGUIDE para darse una idea c mo se comportan los altavoces en diferentes ubicaciones Aunque este experimento no e...

Page 13: ...a instalar su equipo es reducido puede retirar la caja posterior del OC 55 o del OC 65 Dentro de la caja viene un segundo juego de bornes de conexi n para facilitar la instalaci n de los altavoces Ret...

Page 14: ...ogni amplificatore o ricevitore disponibile sul mercato La maggior parte degli amplificatori con potenza compresa tra i 20 e 100 watts per canale si presta a pilotare gli altoparlanti Mirage Avvertim...

Page 15: ...rtura protettiva cilindrica da far scivolare tra la cornice e l altoparlante esattamente entro lo spazio ove la griglia solitamente affissa La copertura protettiva pu essere ottenuta sovrapponendo le...

Page 16: ...ICAN in diverse posizioni Sebbene quest esperimento non sia accurato al 100 pu comunque dare buone indicazioni sull effetto prodottodagli altoparlanti nella stanza prescelta importante ricordare che i...

Page 17: ...ti inserito nell impianto per permettere agli altoparlanti di essere collegati facilmente Rimuovere le quattro viti situate sul retro dell impianto e seguire le istruzioni per l installazione di cui s...

Page 18: ...en Verst rkern oder Receivern benutzt werden Die meisten Verst rker mit einer Nennleistung von 20 100 Watt pro Kanal werden Ihre Mirage Lautsprecher ohne Probleme versorgen k nnen Achtung Wird ein Ver...

Page 19: ...en 1 Nehmen Sie die Bespannung vom Lautsprecher ab 2 Die entfernte Bespannung kann jetzt separat angestrichen werden 3 Um den Rahmen anzustreichen sollten Sie sich eine zylinderf rmige Schutzabdeckung...

Page 20: ...eln Positionieren Sie die OMNICANs auf dem Boden und achten Sie darauf dass der Lautsprecher und das OMNIGUIDE Modul nach oben weisen etwa am selben Ort als ob sie in der Decke eingebaut w ren Schlie...

Page 21: ...Ausrichtung des OMNIGUIDE zufrieden sind da das Entfernen der Lautsprecherbespannung ziemlich schwierig sein kann Siehe Schaubild 10 9 Um die Bespannung wieder am Lautsprecher zu befestigen arbeiten...

Page 22: ...de forst rkere og modtagere der findes p markedet De fleste forst rkere med en ydelse p 20 100 watts per kanal kan effektivt forsyne Deres Mirage h jttalere Advarsel Hvis en forst rker eller modtager...

Page 23: ...en beskyttende cylindrisk afd kning der kan anbringes mellem rammen og h jttaleren hvor gitteret normalt sad Afd kningen kan laves ved at folde et stykke papir der er ca 40 cm langt sammen 4 N r afd k...

Page 24: ...linje for hvordan systemet kan finindstilles og hvordan man kan arbejde med rum med us dvanlige dimensioner Vi anbefaler p det kraftigste at eksperimentere med forskellige vinkler for at finde den per...

Page 25: ...blive monteret under tagsk gget og i omgivelser med forholdsvist h j fugtighed s som badev relser Imidlertid b r de nedenst ende retningslinjer f lges for at sikre Deres h jtalere en lang forventet le...

Page 26: ...te laten op bijna elke op de markt verkrijgbaar versterker of ontvanger De meeste versterkers met een sterkte van 20 100 watts per kanaal zullen uw Mirage luidsprekers effici nt doen werken Waarschuwi...

Page 27: ...ker moet schuiven in het gedeelte waar het rooster meestal gefixeerd is Deze beschermende scherm kan worden ontworpen door middel van het vouwen van de eindes van een blad papier in een lengte van ong...

Page 28: ...e vloer met de luidsprekers en de OMNIGUIDE module naar boven gericht en op ongeveer dezelfde plaats als de plek op het plafond Verbind de luidspreker met een ontvanger zie onderstaande INSTRUCTIES VO...

Page 29: ...volgende stap voordat u volledig tevreden bent met de richting van de OMNIGUIDE omdat het verwijderen van rooster enigszins lastig kan zijn Diagram 10 9 Om het rooster weer tot de luidspreker vast te...

Page 30: ...dos amplificadores com uma pot ncia entre 20 watts e 100 watts por canal funcionar o de modo eficiente com os alto falantes Mirage Advert ncia Se um amplificador ou receptor for sobrecarregado a dist...

Page 31: ...ver ser inserido entre o quadro e o alto falante na rea onde normalmente a grade est fixada O cilindro protector pode ser feito sobrepondo as extremidades de uma folha de papel de cerca de 40 cm 16 po...

Page 32: ...oferecer algumas ideias valiosas sobre o modo como os alto falantes podem desempenhar especificamente na sua sala importante notar que o OMNICAN oferece um desempenho excepcional qualquer que seja o...

Page 33: ...ermitir que os alto falantes sejam conectados facilmente Remova os quatro parafusos localizados na parte de tr s da caixa e siga as instru es de instala o como acima Diagrama 12 UTILIZA O NO EXTERIOR...

Page 34: ...Mirage Mirage CD 50 100 Mirage 8 20 100 Mirage Clipping Mirage Speaker Systems 34 o w n e r s m a n u a l Omnican Series OMNICAN OMNICAN Omnican 8 5x8 5 5 Layout 1 1 28 08 4 19 PM Page 34...

Page 35: ...OMNICAN OMNIGUIDE 1 2 3 16 40 4 35 2 87 73mm 65 65 55 55 45 OC 65 OC 55 OC 45 Omnican 8 5x8 5 5 Layout 1 1 28 08 4 19 PM Page 35...

Page 36: ...IGUIDE 1 OMNICAN OMNIGUIDE OMNICAN OMNIGUIDE OMNICAN 2 5 1 OMNICAN OMNICAN OMNIGUIDE OMNIGUIDE OMNICAN 100 OMNICAN OMNICAN OMNICAN HYPERLINK http www miragespeakers com v2 http www miragespeakers com...

Page 37: ...37 6 7 7 OMNICAN Philips 8 9 8 Pure Titanium Hybrid Tweeter OMNIGUIDE OMNICAN OMNIGUIDE 10 9 11 10 OMNICAN 55 65 12 OMNICAN Mirage Omnican 8 5x8 5 5 Layout 1 1 28 08 4 19 PM Page 37...

Page 38: ...d i a g r a m s 38 1 2 Omnican 8 5x8 5 5 Layout 1 1 28 08 4 19 PM Page 38...

Page 39: ...d i a g r a m s 39 3 4 5 6 Omnican 8 5x8 5 5 Layout 1 1 28 08 4 19 PM Page 39...

Page 40: ...d i a g r a m s 40 7 8 9 10 Omnican 8 5x8 5 5 Layout 1 1 28 08 4 19 PM Page 40...

Page 41: ...d i a g r a m s 417 11 12 Omnican 8 5x8 5 5 Layout 1 1 28 08 4 19 PM Page 41...

Page 42: ...ty the terms of the Limited Warranty prevail GARANTIE GARANTIE AUX TATS UNIS ET AU CANADA La soci t MIRAGE garantit cet appareil contre toute d fectuosit attribuable aux pi ces d origine et la maind o...

Reviews: