


HOW TO SAMPLE
The basic sampling process is not much more
complicated than making a good quality audio
tape copy. It involves making the proper
connections, setting the right levels, capturing
the recording, and checking the results.
The process is controlled by the sampling
parameters and gives you a great deal of
flexibility. Covered here is the general procedure
to follow when sampling.
The flexibility of the Mirage gives you many
other options for sampling and manipulating
sound. These options, along with additional
information and variations to the procedure are
contained in the Advanced Sampler's Guide.
GETTING READY TO SAMPLE
The nature of the sound you will be sampling will have some effect on the results. Unfortunately
there are no hard and fast rules governing different techniques for different sounds. As you use
the Mirage you will quickly adapt to the procedure and develop your own methods for getting
the best results.
As an example, let's use an electric guitar. We can connect the guitar directly to the Mirage input
or connect the "preamp out" jack of an amplifier directly to the Mirage. We could mike the
speaker cabinet and plug the microphone into the Mirage, or we could run the mike through a
mixer and take a line out of the mixer into the Mirage. As you can see, there are many ways to
go about getting a sample.
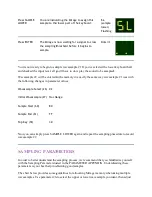
One important thing to remember is this: there is no level control for the audio input of the
Mirage. You must adjust the level at the source. For this reason, the best results will always be
obtained by sending the Mirage a line level signal (from a mixer, synthesizer, tape deck, etc.)
whose volume you can adjust, and using the Mirage's LINE LEVEL INPUT (param 75-on).


