4
MR6401 CPR Sensor Operator’s Manual
WARNING
●
Check the battery indicator regularly.
●
The battery indicator lighting in red indicates a low battery. To ensure the CPR sensor is ready
for operation in an emergency treatment, you should charge the battery in time. Do not
interrupt CPR when the battery indicator lighting in red during the emergency treatment.
To store the CPR sensor with a battery for an extended period of time, place the CPR sensor at a
temperature of 25°C±5°C and a relative humidity (non-condensing) between 50% and 60%.
For the CPR sensor configured with a battery, you should perform a complete charge-discharge cycle
every three months. Make sure the battery is fully charged before the next use.
We recommend replacing the battery every two years.
Basic Operations
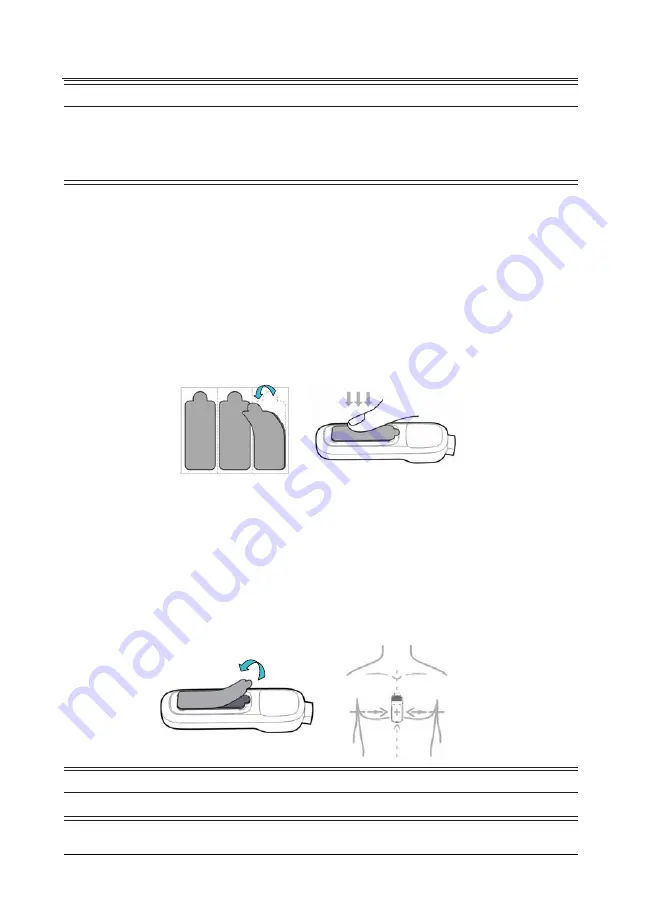
1. Apply a new CPR adhesive tape.
Open the package of CPR adhesive tapes and peel one to expose it on the adhesive mount area of
the CPR sensor with its adhsive surface.
2. Wake up the CPR sensor.
Only the CPR sensor configured with a battery can enter the sleeping status. In this case, you can
wake up the CPR sensor by shaking and compressing it, or connecting it to a Mindray defibrillator
or monitor supporting the CPR function.
3. Attach the CPR sensor.
a. Prepare the patient skin, shave hair from skin if necessary. If the patient’s chest is contaminated
with blood, clean it completely.
b. Peel off the liner from the CPR adhesive tape.
c. Position the CPR sensor so that the compression area is in the middle of the chest, on the lower
half of the sternum.
WARNING
●
Do not apply the CPR sensor to an open wound or recent incision site.


