


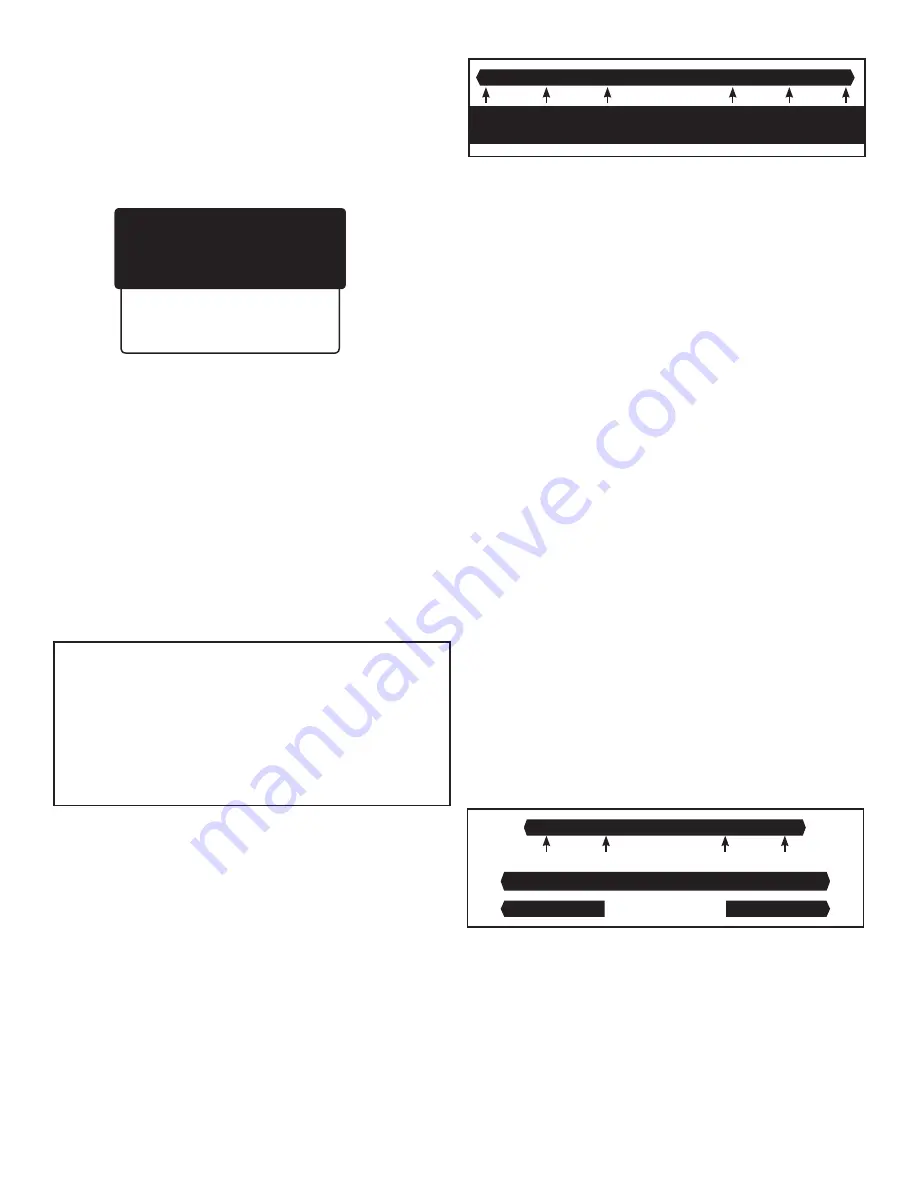
3
Replace
Probe
Clean
Probe
Acceptable Slope
Performance
Probe
Clean
Probe
Replace
Probe
Setting Calibration Points
Menu Button>pH>pH Calibration
Before selecting calibration point(s), you may want to review the
**Last Calib./GLP** screen. Scroll down to the “Last Calib./GLP” option
and press
SELECT. (Menu Button>pH>pH Calibration>Last Calib./
GLP)
The **Last Calib./GLP** screen will then give you the date and
time of the last calibration; indicate 1, 2, or 3 point calibration; and
give you the calibration points, as shown below.
In accordance with GLP (Good Laboratory Practices), you can
scroll down on this screen to view Acid Slope and Base Slope
once calibration is complete.
1) On **pH Calibration** screen, select 1, 2, or 3 point calibration.
2) Depending on your selection, the **1 Pt Calibration**,
**2 Pt Calibration**, or **3 Pt Calibration** screen will appear.
Each of these screens lists the calibration points - various
combinations of 4.01, 7.01, and 10.01. Place the cursor beside
your desired point or combination of points and press SELECT.
As an example, if you select 2 Point Calibration, a new screen
will appear listing 7.01 & 4.01 Calib and 7.01 & 10.01 Calib. If
you SELECT 7.01 & 4.01 Calib, another screen will appear which
will take you through the calibration process.
•
You will be instructed to “Place probe in 7.01 calibration
solution. Press Select.”
•
A “Please Wait...” message will appear on screen.
•
Once the probe calibrates in the 7.01 solution, you will then
be instructed to “Place probe in 4.01 calibration solution.
Press Select.”
•
Once the probe has calibrated in the 4.01 solution,
calibration is complete.
Using Acid/Base Slopes
to Assess pH Probe Performance
In addition to displaying date, time, number of calibration
points and specific points, the **Last Calib./GLP** screen
provides readings for Acid Slope and Base Slope. Slopes are
given as percentages and tell you how closely your freshly
calibrated pH probe is reading as compared with an “ideal”
probe.
A new probe can get very close to “ideal” probe readings, but
with aging and coating becomes less accurate. The following
graph shows the acceptable range and indicates what should
be done if the reading falls outside this range. If your probe is
good in one range (acid or base), but bad in the other, it should
be replaced.
90% 95% 102% 105%
A 3-point calibration will always give you an acid and a
base slope: however, when using 1- or 2-point calibration,
depending on points chosen, you may get an acid OR a base
slope reading. In this case, the other reading will show as a
default 99.9.
pH Probe Diagnostic
Menu Button>pH>pH Probe Diagnostic
pH probes have a limited lifetime and must be replaced
periodically to maintain accurate readings. If you suspect
incorrect readings, work your way to the pH Probe Diagnostic
screen. Press SELECT. Follow instructions on the screen and
the unit will run a diagnostic test, then a message will appear
on the screen, such as “Probe or solution is bad!” Replace
your solution, run diagnostic again, and if you get the same
message, replace the probe.
Understanding pH Alerts (Caution and Critical)
The DL100 is designed to efficiently monitor the pH value of
a solution and generate caution and critical alerts as needed.
The status lights located beside the screen will change color to
signal these alerts and, if you have enabled Wi-Fi and subscribe
to the interface portal, the monitor will send out your choice of
emails or text messages, or both, to alert you. See “Setting up
Wi-Fi” section for details on connecting to the interface portal.
A Caution is intended to alert you when the pH reading is
getting too high or too low. A Critical Alert is to let you know
that a reading has reached a critical level and you have a
serious problem needing immediate attention.
It is your responsibility to set the pH alerts for your specific
requirements. This is a balancing act and may require some
experimentation on your part. You want to receive the alerts
when needed, but you don’t want the DL100 to be sending out
alerts too frequently. See the diagram below for a typical setup.
5.60 6.30 7.00 7.70 8.40
Critical Caution Caution Critical
Red | Lime | Blue | Lime | Red
Below Alert Above Alert
If the value for pH is within the Caution parameters you have set,
the status lights on both sides of the screen will remain blue.
If the blue changes to lime, this signals that the value has
reached the Caution level. If the reading continues to drift
further from the target value and reaches the Critical level, the
lime lights will turn red, indicating a critical condition.
** Last Calib./GLP **
O5/04/15 9:25
2 Point Calibration
7.01 & 4.01
Acid Slope: 000.0
Base Slope: 000.0
>Exit


