


6
LA
SE
R
A
LI
G
N
M
EN
T
35
4
Align the central light sheet of the left side to the pinhole by using the adjustment screw Z1 on the left-
hand side.
5
Move the slider
Sheetmotor Calibration
in the
Settings 1
window until only one light sheet passes the
pinhole.
6
Ensure that the slider for the horizontal focus is still in the center and the NA is at maximum. If necessary,
adjust the position.
7
Repeat moving the screw in the z-direction and adjusting the position of the horizontal focus to find the
maximum intensity.
8
If it is not possible to make only one light sheet pass the pinhole, observe the instructions under
the horizontal focus on page 33
.
6.6
Adjusting the lateral light sheets on the left-hand side
To adjust the lateral light sheets on the left-hand side, the horizontal focus must not be changed.
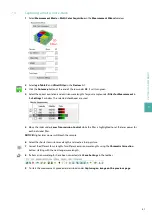
1
Click
Laser beam adjustment > Left > 3
in the
Advanced
tab in the
Settings 1
window to activate all
laser beams. All light sheets should pass the pinhole in the center of the mask of the alignment tool.
2
Adjust the height of the lateral light sheets. Start with the rear light sheet using the adjustment screw
Z2
:
Refer to
. Use an Allen key to align the light sheet to the pinhole.
3
Repeat the procedure with the front light sheet using the adjustment screw
Z2
: Refer to
4
Draw a region of interest over the light sheets passing the pinhole in the live window, and activate the
intensity profile.
5
Check the adjustment by clicking the
Brain
button under
Scan Range
in the
Settings 2
window. Keep the
cursor on the button, and scroll with the mouse wheel to move the alignment tool up and down.
If the intensity peaks decrease in the same way, the alignment is sufficient.
6
To move back the alignment tool to the reference position, regardless whether the adjustment was
successful, type
0
under
Current Position
.
7
Press the
Move to set position
button.
Alternatively use the mouse wheel.
If the alignment from the right-hand side to the left-hand side is not successful, check the position of the
alignment tool again.
If the alignment is successful, click the
Start live preview
button again to stop the laser activity.
Summary of Contents for UltraMicroscope II
Page 1: ...UltraMicroscope II Imaging System User manual...
Page 14: ...1 IMPORTANT SAFETY INFORMATION 12...
Page 20: ...2 INTRODUCTION 18...
Page 30: ...5 PREPARING THE INSTRUMENT 28...
Page 38: ...6 LASER ALIGNMENT 36...
Page 46: ...7 SETTING UP AN EXPERIMENT 44...
Page 48: ...8 MAINTENANCE 46...
Page 54: ...10 TECHNICAL SUPPORT 52...
Page 57: ......


