background image

Imp

ort

Ap

plia

nce

s.c

om

THE EASIEST WAY TO SELF-IMPORT APPLIANCES DIRECT FROM EUROPE.

Operation

19

Vacuum sealing levels

There are 3 vacuum sealing levels.

The higher the vacuum level selected, the greater the vacuum.

Vacuum

sealing level

Use for

  

Packaging, portioning and storing

Suitable for

– food that is prone to squashing, e.g. lettuce, berries or crisps;

– preserving jars and jars with twist-off lids (screw cap lids) with

liquid contents, e.g. stock or pickled vegetables.

  

Marinating, tenderising, sous vide cooking and freezing

Suitable for

– food that is prone to squashing, e.g. tender fish fillets;

– sauces and food with a high liquid content (

 50 g), e.g. ragout,

curry;

– preserving jars and jars with twist-off lids (screw cap lids) with

more solid or dry contents e.g. jam, pesto or cake.

  

Sous vide cooking, freezing and storage

Suitable for

– meat and more solid food, e.g. potatoes, carrots;

– hard cheese (storage);

– food with a low liquid content (

 50 g), such as meat seasoned

with a herb oil.

Summary of Contents for EVS 6114

Page 1: ...OM EUROPE Thanks for choosing ImportAppliances for your kitchen appliance purchase We hope you are enjoying the convenience quality and affordability of your new appliance If you have any issues or questions please contact us via email info ImportAppliances com User Manual ...

Page 2: ... DIRECT FROM EUROPE Operating and installation instructions Built in vacuum sealing drawer To avoid the risk of accidents or damage to the appliance it is essential to read these instructions before it is installed and used for the first time en GB M Nr 10 688 220 ...

Page 3: ...sealing bags 21 Sealing the bag early 22 Vacuum sealing preserving jars and jars with twist off lids 23 Vacuum sealing external containers 25 After use 27 Cancelling a vacuuming process 27 Cleaning and care 28 Cleaning the drawer front and glass lid 29 Cleaning the vacuum chamber and sealing bar 29 Cleaning the vacuum adapter 29 Carrying out a drying cycle 30 Problem solving guide 31 Optional acce...

Page 4: ...ImportAppliances com THE EASIEST WAY TO SELF IMPORT APPLIANCES DIRECT FROM EUROPE Contents 3 Warranty 52 ...

Page 5: ...ead to personal injury and damage to property To avoid the risk of accidents or damage to the appliance please read these instructions carefully before installation and before us ing it for the first time They contain important notes on installa tion safety use and maintenance Miele cannot be held liable for damage caused by non compliance with these Warning and Safety instructions Keep these inst...

Page 6: ... this purpose to vacuum seal preserving jars jars with twist off lids and vacuum proof containers made of plastic or stainless steel Any other use is not permitted Never vacuum seal live food e g mussels seafood People with reduced physical sensory or mental capabilities or lack of experience and knowledge who are not able to use the drawer safely on their own must be supervised whilst using it Th...

Page 7: ...be allowed to clean the drawer unsupervised Please supervise children in the vicinity of the drawer and do not let them play with it The sealing bar becomes hot during operation The weld seam of the vacuum bag is also heated to a very high temperature during the sealing process Keep children away from the drawer until the seal ing bar and the seam have cooled sufficiently that there is no longer a...

Page 8: ...n its side The manufacturer s warranty will be invalidated if oil has leaked out of the appliance because it has not been transported or stored cor rectly Reliable and safe operation of the drawer can only be assured if it has been connected to the mains electrical supply The electrical safety of this drawer can only be guaranteed when correctly earthed It is essential that this standard safety re...

Page 9: ...ty of the appliance when genu ine original Miele replacement parts are used Faulty components must only be replaced by Miele spare parts If the plug is removed from the connection cable or if the cable is supplied without a plug the drawer must be connected to the elec trical supply by a suitably qualified electrician If the connection cable is damaged it must be replaced with a special connection...

Page 10: ...the glass lid cannot sustain damage from falling objects Do not use the drawer or the glass lid as a working surface a chopping surface or as a shelf The drawer must be built in so that it can be pulled out completely and there is sufficient room to open the glass lid This ensures that you can see into the vacuum chamber and avoid touching the seal ing bar and weld seam and burning yourself When v...

Page 11: ...rs and jars with twist off lids in the closed va cuum sealing chamber Risk of injury Damage and cracks in jars or glass twist off lids can cause implosion Only vacuum seal jars and lids which are in perfect condition Risk of injury The high pressure during the vacuuming process causes the vacuum chamber and the glass lid on the drawer to dis tort slightly Do not let preserving jars or jars with tw...

Page 12: ...T WAY TO SELF IMPORT APPLIANCES DIRECT FROM EUROPE Warning and Safety instructions 11 Cleaning and care Do not use a steam cleaning appliance to clean the drawer The steam could reach electrical components and cause a short cir cuit ...

Page 13: ...of ten contain valuable materials They also contain specific materials com pounds and components which were essential for their correct function and safety These could be hazardous to hu man health and to the environment if disposed of with your domestic waste or if handled incorrectly Please do not therefore dispose of your old appliance with your household waste Please dispose of it at your loca...

Page 14: ...ss lid with chamber seal Push down on the little black triangle to close the glass lid c Sealing bar in the vacuum chamber and counterpressure bar on the un derside of the glass lid d Push2open mechanism The drawer can be opened by press ing lightly in the middle of the drawer front e Control panel f Vacuum pump air intake valve Va cuum adapter connection g Vacuum chamber ...

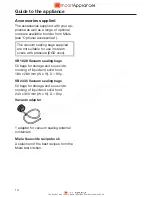
Page 15: ...m sealing bags supplied are not suitable for use in steam ovens with pressure DGD xxxx VB 1828 Vacuum sealing bags 50 bags for storage and sous vide cooking of liquid and solid food 180 x 280 mm W x H D 90 µ VB 2435 Vacuum sealing bags 50 bags for storage and sous vide cooking of liquid and solid food 240 x 350 mm W x H D 90 µ Vacuum adapter 1 adapter for vacuum sealing external containers Miele S...

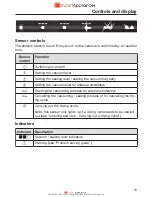
Page 16: ...ing the sealing level sealing the vacuum bag early Setting the vacuum level for external containers Starting the vacuuming process for external containers Cancelling the vacuuming sealing process or for cancelling the dry ing cycle Carrying out the drying cycle Note this sensor only lights up if a drying cycle needs to be carried out see Cleaning and care Carrying out a drying cycle Indicators Ind...

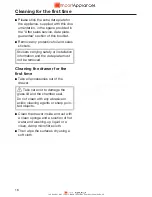
Page 17: ...foil and sales stickers Stickers carrying safety or installation information and the data plate must not be removed Cleaning the drawer for the first time Take all accessories out of the drawer Take care not to damage the glass lid and the chamber seal Do not clean with any abrasive or acidic cleaning agents or sharp poin ted objects Clean the drawer inside and out with a clean sponge and a soluti...

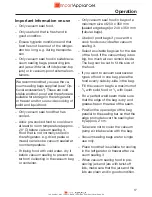
Page 18: ...ater dry it before vacuum sealing to prevent wa ter from collecting in the vacuum bag or container Only vacuum seal food in bags of a maximum size of 250 x 350 mm sealed edge bags or 240 x 350 mm tubular bags Use boil proof bags if you want to cook food sous vide after vacuum sealing it Select a suitable bag size for the size of the food If the vacuum bag is too big too much air can remain inside ...

Page 19: ...aling make sure that jars do not exceed the maximum permitted height Tips Freeze liquids before vacuum sealing them You can then fill the bags full Fold the edges of the vacuum sealing bag outwards for filling This will give you clean perfect weld seams To prevent small bags from slipping down into the vacuum chamber a chopping board can be placed in the bottom of the chamber If you are unsure whe...

Page 20: ...h twist off lids screw cap lids with liquid contents e g stock or pickled vegetables Marinating tenderising sous vide cooking and freezing Suitable for food that is prone to squashing e g tender fish fillets sauces and food with a high liquid content 50 g e g ragout curry preserving jars and jars with twist off lids screw cap lids with more solid or dry contents e g jam pesto or cake Sous vide coo...

Page 21: ... bags The sealing level to select depends on the material thickness of the bag the stronger the bag the higher the sealing level Level 3 is recommended for the vacuum sealing bags supplied Tip The sealing bar will get progressively hotter when carrying out a number of consecutive vacuuming processes You can use a lower sealing level after sealing a few bags ...

Page 22: ...hamber so that the open end of the bag lies across the sealing bar Ensure that the edge of the bag is positioned centrally and crease free on the sealing bar Switch the drawer on with the sensor The and sensors will light up Touch the sensor repeatedly until the segment for the required vacuum level lights up Touch the sensor repeatedly until the segment for the required sealing level lights up Cl...

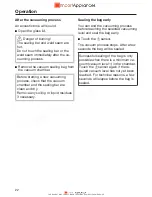
Page 23: ...ng process check that the vacuum chamber and the sealing bar are clean and dry Remove any soiling or liquid residues if necessary Sealing the bag early You can end the vacuuming process before reaching the selected vacuuming level and seal the bag early Touch the sensor The vacuum process stops After a few seconds the bag will be sealed Successful sealing of the bag is only possible when there is ...

Page 24: ...in a safety gap of at least 1 cm between the lid on the jar and the glass lid on the drawer Vacuum sealing preserving jars and jars with twist off lids Close the jar with its appropriate lid and rubber seal or with the twist off lid Open the drawer and the glass lid Place the jar in the vacuum chamber Switch the drawer on with the sensor The and sensors will light up Touch the sensor repeatedly un...

Page 25: ...oustic tone will sound Open the glass lid Danger of burning The sealing bar is hot Do not touch the sealing bar immedi ately after the vacuuming process Remove the jar from the vacuum chamber Before starting a new vacuuming process ensure that the vacuum chamber is clean and dry Remove any soiling or liquid residues if necessary ...

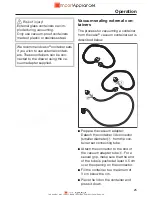
Page 26: ... using the va cuum adapter supplied Vacuum sealing external con tainers The process for vacuuming a container from the caso vacuum container set is described below Prepare the vacuum adapter Detach the container lid connector smaller diameter from the con tainer set connecting tube Attach the connector to the end of the vacuum adapter tube For a secure grip make sure that the end of the tube is pu...

Page 27: ...vacuum level lights up Touch the sensor The vacuuming process will start Leave the glass lid open for the en tire duration of the vacuuming pro cess If an excessive amount of bubbles form you can cancel the vacuuming process by pressing the sensor see Cancelling the vacuuming pro cess After the vacuuming process An acoustic tone will sound Dettach the connector from the con tainer lid Make sure th...

Page 28: ...st vacuum and sealing level se lected is automatically activated the next time the drawer is switched on and this is shown in the display Cancelling a vacuuming pro cess You can cancel a vacuuming process at any time e g if you notice during the process that the edge of the bag is not positioned correctly or that the closure on the container lid is not pointing to seal closed Please note that when...

Page 29: ... any residual cleaning agent immediately Allow the sealing bar to cool before cleaning it Switch the drawer off to clean it The drawer and accessories should be cleaned and dried thoroughly after each use Do not close the glass lid until the va cuum chamber is completely dry Unsuitable cleaning agents To avoid damaging the surfaces do not use cleaning agents containing soda am monia acids or chlor...

Page 30: ...getting into the vacuum pump air intake valve can result in damage to the vacuum pump Take care that water does not get into the air intake valve Tip For easier cleaning the sealing bar can be lifted off Remove light soiling immediately us ing a solution of hot water and wash ing up liquid applied with a clean sponge or use a clean damp mi crofibre cloth Remove any residual cleaning agent with a l...

Page 31: ...l lock after the last remaining use and cannot be used again until dry ing has been carried out We recommend carrying out a drying cycle before the drawer locks out The whole drying cycle lasts for a max imum of 20 minutes When carrying out the drying cycle the vacuum chamber must be empty and free of liquid residues Clean and dry the vacuum chamber as necessary Touch the sensor Close the glass li...

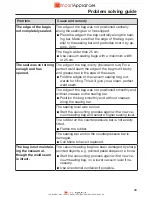
Page 32: ...s defective or has tripped Reset the trip switch in the mains fuse box min imum fuse rating see data plate If after reset ting the trip switch or replacing the fuse in the mains fuse box and switching the drawer back on the drawer will still not operate contact a qualified electrician or the Miele Service Department There was a loud bang during operation The transit device has not been not removed...

Page 33: ...during the vacuuming process The vacuum chamber is still under pressure so the glass lid cannot be opened Do not in any circumstances try to force the glass lid open or use tools to open it When the power supply is restored the glass lid can be opened again after initialisation all sensors and controls light up Start the vacuuming process again if necessary There is still too much air in the bag a...

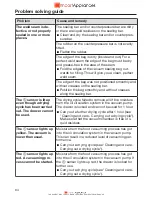
Page 34: ...of the seam Fold the edges of the vacuum sealing bag out wards for filling This will give you a clean perfect weld seam The edge of the bag was not positioned smoothly and without creases on the sealing bar Position the bag smoothly and without creases along the sealing bar The sealing level was too low Start the vacuuming process again with a new va cuum sealing bag and select a higher sealing le...

Page 35: ...ong the sealing bar The sensor is lit up even though a drying cycle has been carried out The drawer cannot be used The drying cycle failed to remove all of the moisture from the oil circulation system in the vacuum pump The drawer is locked and cannot be used for 1 hour Carry out a further drying cycle after 1 hour see Cleaning and care Carrying out a drying cycle Make sure that the vacuum chamber...

Page 36: ...he vacuuming process again selecting a dif ferent vacuum level if necessary After intensive use of the drawer the oil in the vacuum pump has severely overheated Leave the drawer to cool for an hour before start ing another vacuuming process When carrying out a number of consecutive vacu uming processes wait a minimum of 2 minutes between each process to prevent the oil from overheating again The v...

Page 37: ...e ordered through the Miele Webshop They can also be ordered from Miele see end of this booklet for contact de tails or from your Miele dealer Vacuum sealing bags VB 1828 pack of 50 For storing and sous vide cooking of li quid and solid food 180 x 280 mm W x H D 90 µ VB 2435 pack of 50 For storing and sous vide cooking of li quid and solid food 240 x 350 mm W x H D 90 µ Cleaning and care products ...

Page 38: ...combination with those appli ances quoted by Miele as being suitable Miele cannot guarantee trouble free operation if the appliance is operated in combination with appliances other than those quoted by Miele as being suitable The base on which the drawer and the combination appliance are fitted must be fixed in place and must support the weight of both ap pliances When building in the combination ...

Page 39: ...F IMPORT APPLIANCES DIRECT FROM EUROPE Installation notes 38 When building in the drawer with a combination appliance the combina tion appliance is placed on top of the drawer without the need for an interim shelf All dimensions are given in mm ...

Page 40: ...out for ventilation b Building in dimension including mains supply cable plug connector Mains connection cable L 2200 mm c Worktop protrusion Glass front metal front Installation in a tall unit a Cut out for ventilation b Building in dimension including mains supply cable plug connector Mains connection cable L 2200 mm Glass front metal front ...

Page 41: ...alled with a pyrolytic oven b Building in dimension including mains supply cable plug connector Mains connection cable L 2200 mm Glass front metal front EVS with H 6xxx BM BP M 61xx M 62xx a Ventilation cut out required when in stalled with a pyrolytic oven b Building in dimension including mains supply cable plug connector Mains connection cable L 2200 mm Glass front metal front ...

Page 42: ... with a steam oven with mi crowave b Building in dimension including mains supply cable plug connector Mains connection cable L 2200 mm Glass front metal front EVS with DG 6x00 DG 6x0x a Ventilation cut out required when in stalled with a steam oven b Building in dimension including mains supply cable plug connector Mains connection cable L 2200 mm Glass front metal front ...

Page 43: ...g mains supply cable plug connector Mains connection cable L 2200 mm Glass front metal front EVS with DGC 6500 DGC 6600 DGC 680x a Ventilation cut out required when in stalled with a steam combination oven b Building in dimension including mains supply cable plug connector Mains connection cable L 2200 mm Glass front metal front For the DGC 6805 cut outs are re quired for the water inlet and drain...

Page 44: ...ble L 2200 mm Glass front metal front For the DGC 6865 cut outs are re quired for the water inlet and drain hoses see DGC 6865 installation in structions EVS with DGD 4635 DGD 6xx5 a Filler panel AB 45 7 optional ac cessory b Building in dimension including mains supply cable plug connector Mains connection cable L 2200 mm Glass front metal front For the steam oven with pressure cut outs are requi...

Page 45: ...CT FROM EUROPE Building in dimensions 44 EVS with CVA 6401 CVA 68xx a Ventilation cut out for installation in combination with a coffee machine b Building in dimension including mains supply cable plug connector Mains connection cable L 2200 mm Glass front metal front ...

Page 46: ...d must be fit ted in place of the transit device There are also 2 safety screws on the back of the drawer to prevent the drawer from being opened unintention ally during transportation and when it is being removed from the packaging Warning Fit the air filter before building in the drawer and remove the safety screws at the back Otherwise the drawer cannot be op erated and may have to be taken out...

Page 47: ...re the transit device to the back of the drawer Slide the cover over the opening to close it Remove the safety screws from the back of the drawer Avoid damaging the drawer Remove the air filter before trans porting the drawer and plug the va cuum pump with the transit device To remove the air filter and fit the transit device carry out these steps in reverse order ...

Page 48: ...eck that the base that the drawer will sit on is clean and level use a spirit level This is important for the appliance to function correctly Fitting the anti tipping mechanism Measure the distance to the right and left hand side walls of the housing see illustration Mark the uppermost position in the long slot of the anti tipping mechan ism Make sure that the anti tip ping mechanism is flush with...

Page 49: ...t right angles Open the drawer and secure it to the right and left hand side walls of the housing unit with the 2 wood screws supplied 3 5 x 25 mm Remove the 4 foam adhesive labels from the back of the front panel on the right and left hand sides Connect the drawer to the mains electricity supply When the drawer is first connected or after an interruption to the power sup ply all of the sensors an...

Page 50: ... and the combination appliance To help you do this there are 2 screws behind the drawer front with which the front is fixed to the drawer housing Open the drawer Loosen fixing screws on the right and left of the drawer housing Danger of injury When the fixing screws are removed the drawer front is only hooked onto the housing and can easily fall off Do not remove the fixing screws completely Push ...

Page 51: ...e g electric shock If the plug is removed from the con nection cable or if the cable is sup plied without a plug the drawer must be connected to the electrical supply by a suitably qualified electrician If the switched socket is not access ible after installation or if the appli ance is to be hard wired an addi tional means of disconnection must be provided for all poles When switched off there mu...

Page 52: ...lation Safety fuses Completely remove fuses Automatic circuit breakers Press the red button until the middle black button springs out Built in circuit breakers Circuit breakers type B or C Switch the on off switch from 1 on to 0 off Residual current device RCD Residual current circuit breaker Switch the main switch from 1 on to 0 off or press the test button Replacing the mains connec tion cable I...

Page 53: ...e problem could have been resolved as described in this booklet Please quote the model and serial number of your appliance when contacting Miele This information can be found on the data plate Data plate Stick the extra data plate supplied with the appliance here Make sure that the model number matches the one specified on the back cover of this document Warranty The appliance warranty is valid fo...

Page 54: ...ImportAppliances com THE EASIEST WAY TO SELF IMPORT APPLIANCES DIRECT FROM EUROPE ...

Page 55: ...ImportAppliances com THE EASIEST WAY TO SELF IMPORT APPLIANCES DIRECT FROM EUROPE ...

Page 56: ...t www miele ie Ireland Malaysia Miele Sdn Bhd Suite 12 2 Level 12 Menara Sapura Kencana Petroleum Solaris Dutamas No 1 Jalan Dutamas 1 50480 Kuala Lumpur Malaysia Phone 603 6209 0288 Fax 603 6205 3768 Miele New Zealand Limited IRD 98 463 631 Level 2 10 College Hill Freemans Bay Auckland 1011 New Zealand Tel 0800 464 353 Internet www miele co nz New Zealand Miele Pte Ltd 163 Penang Road 04 03 Winsl...

Page 57: ...ImportAppliances com THE EASIEST WAY TO SELF IMPORT APPLIANCES DIRECT FROM EUROPE M Nr 10 688 220 01 en GB EVS 6114 EVS 6214 ...

Reviews: