


GRX-3080 JLR EU STANDALONE
Midtronics B.V. Hoofdveste 6 Houten NL
www.midtronics.com
13
Chapter 2: Overview
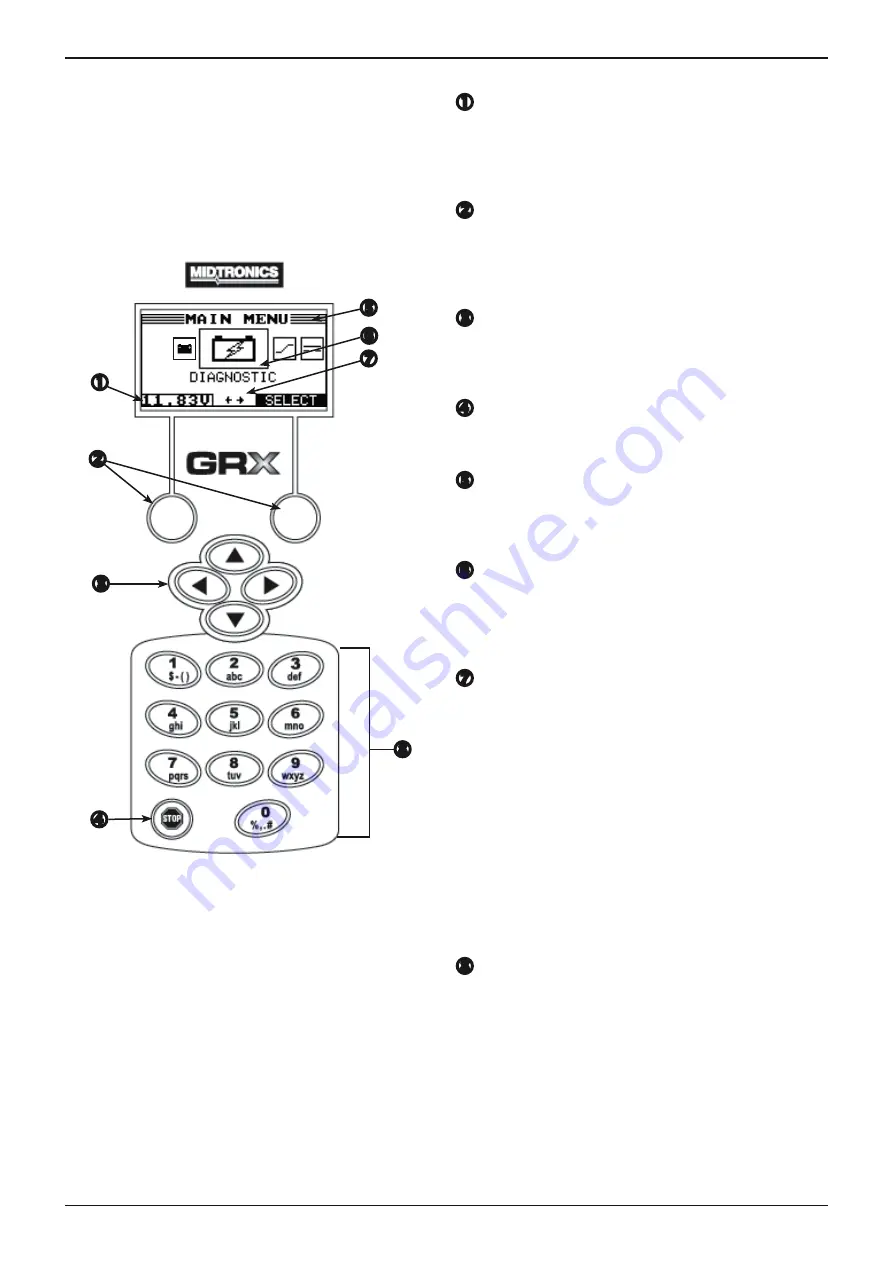
Display and Keypad
The GRX Battery Diagnostic Station can be controlled with
an integrated display and keypad or with an external tester
(special software version needed). The display also keeps
you on track with onscreen navigation aids, directions and
messages. The illustration shows how the elements on the
screen relate to the keypad.
Voltmeter
When you first connect the GRX to a battery it functions as
a voltmeter. The voltage reading appears above the left soft
key until you move to other menus or functions.
Soft Keys
Pressing the two soft keys linked to the bottom of the
screen will perform the functions displayed above them. The
functions change depending on the menu and test process.
ARROW Keys
Press the ARROW keys to scroll through numerical values
and navigate through menus and icons.
STOP Key
Press the STOP key at any time to stop the active mode.
Title Bar
The title bar shows you the name of the current menu, test
tool, utility, or function.
Selection Area
The selection area below the Title Bar contains selectable
icons or dialog boxes that display information or require a
response.
Menu Screen Arrows
When displayed in menu screens, the menu screen arrows
show you which ARROW key on the keypad to press to
display other icons or screens. The Up and Down Menu
Screen Arrows, for example, indicate when to press the
UP (
) or DOWN (
) ARROW keys to display the screens
above and below the current screen.
The left and right menu screen arrows tell you when to use
the LEFT (
) or RIGHT (
) ARROW keys to select an icon.
When displayed under a list of options, the menu screen
arrows show you which keypad arrow to press to highlight a
character or item in a list.
Alphanumeric Keypad
In some cases, you can use the alphanumeric keypad to
enter numerical test parameters instead of scrolling to them
with the ARROW keys.
You can also use the alphanumeric keys to create and edit
customer coupons and your shop contact information on
printed test results. (printer is optional)
To add a space, press the RIGHT (
) ARROW key. To erase a
space and insert a character, press the LEFT (
) ARROW key.


