


16
17
Connect robot with Amazon Alexa.
Voice controls for Amazon Alexa
Amazon Alexa: (please search “
my blink
” in Echo to get skills.)
“Alexa tell
my blink
to start cleaning”
“Alexa tell
my blink
to pause my robot”
“Alexa tell
my blink
to
go home
”
Operating Instructions for Network Accessing Configuration
Add Appliance
The 1st step:
Add by product category
Click “+” key on the main screen of App and select i5
Advance
from product categories on the
new interface.
The 2
nd
step: Network accessing operation of the appliance.
Conduct network accessing operations in accordance with network accessing instructions on App
and after that, click “Next Step” on the mobile phone.
Add Appliance
Next step
Network accessing
introductions
Add Equipment
NOTE
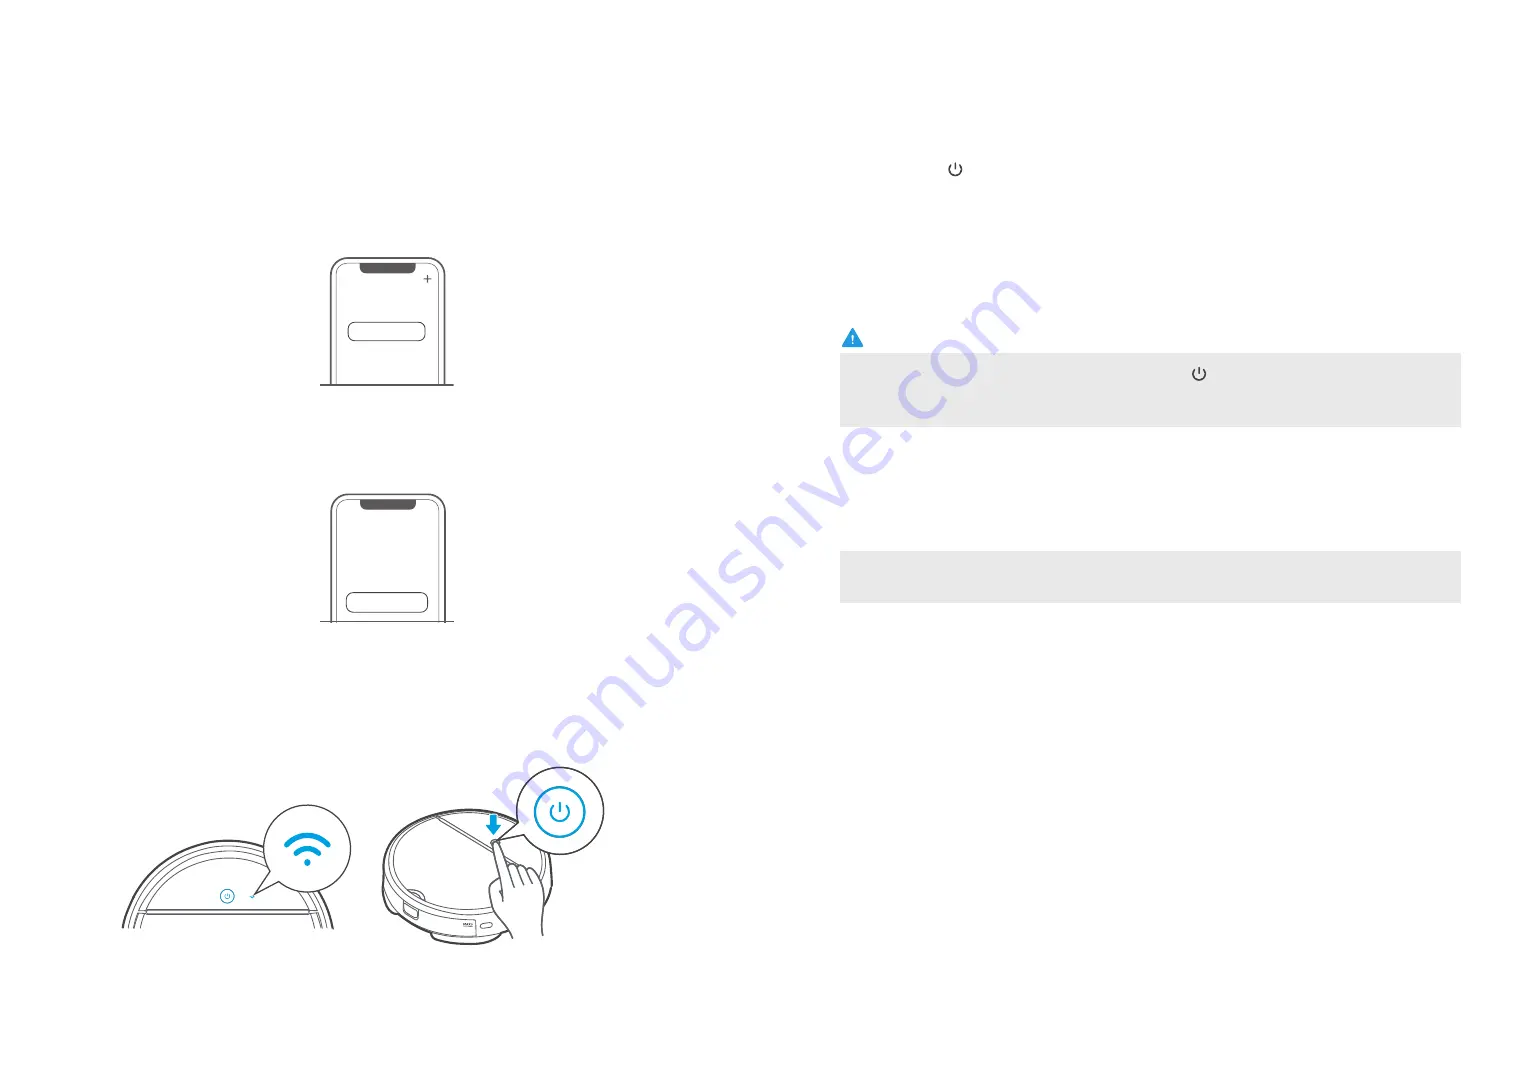
1
Open the upper cover of the cleaner and press power switch;
2
When 1
st
using,slow flickering of wifi indicator light indicates that the cleaner gets into the
state of network accessing configuration, now click “Next Step” on the mobile phone
to operate.
3
Once the network access is configured successfully, you will be the owner of this cleaner and can
operate your security intelligent cleaner by accessing to cleaner operating interface.
The 3
rd
step: Conduct network accessing config operations as per the prompts on
Mobile App.
Short press “ ” on the front side of the cleaner and once the voice prompt
of successful system start-up is heard, the system is now started successfully;
If WiFi indicator light doesn’t flicker slowly, long press “ ” 3 seconds and release
after a tick sound is heard; Slow flickering of wifi indicator light indicates that the cleaner gets into
the state of network accessing configuration.


