Reference: The Preview window 7
Some scanner models feature multiple scanning lenses (one for high-resolution
scanning and one for low-resolution scanning). If the multiple-lens scanner is
detected, a submenu appears for lens selection, and you can choose the option
you want.
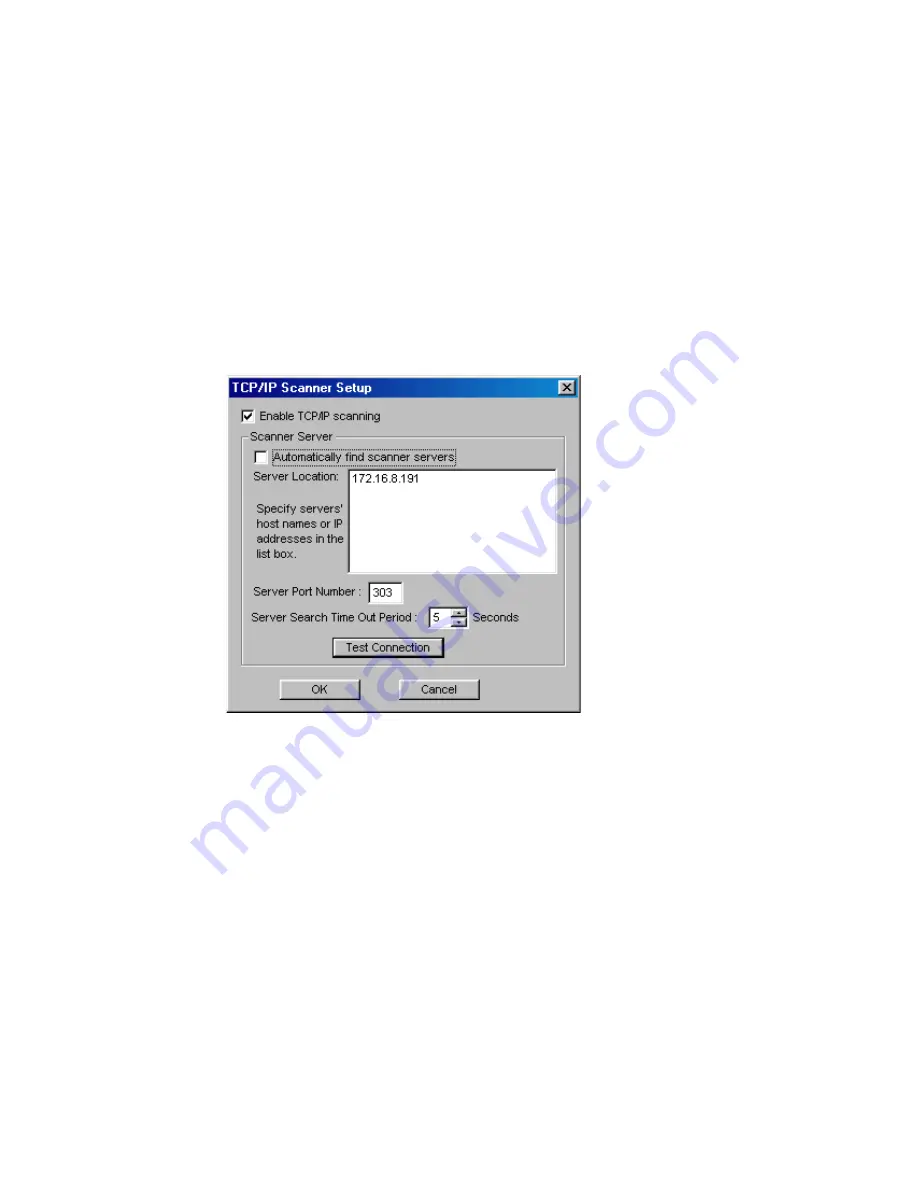
TCP/IP Scanner Setup
This window is the control panel for managing scanner servers. Choose the
“TCP/IP scanner setup” command from the Scanner menu; the following dialog
box appears.
Enable TCP/IP scanning
If checked, your computer is enabled to access remote scanners (scanner
servers) on the network. If unchecked, remote access is disabled.
Auto-search scanner servers
If checked, clicking the Test Connection button displays the IP addresses of
connected scanners. If unchecked, you can type either the host names or the
corresponding IP addresses in the Server Location edit box, then click the Test
Connection or OK button. The Test Connection button lists the information of
the detected scanner servers; while the OK button performs auto searching of
scanner servers without showing information on the detected scanners. The
detected scanners can be selected from the Scanner menu of the ScanWizard
Pro Overview window.


