


M7 Stationary HD Megapixel IP Camera Series
User Manual
© 2001 - 2016 Microseven Systems, LLC
Page | 17
4.
Once you have selected your recording options, you must click the ‘Schedule record enable’ box
to enact the settings.
5.
Accept the default save path or set a folder path of your choice by clicking ‘Browse’.
6.
If you wish to schedule continuous recording for all cameras, check the ‘Apply recording
schedule to all cameras’ box.
7.
Specify the number of days to maintain recording video files on your local system. The default is
0 days. M7CMS monitors the amount of hard disk space available and, if required, removes old
files to free up hard disk space.
8.
If you would like an audible sound to be emitted upon an alert event, select from one of 39
sound variations using the music drop-down list. A brief audio preview will be played upon its
selection.
9.
Click ‘OK’ to save the settings.
3.1.8
Establishing Advanced Camera Properties
Numerous camera settings can be established and configured from the Camera Properties menu. This
menu can be activated in any one of the following three ways:
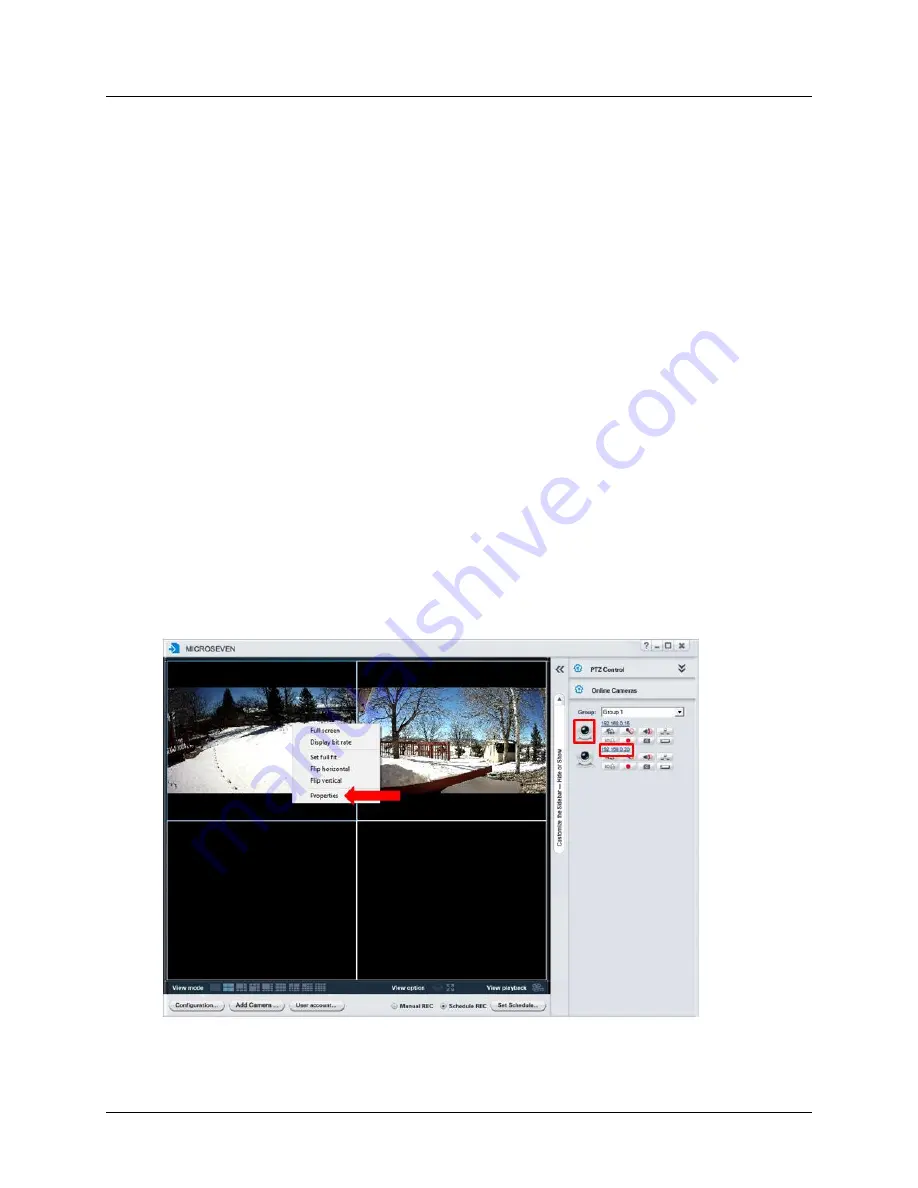
1)
Double-click on a M7CMS video pane to activate it. Right-click on the activated video pane to
bring up a short-cut menu and then select ‘Properties’ from this menu.
--or--
2)
Click on the camera icon in the Online Cameras pane
--or--
3)
Click on the IP address hyperlink in the Online Cameras pane
The Camera Properties window contains two rows of main tabs that, when clicked, present one or more
sub-menus from which numerous camera and network configuration properties can be established.


