background image

M7 Stationary HD Megapixel IP Camera Series 
User Manual 

© 2001 - 2016 Microseven Systems, LLC  

Page | 15 

To remove a camera from a camera group, perform the following 

1.


Follow “Add Camera” steps 1-5. 

2.


Select the camera you wish to remove from the group and click the ‘Delete’ button. This does 
not delete the camera, but simply removes the camera from the group.


3.


Click ‘OK’ to save the changes and close the window. 

3.1.6


User Account 

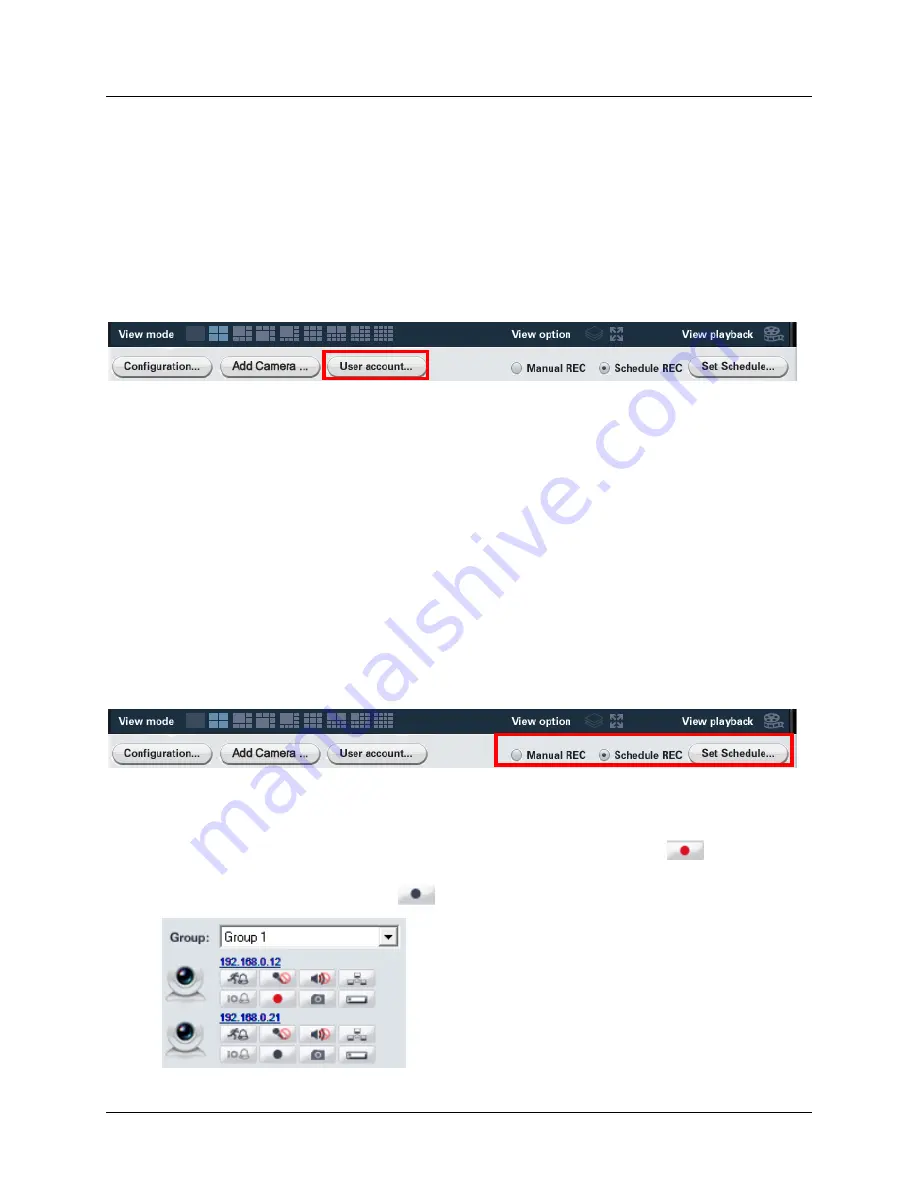
User account credentials can be modified with M7CMS. Click the ‘User account’ button located on the 
bottom of the M7CMS window to access user account controls.   


To modify user ID and password information for M7CMS accounts, perform the following steps: 

1.


Click the ‘User account’ button to launch a ‘User List’ window.


2.


Add a new user by typing a name in the ‘User ID’ field and password in the ‘Password’ field. 


3.


Use the check boxes in the ‘User Privilege’ section to assign camera setup, camera operation, 
record schedule setting, and record playback privileges.


4.


Click ‘Add’.  The name and associated user privileges will be displayed in in the user list.


5.


Click ‘OK’ to save the user and close the window.


3.1.7


Manual and Scheduled Recording of Live Video 

M7CMS provides the optional ability to record live video directly to your PC. Live recordings can be 
initiated manually with the ‘Manual REC’ radio dial button or based on a set schedule using the 
‘Schedule REC’ radio dial and ‘Set Schedule’ buttons.  


3.1.7.1


Manual Recording  

1.


Click the ‘Manual REC’ radio dial button on the M7CMS button bar.  

2.


 Click the ‘record’ button on the Online Cameras pane. A red record button 

 indicates the 

camera is actively recording video. Clicking the ‘record’ button again stops the recording 
(indicated by a grey record button  

 ). 


Summary of Contents for M7B15

Page 1: ...User Guide M7B15 M7D12 M7B37 W M7B57 WPS M7B77 WPS Microseven Systems LLC Walnut California USA Microseven Stationary HD Megapixel IP Camera Series...

Page 2: ...n this manual at any time and without notice This publication could contain technical inaccuracies or typographical errors Changes are made periodically to the information herein these changes will be...

Page 3: ...a Management and Operations 11 3 1 Using the Microseven Camera Management Software M7CMS 11 3 1 1 The M7CMS Interface 11 3 1 2 Monitoring Control 12 3 1 3 View Bar View Mode View Option and View Playb...

Page 4: ...n s download site located at http www microseven com downloads 2 Locate the Software Downloads section 3 Click the Download Now button This will automatically download a file with the exe extension Wi...

Page 5: ...ep involves running a setup file exe or dmg that unpacks a software installation program Setup Wizard onto your local system see Section 1 2 1 for instructions on downloading the setup file onto your...

Page 6: ...n Systems LLC Page 3 4 Accept the default location or choose another location for the storage of record and snapshot files Click Next to continue 5 By default both software components are selected Cli...

Page 7: ...n for the Start Menu folder Click Next 8 Setup installs a Cam Locator icon and M7CMS launch icon on your desktop by default Uncheck any icon you don t want installed on your desktop Click Next to cont...

Page 8: ...ng the provided power supply and connect an Ethernet cable between the camera and your router Wait at least 60 seconds before beginning the set up to allow full enablement of the hardware and network...

Page 9: ...ystems LLC Page 6 5 Click Open to transfer the pkg file name to the Firmware field of the Camera Setup dialog window 6 Click the Upgrade button on the Camera Setup dialog 7 After the firmware is succe...

Page 10: ...r desktop icon to open the Microseven Cam Locator Highlight the desired camera from the list and click the Network Setup button to bring up the Camera Setup window Note If a network camera does not ap...

Page 11: ...nfigured IP address mapped to the camera s MAC address Subnet mask and Gateway parameters 2 Uncheck the Enable Dynamic DNS checkbox and enter the Preferred DNS and Alternate DNS address e g 8 8 8 8 an...

Page 12: ...ottom of the Camera Setup window to bring up a Wireless Settings window Initially the Wireless Settings window displays a single item the Enable wireless checkbox Check the Enable wireless box to disp...

Page 13: ...rypt type fields should now be populated from the router s information Enter your Wi Fi password into the Password field Click Test to test whether a Wi Fi connection was successfully established Clic...

Page 14: ...face is divided into a main viewer section in which live video is displayed and expandable collapsible side panels In the basic viewing mode the Online Cameras side panel is displayed In View Playback...

Page 15: ...he bottom portion of the M7CMS window contains clickable icons with the following viewing functionality View mode Click the icon to choose a display configuration from a single pane up to a maximum of...

Page 16: ...tton located on the bottom of the M7CMS window To add a camera group perform the following steps 1 Click the Add Camera button found on the bottom of the M7CMS window 2 The Microseven Camera popup men...

Page 17: ...group of your choice from the pulldown menu 3 Click OK to close the dialog box and open the Camera List menu 4 If necessary click the Search button to search for cameras A list of results will be dis...

Page 18: ...ping a name in the User ID field and password in the Password field 3 Use the check boxes in the User Privilege section to assign camera setup camera operation record schedule setting and record playb...

Page 19: ...ng Mode 1 Click the Continuous radio button 2 Set the Continuous Recording Schedule by highlighting all DATE TIME cells one cell is equal to one hour Alerts Recording Mode 1 Click the radio button s n...

Page 20: ...d to be emitted upon an alert event select from one of 39 sound variations using the music drop down list A brief audio preview will be played upon its selection 9 Click OK to save the settings 3 1 8...

Page 21: ...n set the time settings to sync with your PC time by clicking the Sync with PC time button located at the bottom of the window c Select and NTP server polling interval between one to 24 hours d Select...

Page 22: ...ameters 2 The DNS type is set to Dynamic DNS by default You can change the DNS type to DNS when using static IP addressing and use primary DNS address of 8 8 8 8 and an alternate DNS address of 8 8 4...

Page 23: ...FTP folder within a defined time interval 1 Enter the FTP server name FTP server port username password and the FTP server path for your FTP account 2 Test the FTP settings by clicking the Test button...

Page 24: ...on or Turn off the current camera s IR lights in night vision For cameras situated behind a glass pane you can eliminate IR glare by turning the IR lights off When the IR light setting is turned off t...

Page 25: ...for auto captured files The Date Time Suffix option creates a filename using the first two digits of the year month day hour minute and second e g P16052721145400 jpg The Overwrite option activates th...

Page 26: ...D card can be downloaded and saved to your PC 3 1 13 1 Record Query From the Record Query tab you can search display playback and download video and snapshots from your camera s onboard MicroSD card Q...

Page 27: ...review and download snapshot files from your camera s onboard MicroSD card Querying and viewing snapshot files 1 Select the date and time range for your query using the From and To dropdown lists 2 Cl...

Page 28: ...the camera to reboot automatically after clicking Apply 3 1 14 User Accounts Tab M7CMS provides three levels of users including 1 Administrator superuser 2 User and 3 Guest The Administrator is the on...

Page 29: ...C 1 Open the M7CMS window 2 Click the View playback icon 3 When in the View playback mode the Select Cameras pane and Set Playback Date and Time pane will be displayed on the right side of the M7CMS w...

Page 30: ...ely you can check the Select all check box to select all displayed files 7 Click the Play button to play the files in the viewer 8 Click the snapshot icon to save a snapshot of the video to the establ...

Reviews: