15
has warmed up properly. Also, your pellet fire will always remember which heat setting was used last and return to
that setting next time the pellet fire is turned on (Power failures will result in this setting being lost). Depending on
conditions you may need to adjust the side damper, generally IN for setting 1 and 2, fully OUT for settings 3, 4 and 5.
“AUGER” Button
Your pellet fire uses an auger system to feed fuel into the burn pot. When the auger system is working, the
“AUGER” light will be on. During normal operation, this light should blink periodically. Holding the “AUGER”
button will run the auger system continuously. This button should only be used to fill the auger with fuel. Using
this button during normal operation will cause too much fuel to fall into the burn pot and may result in damage to
the pellet fire or an unsafe situation.
“FAN” Button
During normal operation of your pellet fire, the circulation fan (blows air into the room) speed can only be changed
by changing the heat setting (see “HEAT SELECT” button) The “FAN” button is used to override the factory fan
setting and run the circulation fan on the highest setting. Pressing the “FAN” button again will return the fan to its
original setting.
“TRIM” Button
Not set for use with the Metro Pellet Fires.
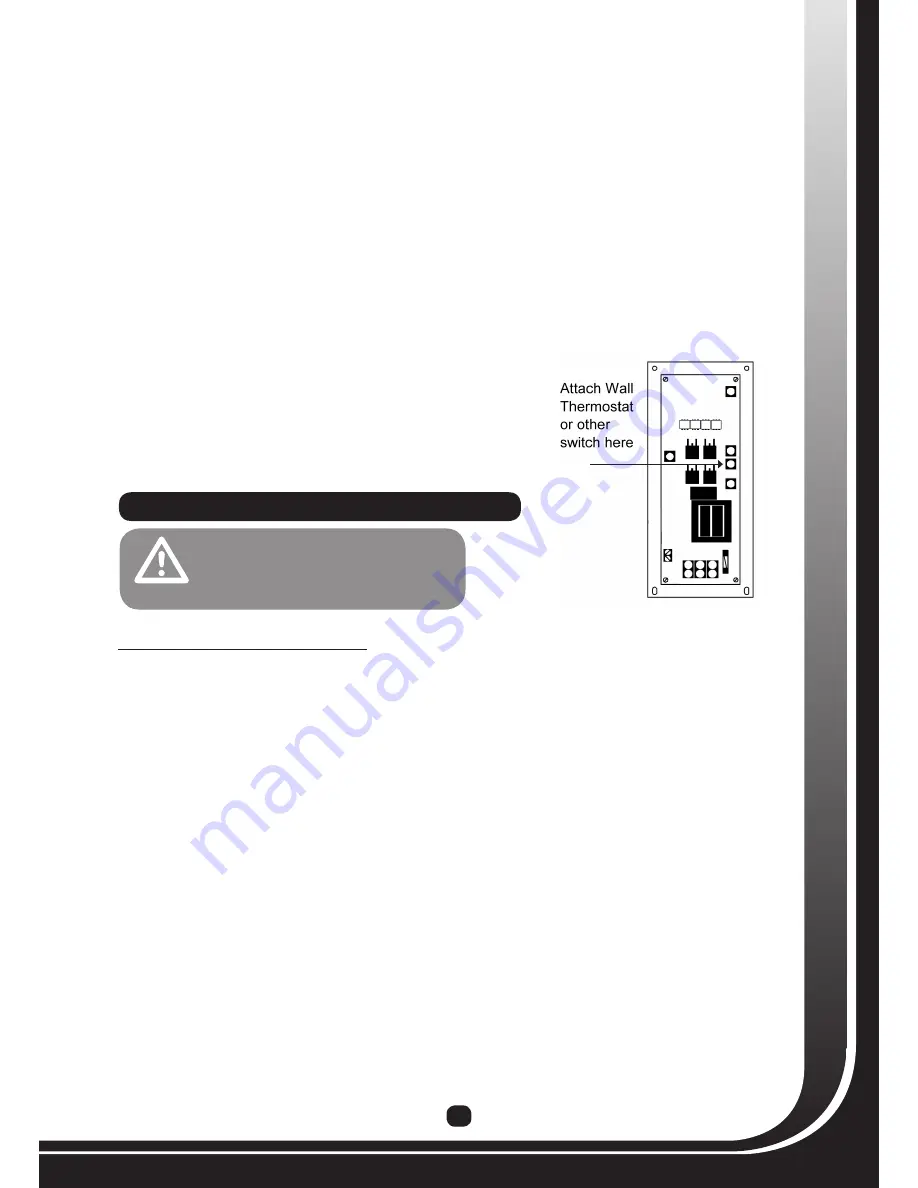
Wall thermostat, wall switch or other switching device.
The MX3™ control is capable of using an external switch (such as a
millivolt programmable or non-programmable wall thermostat) to turn
the pellet fire on and off. The switch/thermostat must be wired to the
blue terminal block as shown in Figure 8.
Please Note: Thermostat option not available in Canterbury
STARTING YOuR PELLET FIRE
This method applies to all modes of operation (“AUTO, HIGH/LOW, “MANUAL”). For “AUTO” mode, use thermostat
or other switching device in lieu of “ON/OFF” button. Once your pellet fire is properly installed, complete the
following steps to start your pellet fire:
1. Ensure that there is adequate fuel in the hopper and that all ash gates and doors are closed.
2. Make sure side damper is fully out
3. Press the “ON/OFF” button. The following should happen
a. The “AUGER” and “ON/OFF” light will blink.
b. The exhaust fan will start.
c. The circulation fan will remain off (will come on after the start up cycle when the pellet fire reaches
operation temperature.
d. Igniter will come on.
4. If the auger tube is full with wood pellets, proceed to step 4. If the auger tube is empty, (i.e if this is the first time
you are starting the pellet fire or it has been run out of wood pellets) proceed with the following instructions:
a. Press and hold the “AUGER” button; the “AUGER” light should stay lit until the button is released.
b. Continue to hold the “AUGER” button until fuel begins to drop into the burn pot. This may take several
minutes.
c. Once the fuel begins to drop into the burn pot, this means that the auger tube is full with wood pellets.
Release the “AUGER” button.
d. If the pellet fire turns off before the fuel begins to drop into the burn pot, press the “ON/OFF” button to
restart the pellet fire. Repeat steps a-c.
5. After the fuel begins to drop into the burn pot it takes about 5-8 minutes for a flame to appear. Allow the
flame to stabalize for 15 minutes
6. Adjust the heat setting as desired (see “MX3™ Control” section).
7. If the pellet fire shuts OFF during the start up cycle and there is still a flame, press the “ON/OFF” button again.
•
TO PREVENT INJURY OR DAMAGE TO
THE PELLET FIRE, ALWAYS UNPLUG
THE PELLET FIRE FROM THE POWER
OUTLET BEFORE SERVICING.
CAuTION
Figure 8: Wall thermostat terminals


