10
CONNECTION (CONTINUED)
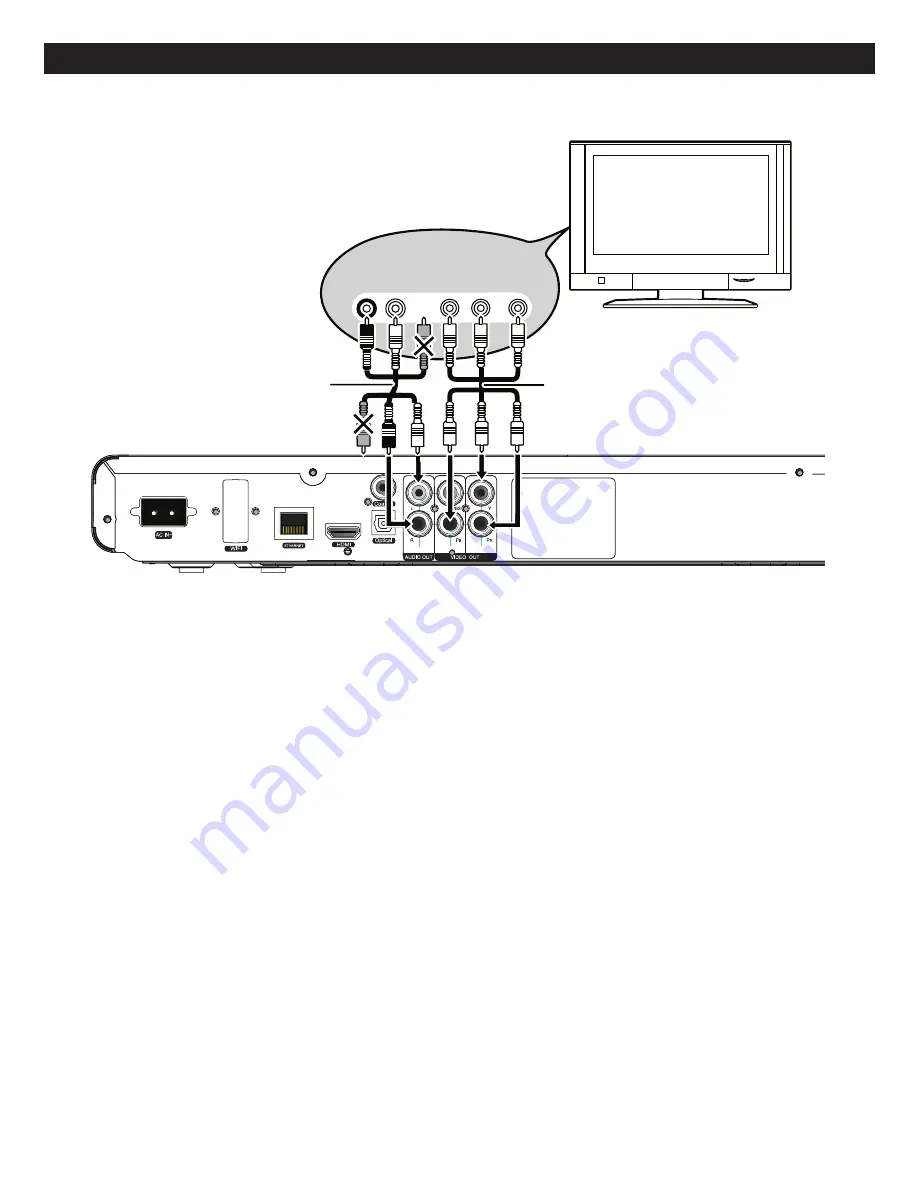
CONNECTING THE PLAYER TO A TV USING THE Y/P
b
/P
r
JACKS
Back of the unit
Television
COMPONENT
VIDEO IN
AUDIO IN
R L
Audio/Video
cable
Component
V
(not included)
ideo cable
Back of the unit
Television
AUDIO IN
VIDEO IN
R L
Audio/Video
+IJTM
NOTES FOR CONNECTING TO A TV:
• If your TV has an HDMI input, connect the player with the HDMI cable for best results, otherwise use the Component or
Video OUT jack on the player.
• The TV must have Y, P
b
and P
r
input jacks.
• Set the TV’s TV/VIDEO button or switch to the VIDEO setting.
• When connecting the Player, refer to the owner’s manual of the TV, as well as this manual.
• When connecting the Player to the TV, make sure the power is off and both units are unplugged before making any
connections.
• Connect the player to your TV directly. If you connect the player through a VCR, the playback picture will be distorted
because video discs are copy protected.
• If using a TV with a blue screen option, turn the option off for best results.
• After connecting to the Component jacks, set the Display Resolutions option as shown on page 32.
PROGRESSIVE (Y, P
b
, P
r
) VIDEO OUTPUT:
Use these jacks to connect to a TV with progressive video input jacks. Progressive scan is a video scanning system that
displays all lines in a frame in one pass, as opposed to the traditional system, interlaced scan. This connection provides
optimum quality. To ensure optimum picture quality, use three video-grade cables for connections. Note that it is essential to
match the color-coded connectors with a compatible TV.


