background image

22 

5.8.  Station search after switching on for the fi rst time

The descriptions in the operating instructions generally refer to operation with the remote 
control. In some exceptional cases, operation using the multifunction button on the de-
vice itself is also described.

You will be guided through the initial installation after you switch on the device for the first time. 
You can call up the initial installation at any time via the 

SETTINGS > INSTALLATION > FIRST TIME IN

STALLATION

 menu and run it again. 

OK

BACK

EXIT

HOME

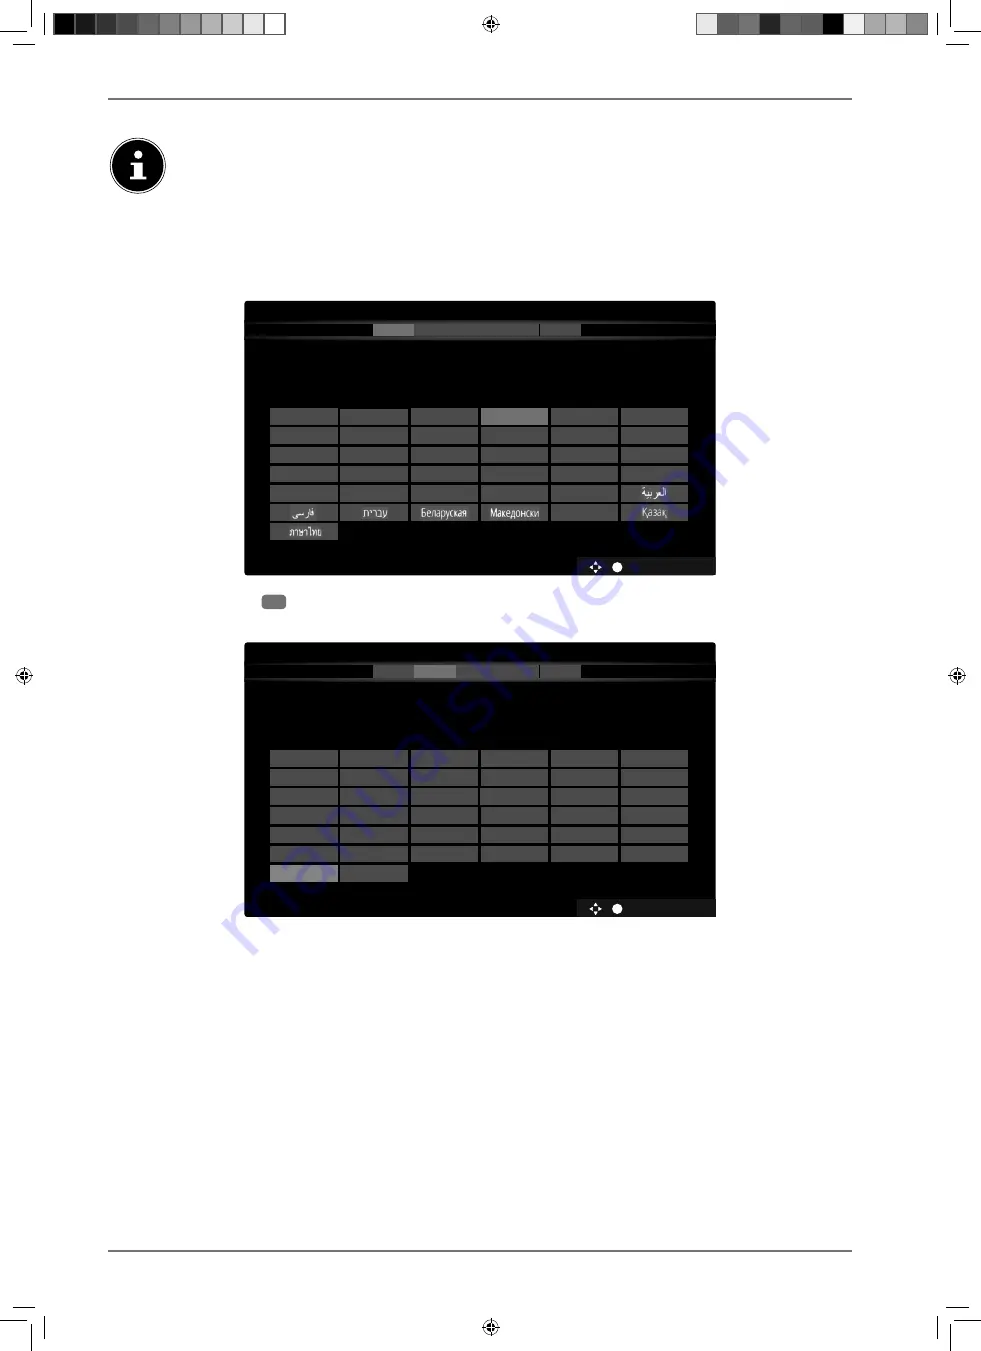
Welcome please select your language! 

Set the language used in menus.

1

2

3

4

5

Dansk

Français

Magyar

Română

Svenska

Deutsch

Gaeilge

Nederlands

Shqiptar

Türkçe

Eesti

Hrvatski

Norsk

Slovenski

Česky

English

Italiano

Polski

Slovenčina

Укрaїнськa

Español

Latviešu

Português

Srpski

Бблгapски

Crnogorski

Eλληυικά

Lietuvių k.

Pyсский

Suomi

Use the 



22

buttons to select the language.

After confirming the selected language with 

O K

 the initial installation will begin.

OK

BACK

EXIT

HOME

Choose your country 

You can configure country settings to activate country specific features.

1

2

3

4

5

Hungary

Israel

Luxembourg

Norway

San Marino

Italy

Macedonia

Iran

Kingdom of Sau...

India

Jordan

Malta

Poland

Serbia

Iraq

Latvia

Montenegro

Portugal

Slovakia

Ireland

Lebanon

Netherlands

Romania

Slovenia

Turkey

Isle of Man

Lithuania

New Zealand

Russia

South Africa

Spain

Sweden

Switzerland

Thailand

Ukraine

UK

Other

Iceland

Select the desired country using 



. The country setting will influence the order in which 

the channels are stored. In addition, there are a number of options preset for the individual 
countries.

Afterwards, press 

O K

 to continue. 

Then you will be prompted to accept the MEDION® Smart TV data protection information. This 
is necessary if you intend to make use of the network/Internet services.  Read the data protec-
tion information carefully. Use 



 to select the individual points and press 

O K

 to confirm, 

where applicable. If you have any queries, complaints or comments regarding the privacy policy 
and its implementation, please contact us by e-mail at 

[email protected]

Finally use 



 to select the 

NEXT

 interface and press 

O K

 to navigate to the next point.

31373 EN Aldi UK Content 30027461 RC.indd   22

31373 EN Aldi UK Content 30027461 RC.indd   22

23.07.2019   14:42:08

23.07.2019   14:42:08

Summary of Contents for LIFE P13901

Page 1: ...N AG AM ZEHNTHOF 77 45307 ESSEN GERMANY MEDION LIFE P13901 MD 31373 User Manual 39 98 cm Smart Full HD TV 31373 EN Aldi UK Cover 30027461 RC indd Alle Seiten 31373 EN Aldi UK Cover 30027461 RC indd Al...

Page 2: ...ing the smart TV on and off 19 5 7 Using the multimedia connections 20 5 8 Station search after switching on for the first time 22 6 Operation 25 6 1 Channel selection 25 6 2 Sound settings 25 6 3 Scr...

Page 3: ...not in use 64 16 Disposal 65 17 Technical specifications 66 17 1 Product data sheet 68 17 2 Trademark information 68 18 Service information 69 19 Privacy statement 69 20 Legal Notice 70 21 Index 71 31...

Page 4: ...ning risk of fatal injury WARNING Warning risk of possible fatal injury and or serious irreversible injuries CAUTION Warning risk of minor and or moderate injuries NOTICE Follow with these instruction...

Page 5: ...ied or approved Comply with all the information in these operating instructions especially the safety information Any other use is considered improper and can cause personal injury or property damage...

Page 6: ...ing may result in damage to the Smart TV and the risk of fire The slots and openings on the TV set are for ventilation purposes Do not cover these openings for example with newspapers table cloths cur...

Page 7: ...r the electrical safety of the device NOTICE Risk of damage Risk of injury due to candles and other open flames Keep candles and other open flames away from this product at all times to pre vent fire...

Page 8: ...ncy or magnetic interference televisions loudspeakers mobile telephones etc to avoid malfunctions Remove the plug from the mains outlet and the antenna cable from the antenna sock et during a thunders...

Page 9: ...ke from the power supply Position the cables so that no one can tread on them or trip over them Do not place any objects on the cables as they may be damaged Never touch the plug with wet hands Always...

Page 10: ...t a doctor immediately Avoid heavy impacts and vibrations Always observe the correct polarity Take care to ensure that the plus and minus poles are correctly inserted to avoid short circuits Do not mi...

Page 11: ...ddress www medion com conformity Due to the 5 GHz frequency range of the integrated wireless LAN solution the device may only be used inside buildings in the EU see table AT BE BG CZ DK EE FR DE IS IE...

Page 12: ...Infrared sensor Reception field for the infrared TV signals Operating light Lights up when the device is in standby mode 31373 EN Aldi UK Content 30027461 RC indd 13 31373 EN Aldi UK Content 30027461...

Page 13: ...ade by moving upwards or downwards Pressing the button briefly switches between functions A long press toggles the device between standby mode and op erating mode 6 HDMI 2 3 HDMI connection for device...

Page 14: ...Remote control MEDION Play 1 21 2 3 4 6 8 9 10 11 12 13 14 15 17 18 20 7 16 5 19 31373 EN Aldi UK Content 30027461 RC indd 15 31373 EN Aldi UK Content 30027461 RC indd 15 23 07 2019 14 42 04 23 07 201...

Page 15: ...t or menus Yellow button For teletext or menus Blue button For teletext or menus 12 Media buttons Fast rewind Fast forward Start recording PVR Stop playback Start playback Pause playback 13 Play Freev...

Page 16: ...towards any monthly broadband data allowance Only selected channels provide 7 day catch up 5 Getting started Before using for the first time ensure you read the Safety instructions section 5 1 Unpack...

Page 17: ...y compartment of the remote control Check the battery polarity see label on the bottom of the battery compartment Close the battery compartment NOTICE Risk of damage The remote control can be damaged...

Page 18: ...ins plug to the mains socket Switch the device to standby mode using the standby on button on the remote control or by pressing and holding MODE on the multifunction switch The device continues to use...

Page 19: ...sed with an HDMI cable 5 7 3 HDMI ARC Audio Return Channel If you want to use a TV set as a signal receiver AND signal source to transmit an audio signal to an audio receiver you must use the HDMI2 po...

Page 20: ...eo transmission of the YPbPr signal Use a suitable YPbPr adapter Connect the VGA port of your TV to the YPbPr cinch connections red blue green of the video device Use the supplied YPbPr adapter option...

Page 21: ...try speci c features 1 2 3 4 5 Hungary Israel Luxembourg Norway San Marino Italy Macedonia Iran KingdomofSau India Jordan Malta Poland Serbia Iraq Latvia Montenegro Portugal Slovakia Ireland Lebanon N...

Page 22: ...the speed of the internet connection ADVANCED SETTING Press the O K button to call up further network configuration options IP CONFIGURATION Select the AUTOMATIC or MANUAL setting here If MANU AL is...

Page 23: ...K to activate Use to select NEXT and press O K to confirm 5 8 3 Cable digital If you have previously activated the D CABLE reception type you can now also make settings for the network channel scan If...

Page 24: ...ats 4 3 or 16 9 As soon as the PICTURE menu is selected using the buttons three direct links appear above it Here you can navigate directly to the aspect ratio settings and adjust the screen format AU...

Page 25: ...ice is in use the list of channels opens Above the list then use the buttons to select EDIT and use the buttons to select a sta tion to be added to the favourites list and press O K A menu then opens...

Page 26: ...function switch MODE on the device For this press the switch briefly several times until you reach the source selection menu Then select the desired source by moving upwards or downwards In addition y...

Page 27: ...e number but tons The selected page number is displayed in the top left corner of the screen The teletext counter searches as long as it takes to find the selected page number 7 1 3 Scrolling through...

Page 28: ...ce other options will appear in the screen settings 9 The menu system in detail 9 1 Home page The home page allows you to compile preferred menu options and applications for quick access To add additi...

Page 29: ...ton on your remote control you are directed straight into the media portal With the M E D I O N button or with the B AC K button you can switch from the currently selected app back to the home page at...

Page 30: ...devices NETFLIX supported devices The NETFLIX service is provided to you by Netflix International B V a limit ed liability company in the Netherlands Press the N E T F L I X button on the remote contr...

Page 31: ...red application in the pre installed app store using the virtual keyboard Then select the required app and press O K to confirm Finally select ADD TO APPS and press OK to confirm The new application i...

Page 32: ...ING you have selected CUSTOM you can set your preferred brightness level for the energy saving mode on a scale of 0 to 100 ADVANCED SETTINGS Dynamic Contrast Noise Reduction ColourTemp White Point Pic...

Page 33: ...anced Settings PC Position Reset Picture 100 50 55 70 100 O Menu option Settings CONTRAST Increase or reduce contrast on a scale of 0 to 100 BRIGHTNESS Increase or reduce brightness on a scale of 0 to...

Page 34: ...SITION AUTOPOSITION If you want to move the image select AUTO POSITION and press O K to move it back to the centre This should be done in the full image mode to ensure the settings match H POSITION He...

Page 35: ...can only be changed if the equaliser mode is set to USER As soon as the SOUND menu is selected using the buttons this menu ap pears above and can be selected directly BALANCE Set the balance between...

Page 36: ...the signal The LINEOUT setting means that the signal has a predefined volume that cannot be changed If this setting is select ed an external amplifier can be connected to the device DYNAMIC BASS Set t...

Page 37: ...ption enables you to quickly establish a WPS connection via a wireless network WLAN Press and hold the WPS button on your router and confirm with the O K button Then the WPS connection is established...

Page 38: ...he connection between the two devices is automatically restored 9 4 5 Installation menu Automatic channel scan Manual channel scan Network channel scan Analogue ne tune Installation Settings Signal In...

Page 39: ...searched MODULATION Set the modulation SYMBOL RATE Set the baud rate NETWORK CHAN NEL SCAN Activate deactivate the network scan NETWORK CHANNEL SCAN Select between digital cable or DVB T station group...

Page 40: ...elates with the initial installation steps that occur after switching on for the first time Carrying out the initial installation again will reset all settings back to the Factory defaults including t...

Page 41: ...th the module Install the CI components on your television in the following way Switch the television off and pull out the mains plug First insert the CI module in the slot on the side of the Smart TV...

Page 42: ...Select your second preferred audio language here PRIMARY SUBTITLE LANGUAGE If the programme includes subtitles for hearing im paired users you can set the preferred language here SECONDARY SUBTITLE L...

Page 43: ...m O O Menu lock O O MENU LOCK The MENU LOCK setting activates or deactivates menu access You can block access to the installa tion menu or disable the entire menu system GUIDANCE If the child lock is...

Page 44: ...OF HEARING If the station broadcasts special audio signals for hear ing impaired users you can change the setting to ON to receive these signals The relevant information must be provided by the respe...

Page 45: ...rocess The search progress is displayed APPLICATION VERSION Version display This item is for information purposes only and cannot be changed AUTO TV OFF You can set the time interval for the auto shut...

Page 46: ...of the device is listed instead HDMI2 The basic functions of the device can then be automatically controlled using the remote control of the Smart TV If the CEC function is activated an HDMI2 has been...

Page 47: ...n You can use the P button or the P button to scroll pages up or down 10 at a time To select channels for editing select a station using the buttons and press O K A menu then opens Here use the button...

Page 48: ...the re quired password factory default 0000 A lock icon ap pears after the channel name Do the same to unlock the channel To lock a channel you must know the password factory default 0000 it can be c...

Page 49: ...dually select each letter of the alpha bet at which point only the channels beginning with the appropriate letter will be displayed in the channel list SORT Select the type of sorting ALPHABETIC or NU...

Page 50: ...T view This shows only the current and the next pro gramme for all channels FILTER enables you to restrict the display according to certain criteria and TIMELINE SCHEDULE takes you back to the origina...

Page 51: ...more informa tion read the section Timer menu 52 I N F O Displays a detailed description of the selected programme if available Press I N F O again to hide the description If the description is longe...

Page 52: ...able although the stick is empty it can also be formatted by the Smart TV under menu option TV RE CORDINGS SETTINGS FORMAT DISK CHANNEL Select the channel RECORD TYPE This is preset and cannot be chan...

Page 53: ...gs according to various crite ria SETTINGS START EARLY This is where you can specify that the recording is to start before the set start time END LATE This is where you can specify that the recording...

Page 54: ...s the button to return to normal playback Timeshift Recording You can start a timeshift recording in TV mode to view the current channel after a delay To do so proceed as follows Press this button dur...

Page 55: ...ser using the E X I T button you can call it up again at any time through the source selection using S O U R C E or in the SOURCES menu The name of the USB storage is now displayed here Select this as...

Page 56: ...further adjustments SUBTITLE AUDIO Activate additional audio voiceover here SUBTITLE TIME CORREC TION Specify a time delay for the subtitle functionality here JUMP TO SECOND Specify a position in the...

Page 57: ...hannel and the programme Observe the messages within the applications 11 MEDION Life Remote app The MEDION Life Remote app is the innovative way to operate your MEDION television from your smartphone...

Page 58: ...TV mode after pressing the red button call up media library Blue button Various functions depending on the menu TV mode after pressing the red button call up Teletext Internet button Number buttons T...

Page 59: ...correctly This data is required to make use of the software update service Access to applications in the portal or via HbbTV may depending on the provider require a registration setting up a user acco...

Page 60: ...and no sound I can hear noise though The reception might be poor Check if the antenna is connected properly The picture is not clear The reception might be poor Check if the antenna is connected prope...

Page 61: ...his is not a defect In some cases the menu of the device connected via HDMI2 opens This is dependent on the playback device and must be supported accordingly Further information is available on page 4...

Page 62: ...class Defect type 1 Continuously lit pixel Defect type 2 Continuously black pixel Defect type 3 Defective sub pixel lit black 0 0 0 0 0 I 1 1 2 1 0 1 3 5 II 2 2 5 5 n 0 0 2xn 10 III 5 15 50 50 n 0 0...

Page 63: ...u could scratch the high gloss finish Do not use solvents corrosive or gaseous cleaning agents Clean the screen with a soft lint free cloth Take care to ensure that no water droplets remain on the Sma...

Page 64: ...act your local waste disposal company or your local authority for more information on this subject Batteries Proper disposal of used batteries protects the environment and your personal health Do not...

Page 65: ...ons Antenna connection analogue TV DVB T DVB T2 or DVB C 1 x USB connection 1 x LAN RJ 45 Video 3 x HDMI 2 0 with HDCP 2 2 decoding 1 x VGA 15 pin D Sub YUV YPbPr AV In cinch Audio Stereo audio in for...

Page 66: ...ox 7 2 kg Mounting on the wall Vesa standard hole spacing 200 x 200 mm3 WLAN Frequency range 2 4 GHz 5 GHz WLAN standard 802 11 a b g n Encryption WEP WPA WPA2 Frequency range MHz Channel Transmitting...

Page 67: ...ion DTS the symbol and DTS together with the symbol are registered trademarks of DTS Inc Further information regarding the DTS patents is available at http patents dts com The HDMI logo and High Defin...

Page 68: ...by our company data protection of ficer who can be contacted at MEDION AG Datenschutz Am Zehnthof 77 D 45307 Essen daten schutz medion com We process your data for the purpose of warranty processing...

Page 69: ...ited without the written per mission of the manufacturer Copyright is owned by the distributing company MEDION AG Am Zehnthof 77 45307 Essen Germany Please note that you cannot use the address above f...

Page 70: ...GA YPbPr 21 Music 36 66 N Network search 40 O Operating safety 7 Operation 25 OSD menu 29 Applications 32 Channels 48 Home page 29 Installation 39 Media browser 56 Media portal 30 Network 38 Picture 3...

Page 71: ...72 31373 EN Aldi UK Content 30027461 RC indd 72 31373 EN Aldi UK Content 30027461 RC indd 72 23 07 2019 14 42 18 23 07 2019 14 42 18...

Page 72: ...N AG AM ZEHNTHOF 77 45307 ESSEN GERMANY MEDION LIFE P13901 MD 31373 User Manual 39 98 cm Smart Full HD TV 31373 EN Aldi UK Cover 30027461 RC indd Alle Seiten 31373 EN Aldi UK Cover 30027461 RC indd Al...

Reviews: