DMR200
User’s Guide
V1.1
18
Connecting the DMR300
Use this procedure when you first purchase the
DMR300
and when you are ready to
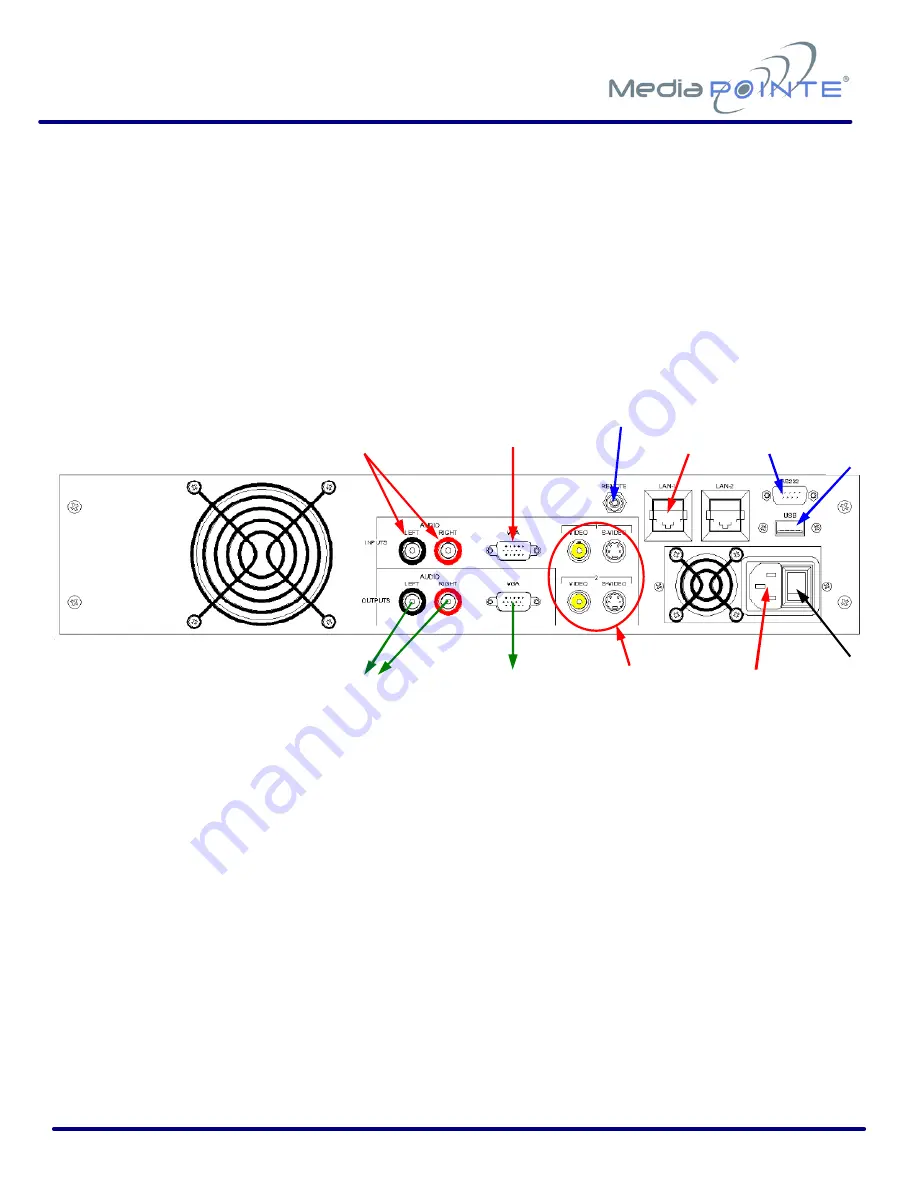
install the hardware at your site. This section shows the back panel and explains how to
connect the separate input connections to the unit. For clarity purposes,
INPUTS
are
shown in RED
,
OUTPUTS
are shown in GREEN
and
CONTROL
ports are shown in
BLUE
.
The Rear Panel
To connect to the
DMR300
, insert the following cables to the unit:
AC Power Cable
– insert the IEC cable to the AC power input plug. Make sure the
on/off switch is in the off position before plugging in the power cable.
Video Inputs
– insert the two video inputs from the videoconferencing system. These
connections can be either standard video via composite connectors or S-Video cables.
The video inputs on the
DMR300
have both composite and S-Video connections.
High-resolution Input
- Insert the VGA DB15 connector on the high-resolution input
connection on the
DMR300
.
Video
OUTPUT
High
Resolution
INPUT
Video
INPUTS
Stereo Audio
OUTPUTS
Stereo Audio
INPUTS
Remote
Contact
Closure
AC
Power
INPUT
Power
ON/OFF
LAN
INPUT
RS-232
USB
(FUTURE)
Summary of Contents for DMR300
Page 2: ...DMR200 User s Guide V1 1 2 ...
Page 10: ...DMR200 User s Guide V1 1 10 ...
Page 32: ...DMR200 User s Guide V1 1 32 ...


