background image

Vocies and Effects

12

Voice Selecting

1

2

Voice numeber

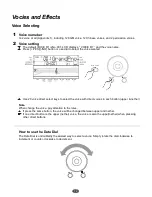
142 voice at all (Appendix 1), including 128 GM voice, 12 Chinese voices, and 2 percussion voices.

Voice setting

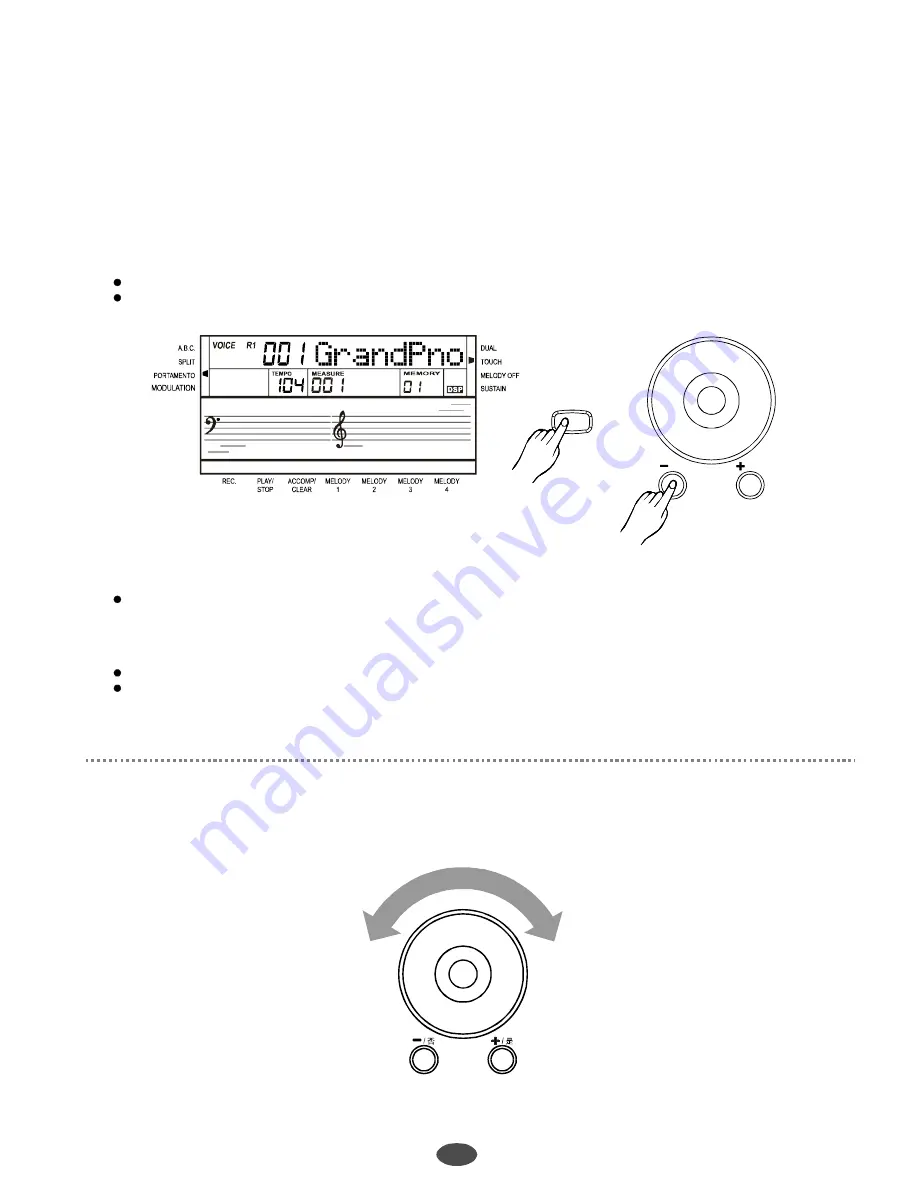
The default VOICE R1 is No.001; LCD displays

VOICE R1

and the voice name.

Press [+/YES]/[-/NO] button or use dial to select the voice wanted.

Use 20 voice direct select keys to select the voice with direct voices in each botton (upper & nether)

Note

When change the voice, pay attention to the rules:

If press the same button, the voice will be changed between upper and nether.
If one direct button is the upper (nether) voice, the voice is also the upper(nether) when pressing
other direct bottons.

How to use the Data Dial

The Data Dial is undoubtedly the easiest way to select a voice. Simply rotate the dial clockwise to
increment or counter-clockwise to decrement.

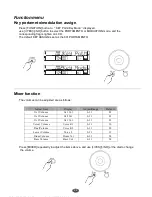
/ NO

/ YES

STYLE / VOICE

SONG

PDF 

文件使用

 "pdfFactory Pro" 

试用版本创建


ÿ


www.fineprint.com.cn

Summary of Contents for DP-600

Page 1: ......

Page 2: ...the switches and buttons When the piano is not in use or in the time of thunderstorm please remeber disconnect the power supply Avoid adjusting the volume level to the maximum or to the levels that y...

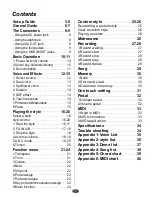
Page 3: ...type 8 Key portamnto modulation assign 9 Mixer function 3 5 6 7 8 9 10 11 12 15 16 20 21 24 8 8 8 9 9 10 10 11 12 13 13 14 14 14 15 15 16 16 20 16 17 17 18 18 18 19 19 20 20 21 21 22 22 22 23 23 24 24...

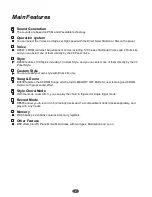
Page 4: ...you can select one of them directly by the 30 Panel Style Custom Style You can create your own style with Drum kits only Song Demo DP600 features the 60 ROM Songs which provide MELODY OFF Mode for us...

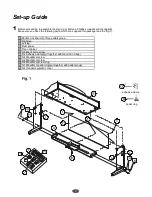
Page 5: ...ed into package see the Fig 1 adhesive clamp pedal clog 1 N N Bottom crossbar with three pedals group Right leg Left leg Rear panel Piano cabinet N 5 M4X15mm screw N 2 Adhesive clamp put together with...

Page 6: ...as shown in Fig 1 Fix and well tighten the left leg C and Right leg B to crossbar A with screws H Insert the 4hand screw plastic cover N into the legs holes 2 a b c Fix the rear panel D to the crossba...

Page 7: ...ach 2 adhesive clamps G on stand and cabinet Insert the DIN plug of pedals cable into the proper socket of cabinet Fix the cable into adhesive clamp G Place the piano in its final location and adjust...

Page 8: ...uide Top View Rear View Front View Control Panel Pedal Jack MIDI IN OUT Jack AUX OUT Jack AC Power Jack Headphones Jack Soft Pedal Sustenoto Pedal Sustain Pedal Music Stand Piano Keyboard 1 2 3 4 5 6...

Page 9: ...heng 136 Hi Suona 139 Bangdi 76 PanFlute 142 Percus 07 Harpsi 13 Marimba 23 Harmonica 27 Jazz Gtr 41 Violin 04 Honky Tonk 20 Ch Organ 57 Trumpet 62 BrassSect 67 TenorSax 47 Harp 53 ChoirAah 50 StringE...

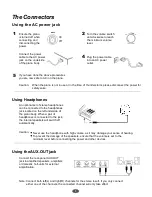
Page 10: ...ones is connected to the jack the internal speakers will switch off automatically Caution Never use the headphone with high volume as it may damage your sense of hearing To prevent the damage of the s...

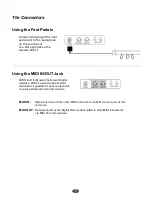
Page 11: ...instruments and other devices Data transmitted from other MIDI instrument via MIDI is received at this terminal Data produced by the Digital Piano is transmitted to other MIDI instruments via MIDI fro...

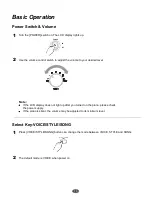
Page 12: ...to adjust the volume to your desired level Note If the LCD display does not light up after you turned on the piano please check the power supply If the piano is silent the volume may be adjusted to i...

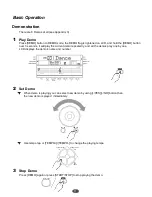
Page 13: ...t demo repeatedly and all the demos play one by one LCD displays the demo s name and number Set Demo Stop Demo When demo is playing you can select new demo by using YES NO botton then the new demo is...

Page 14: ...lect keys to select the voice with direct voices in each botton upper nether Note When change the voice pay attention to the rules If press the same button the voice will be changed between upper and...

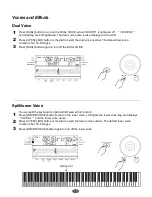
Page 15: ...ice number is No 50 Strings2 Press DUAL button again to turn off the DUAL VOICE DUAL NO YES NO YES You can split the keyboard to right and left area in this function Press LOWER VOICE button to turn o...

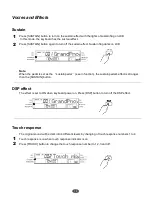
Page 16: ...Note When the pedal is set as the sustain pedal see in function the sustain pedal s effect is stronger than the SUSTAIN button 1 1 2 2 SUSTAIN The effect is set to ON when keyboard power on Press DSP...

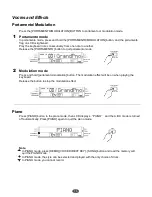
Page 17: ...cannot record PIANO Portamento Modulation 1 2 PORTAMENTO PORTAMENTO MODULATION MODULATION 15 Press the PORTAMENTO MODULATION BUTTON to portamento or modulation mode Portamento mode In portamento mode...

Page 18: ...er and nether If one direct button is the upper nether style the style is the same when pressing other direct bottons 1 1 2 NO YES STYLE VOICE SONG STYLES 01 8 Beat 1 07 16 Beat 1 15 Ballad 1 34 BigBa...

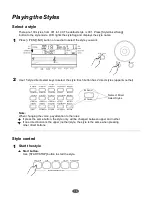
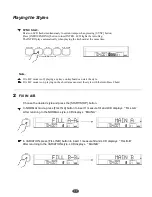
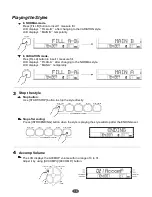
Page 19: ...ING Fill IN A B Choose the desired style and press the START STOP button In NORMAL mode press FILL IN A button to insert 1 measure fill and LCD displays FILL A A After returning to the NORMAL style LC...

Page 20: ...CCOMP button ACCOMPANIMENT CONTROL ACCOMPANIMENT CONTROL START STOP START STOP SYNC SYNC FILL IN A FILL IN B FILL IN A FILL IN A FILL IN B FILL IN B INTRO ENDING INTRO ENDING ACCOMP VOLUME ACCOMP VOLU...

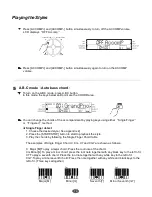
Page 21: ...ain to turn on the ACCOMP volume ACCOMP VOLUME ACCOMP VOLUME TEMPO TEMPO 1 Choose the desired style See appendix 2 2 Press the START STOP button to start to playback the style 3 Play the chords by fol...

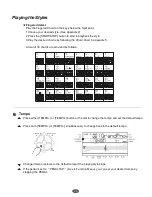
Page 22: ...tops If the pedal is set to PEDAL TAP See in Function Menu you can set your desired tempo by stepping the PEDAL Tempo ACCOMP VOLUME ACCOMP VOLUME TEMPO TEMPO Playing the Styles 20 Play the Fingered Ch...

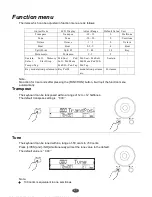
Page 23: ...Ped Tap Ped Sust Ped Soft Ped Mem PedSt S Ped Tap Sustain Key modulation portamento Key PotM modulation portame nto Portamen Note No action for 3 seconds after pressing the FUNCTION button it will qui...

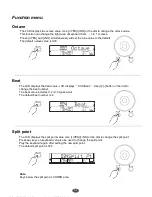
Page 24: ...the beat value LCD displays XXX Beat Use button or the dial to change the beat number The beat value includes 0 2 9 9 types at all The default beat number is 4 The LCD displays the split point value U...

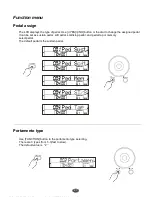
Page 25: ...The default value is 2 The LCD displays the type of pedal Use YES NO button or the dial to change the assigned pedal It can be set as sustain pedal soft pedal start stop pedal and pedal tap or memory...

Page 26: ...ortamnto modulation assign Mixer function The volumes can be adjusted are as follows Adjust Item Display Adjust Range Default Oc1 Volume Oc1 Vol 0 31 28 Oc2 Volume Oc2 V ol 0 31 28 Oc3 Volume Oc3 Vol...

Page 27: ...LE button The LCD displays the CUSTOM and 000 with four beats flashing simultaneously To start recording press the START STOP button or hit the key corresponding to the drum set sound Play the percuss...

Page 28: ...owing method While the ACCOMP CLEAN button is being held CLEAR shown on the display press the key corresponding to the instrument you want to clear ACCOMP CLEAR Note When playing the Custom Style the...

Page 29: ...rting recording the original data in the track will be overwritten If there has data in the ACCOMP track the tempo is played as the ACCOMP track tempo If there has no data in the ACCOMP track then the...

Page 30: ...D appears it indicates that this track has record data and is ready to play Press the melody track button When the recorded melody track lights on the LCD it indicates that the track is ready to play...

Page 31: ...on LCD and will be stopped at the abbreviated name In song mode press MELODY OFF button can mute the melody track The melody off flag lights on LCD When the keyboard voice is automatically changed to...

Page 32: ...ers on the memory data will set as the default value And it will clear the record data Note If current data is not the same as the current memory data the corresponding memory flag on LCD will flash S...

Page 33: ...T S ONE TOUCH SETTING M 1 M 2 M 3 M 4 M 5 M 6 ONE TOUCH SETTING M 1 M 2 M 3 M 4 M 5 M 6 ONE TOUCH SETTING M 1 M 2 M 3 M 4 M 5 M 6 When O T S M1 or M2 loads it will inset FILL in A LCD displays FILL A...

Page 34: ...set as pedal soft it has the soft effect when stepping the pedal If pedal assign is set as pedal mem it will load the memory circularly when pressing the pedal each time If pedal assign is set as ped...

Page 35: ...on the equipment which control another equipment is called Host equipment while another is called affiliated equipment The host equipment s MIDI OUT connect with affiliated equipment s MIDI IN Donot c...

Page 36: ...UTION No keyboard sound and LCD display has not lightened up No keyboard sound when LCD display is lightened up No rhythm sound when the beat indicators appeared on the display in style mode There is...

Page 37: ...Appendix 1 Voice List 35...

Page 38: ...Appendix 2 Style List 36...

Page 39: ...Appendix 3 Demo List Appendix 4 Song List 37...

Page 40: ...teen 7b13 Seventh sharp ninth 7 9 Major Seventh augmented M7aug Seventh augmented 7 aug Suspended Fourth sus4 One plus two plus five 1 2 5 1 3 5 1 3 5 6 1 3 5 7 1 2 3 4 5 7 1 2 3 5 1 2 3 5 7 1 2 3 5 6...

Page 41: ...5 66 67 80 81 91 93 120 121 123 Bank select Modulation Portamento time Volume Pan Expression Sustain Pedal Portamento on off Sostenuto Pedal Soft Pedal Reverb Program Chorus Program Reverb Level Choru...

Reviews: