27
2.
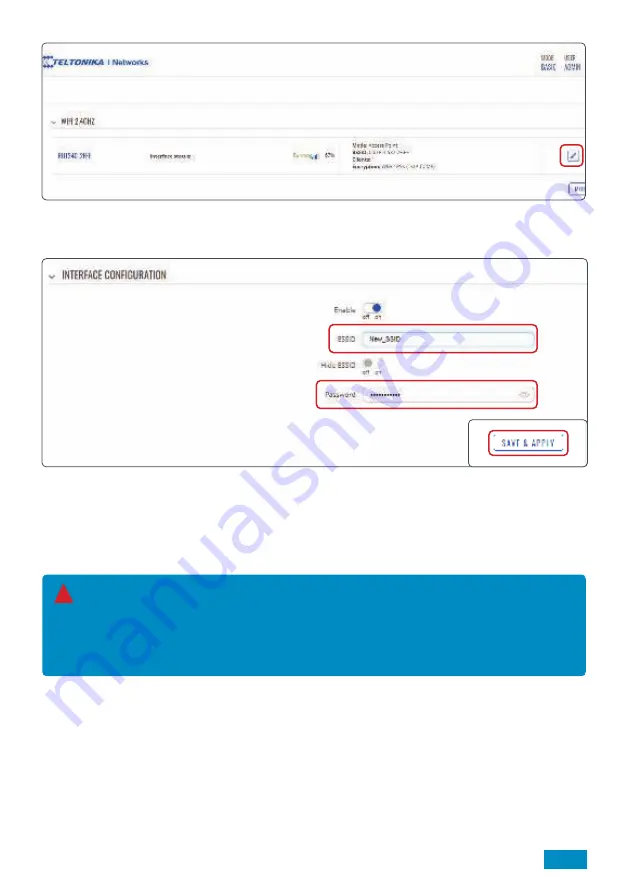
You will then see a list of the Wireless Access Points (hotspots) the router is creating. As standard, this will
be for 2.4GHz and one for 5GHz. Select ‘
pencil icon
’ on the RUT240_XXXX access point.
3.
You will now be transferred to the ‘
Interface Configuration
’ tab under the ‘
General Set Up
’ tab. In the
ESSID box, input a new name (ESSID) for your router.
4.
Click ‘
WIRELESS SECURITY
’ and input new password in the ‘
Password
’ box.
5.
Once completed, select ‘
SAVE & APPLY
’.
It is important this is a strong password to ensure your hotspot remains secure.
We recommend using a combination of
uppercase characters, lowercase characters, numbers and symbols. You should also avoid common
phrases such as ‘password’ and ‘12345’.
Keep your password safe as it will be required to connect devices to the new Wi-Fi network.
!


