


12
12
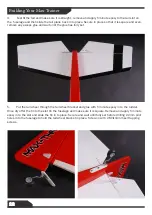
Building Your Max-Trainer
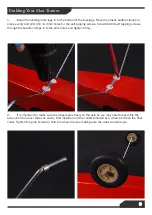
5.
Put the tail wheel through the tail wheel bracket and glue with 5 minute epoxy in to the rudder.
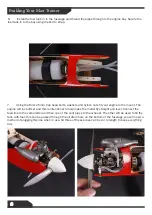
Once dry offer the fin to the slot tin the fuselage and make sure it is square. Remove and apply 5 minute
epoxy in to the slot and slide the fin in to place. Secure and wait until fully set before drilling 2 2mm pilot
holes in to the fuselage to hold the tail wheel bracket in place. Screw on with 2 M3x10mm self tapping
screws.
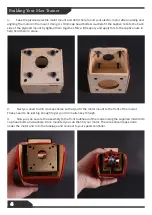
4.
Test fit the tail and make sure it is straight, remove and apply 5 minute epoxy to the tail slot on
the fuselage and then slide the tail plane back in to place. Secure in place so that it is square and even,
remove any excess glue and wait until the glue has fully set.
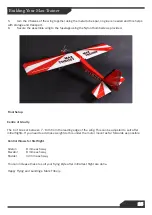
Summary of Contents for MAX TRAINER Balsa Pro-Built Series
Page 1: ...Instruction Manual...


