12
Power and data connection
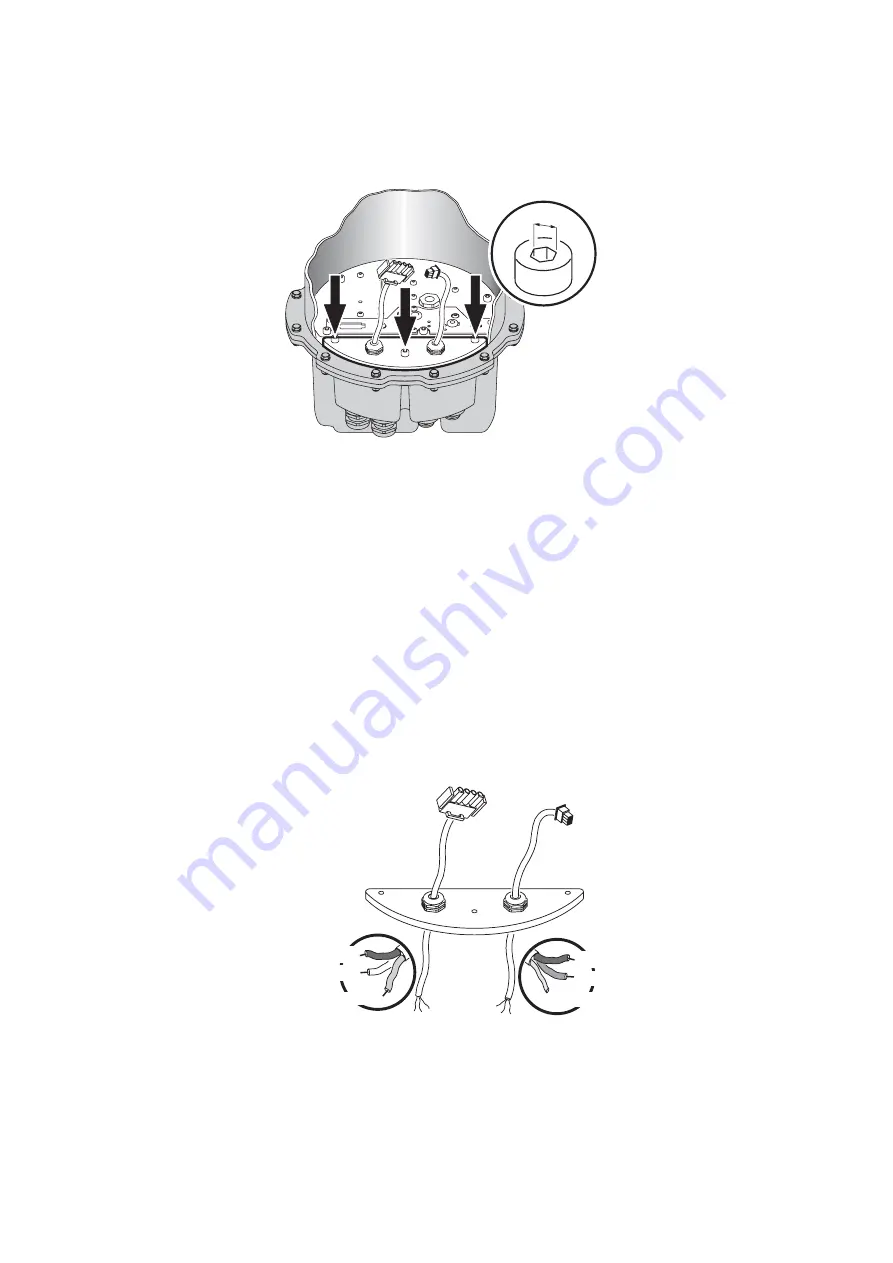
To connect the AC power cables:
1. If the internal components are not already removed to give access to the cable connection
compartment, remove them (see
“Component removal & reinstallation”
2. Remove the three 5mm Allen screws from the cable compartment cover and carefully lift the
cover off, being careful not to damage the seal:
3. Working from outside the fixture, unscrew one of the two larger blanking plugs on the bottom of
the cable compartment. Dismantle a power cable gland and screw the cable entry into the hole
with its rubber O-ring facing inwards, so that the O-ring makes a seal against the housing.
Tighten sufficiently to make a water-resistant seal. Do not over-tighten, as this may damage the
seal.
4. Thread the power arrival cable through the compression nut, washer, rubber gland and cable
entry into the fixture. Remember to allow at least 80cm (2ft 8in) of cable slack in the installation
well or sleeve, so that the Inground 200 can be lifted clear for cable disconnection or service.
5. Prevent the cable entry from turning by holding it with a wrench. Tighten the compression nut
sufficiently to make a water-resistant seal. Do not over-tighten, as this may damage the seal.
6. If power cable is to continue to another fixture, repeat steps 3 to 5 for the power exit cable.
7. Working inside the fixture, connect the Inground 200’s green wire to ground (earth), its black wire
to live, and its white wire to neutral. If power cable is to continue to another fixture, connect power
in and power out cables to the same terminals on the fixture, so that the Inground 200 is
connected to AC power in parallel. Table 2 on page 13 shows some wire identification schemes;
consult an electrician if you have any doubts about proper installation.
8. If data cable also needs to be connected, move on to the next section in this guide. If data cable
does not need to be connected, examine the seal. If it shows any signs of damage or
deterioration, the PCB/power compartment cover must also be removed and the seal must be
replaced with a new one (available from Martin Architectural dealers: p/n 20600450).
5mm
Black: to DMX -
Brown: to DMX +
Shield: to DMX shield
Black: to AC live
White: to AC neutral
Green: to AC ground (earth)
AC power
DMX control data
Summary of Contents for Inground 200
Page 1: ...mar tinar chi te ctural Installation Guide Inground 200...
Page 4: ......


