background image

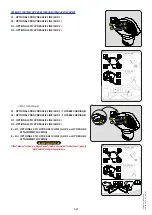
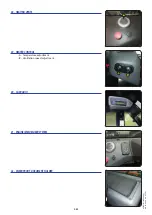
43 - REVERSING BUZZER ALARM

44 - ROOF SUNSHADE

45 - LOCKABLE CAP

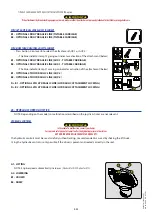
46 - ENGINE BLOCK HEATER

Enables the engine block to be kept warm during prolonged periods of stoppage and 
thus improves engine starting.

SUPPLY CHARACTERISTICS OF PREHEATING SYSTEM:

• Rated power supply voltage range: 220-240 V; 50-60 Hz.
• Current consumed: 4.5 A.
• Class 1 equipment.
• Equipment can only be connected to TT or TN supply diagrams.
• Installation category 2.

ENVIRONMENTAL CONDITIONS FOR USE:

• Maximum ambient temperature for using preheat: +25°C.
• Pollution level 2.

CONDITIONS FOR CONNECTION AND USE OF PREHEATING:


- The preheat system should not be used for an external ambient temperature higher than + 25°C.


- It is essential that the power supply to the preheating system:

• Is effected with a cable that conforms to the installation standards in force and contains a protective earth conductor.
• Contains an appropriate sectioning system.
• Incorporates an appropriate safety system against short circuits (fuses or circuit breaker) and a differential circuit 

breaker with 30 mA sensitivity.


- Only connect to and disconnect from the power supply while the unit is switched off and the engine is stopped.

2-46

647837 M1 (A052020) 

MC 18-2/18-4 D K ST5 S1

Summary of Contents for MC 18-2 D K ST5 S1

Page 1: ...OPERATOR S MANUAL ORIGINAL INSTRUCTIONS EN USM1 A052020 647837 MC 18 2 D K ST5 S1 MC 18 4 D K ST5 S1...

Page 2: ...cs given at the time of its design The level of equipment of the lift truck depends on the options chosen and the country of sale According to the lift truck options and the date of sale certain items...

Page 3: ...other in part or in whole in any format is prohibited The plans designs views commentaries and instructions even the document organization that are found in this document are the intellectual property...

Page 4: ...1 OPERATING AND SAFETY INSTRUCTIONS 2 DESCRIPTION 3 MAINTENANCE 4 OPTIONAL ATTACHMENTS FOR USE WITH THE RANGE 647837 M1 A052020 MC 18 2 18 4 D K ST5 S1...

Page 5: ...1 OPERATING AND SAFETY INSTRUCTIONS 1 1 647837 M1 A052020 MC 18 2 18 4 D K ST5 S1...

Page 6: ...1 2 647837 M1 A052020 MC 18 2 18 4 D K ST5 S1...

Page 7: ...1 3 647837 M1 A052020 MC 18 2 18 4 D K ST5 S1...

Page 8: ...ND LADEN 1 9 A BEFORE STARTINGTHE LIFTTRUCK 1 9 B DRIVER S OPERATING INSTRUCTIONS 1 9 C ENVIRONMENT 1 9 D VISIBILITY 1 10 E STARTINGTHE LIFTTRUCK 1 10 F DRIVINGTHE LIFTTRUCK 1 11 G STOPPINGTHE LIFTTRU...

Page 9: ...CTINGTHE ENGINE 1 18 PROTECTINGTHE LIFTTRUCK 1 18 BRINGINGTHE LIFTTRUCK BACK INTO SERVICE 1 19 LIFTTRUCKDISPOSAL 1 20 RECYCLING OF MATERIALS 1 20 METALS 1 20 PLASTICS 1 20 RUBBER 1 20 GLASS 1 20 ENVIR...

Page 10: ...ioning the company manager must make sure that the lift truck is appropriate for the work to be done and perform certain tests in accordance with current legislation B ADAPTATION OF THE LIFT TRUCK TO...

Page 11: ...engine speed addition of extra equipment addition of counterweights unapproved attachments alarm systems etc In this event the manufacturer cannot be held liable D FRENCH ROAD TRAFFIC RULES Only one c...

Page 12: ...operator must immediately advise his superior if his lift truck is not in good working order or does not comply with the safety notice The operator is prohibited from carrying out any repairs or adjus...

Page 13: ...ny event be used for any other than their intended purposes e g climbing onto or down from the lift truck portmanteau etc If the control components are fitted with a forced operation lever lock device...

Page 14: ...erson clearly in view at all times Keep all components affecting visibility in a clean properly adjusted state and in good working order e g windscreens windows windscreen wipers windscreen washers dr...

Page 15: ...ng gentle braking Ensure that visibility is adequate Take bends slowly In all circumstances make sure you are in control of your speed On damp slippery or uneven terrain drive slowly Brake gently neve...

Page 16: ...the ignition so as to eliminate all the fuel in the feed tube H DRIVING THE LIFT TRUCK ON THE PUBLIC HIGHWAY FRENCHROADTRAFFICRULES The driving of non approved lift trucks on the public highway is su...

Page 17: ...d chart limits for the lift truck for the attachment used Do not exceed the rated capacity of the attachment Never lift a load in a sling without the attachment provided for the purpose There are opti...

Page 18: ...er the load fig D4 block the load if necessary Continue to move the lift truck forwards 2 tilting the carriage 3 fig D4 backwards to position the load on the forks and check the load s longitudinal an...

Page 19: ...Raise the mast 1 until the load is higher than the pile and move the lift truck forward 2 fig E6 very carefully and gently until the load is over the pile Put the handbrake on and set the forward rev...

Page 20: ...ate of the work the names of the individuals or companies having performed them the type of operation and its frequency if applicable The part numbers of any lift truck components that are replaced ar...

Page 21: ...ing irreparable damage to electronic components WASHINGTHELIFTTRUCK Clean the lift truck or at least the area concerned before any intervention Remember to close and lock all accesses to the lift truc...

Page 22: ...DESCRIPTION Start up the lift truck to pressurise the circuit and bring it up to working temperature Switch off the engine Check the DEF level and top up if required PROTECTINGTHEENGINE Contact your...

Page 23: ...DEF tank dependingonthemodeloflifttruck Top up slowly fill the tank with new DEF Diesel Exhaust Fluid up to the bottom of the filler neck dependingonthemodel oflifttruck Refit the drive belts and adju...

Page 24: ...TALPROTECTION By entrusting the maintenance of your lift truck to the MANITOU network the risk of pollution is limited and the contribution to environmental protection contribution is made WORN OR DAM...

Page 25: ...2 DESCRIPTION 2 1 647837 M1 A052020 MC 18 2 18 4 D K ST5 S1...

Page 26: ...2 2 647837 M1 A052020 MC 18 2 18 4 D K ST5 S1...

Page 27: ...TYPLATESANDSTICKERS 6 IDENTIFICATIONOFTHELIFTTRUCK 8 SPECIFICATIONS MC18 2 10 SPECIFICATIONS MC18 4 12 MASTCHARACTERISTICSANDLOADCHARTS 14 TYRES 16 INSTRUMENTSANDCONTROLS 18 SLINGINGANDSECURINGPIN 48...

Page 28: ...ctives and their transpositions into national law 2006 42 CE 8 Pour les machines annexe IV For annex IV machines 9 Num ro d attestation Certificate number 10 Organisme notifi Notified body 15 Normes h...

Page 29: ...6 Tiddikjara li din il magna 7 Hija konformi hija konformi mad Direttivi segwenti u l li ijiet li jimplimentawhom fil li i nazzjonali 8 G all magni fl Anness IV 9 Numru ta ertifikat 10 Entit nnotifika...

Page 30: ...nsultyourdealer Loadcharts accordingtomodel 11 239594 Soundpower104dB 12 Consultyourdealer Manufacturer splate 13 300681 Safetyinstruction 14 52549319 DPFsafetyinstruction 15 52681322 DPFinstruction 1...

Page 31: ...KTIVE KAPAZIT T CAPACIDAD EFECTIVA CAPACIT EFFETTIVA CAPACITES EFFECTIVES ACTUAL CAPACITIES EFFEKTIVE KAPAZIT T CAPACIDAD EFECTIVA CAPACIT EFFETTIVA n 1 Jusqu hauteur de lev e Up to height of Bis zur...

Page 32: ...t truck is listed in the chapter CHARACTERISTICS LIFTTRUCKMANUFACTURER SPLATE Designation Designation Series Series Yearofmanufacture Yearofmanufacture Modelyear Modelyear SerialNumber ProductIdentifi...

Page 33: ...ATICMOTORS OnlyforMC 4D Typedecodification Typeofcodification N demoteur Enginenumber N defabrication Manufacturingnumber Ann edefabrication Yearofmanufacture OVERHEADGUARD CAB Constructeur Manufactur...

Page 34: ...1 Number of rear wheels x drivewheel 2 3 6 Front track middleofwheels b10 mm 1159 3 7 Rear track middleofwheels b11 mm 1112 DIMENSIONS 4 1 Tilt of mast forward 12 4 1 1 Tilt of mast backward 10 4 2 H...

Page 35: ...Type KUBOTA D1803CRE5B 7 2 Engine power inaccordancewithISO1585 kW 27 7 3 Rated speed rpm 2700 7 4 Number of pistons Capacity cm 3 1826 7 5 Fuel consumption accordingtoVDIcycle h MISCELLANEOUS 8 1 Sp...

Page 36: ...1 Number of rear wheels x drivewheel 2x 3 6 Front track middleofwheels b10 mm 1159 3 7 Rear track middleofwheels b11 mm 1176 DIMENSIONS 4 1 Tilt of mast forward 12 4 1 1 Tilt of mast backward 10 4 2 H...

Page 37: ...urer Type KUBOTA D1803CRE5B 7 2 Engine power inaccordancewithISO1585 kW 27 7 3 Rated speed rpm 2700 7 4 Number of pistons Capacity cm 3 1826 7 5 Fuel consumption accordingtoVDIcycle h MISCELLANEOUS 8...

Page 38: ...CELLANEOUS DUPLEXTOTALVISIBILITY 3300 85 2348 4018 10 12 3700 85 2608 4428 10 12 4000 85 2798 4768 10 12 4500 85 3048 5268 10 12 TRIPLEXWITHOUTFREELIFT 3300 135 1888 4048 10 12 TRIPLEXFREELIFT 3700 13...

Page 39: ...aximumheightof VERTICALMAST EQUIPMENT ACTUALCAPACITIES 2 15 D D mm mm kg mm 1 2 1 2 CAPACITE NOMINALE RATED CAPACITY NENNKAPAZIT T CAPACIDAD NOMINAL CAPACIT NOMINALE CAPACITES EFFECTIVES ACTUAL CAPACI...

Page 40: ...SSURE 4 4 Front unladen 800 800 Front laden 2250 2250 BKT 12 5 80 18TL12 PRESSURE 3 7 Front unladen 800 Front laden 2250 REAR PRESSURE bar LOADPERTYRE kg MC18 2D MC18 4D SOLIDEAL CAMSO 7 00 12 12EDPLU...

Page 41: ...3 7 800 2250 7 00 12 12EDPLUS 8 5 950 400 27x10 1214PRSKS 7 950 400 ALIANCE 300 75R18A580 4 1 800 2250 DUNLOP 15 5 55R18 MPTSPPG714PR 4 800 2250 BKT 12 5 80 18TL12 3 7 800 2250 227 10 80 12TL10 3 9 9...

Page 42: ...ULIC CONTROLS FOR ADDITIONAL ATTACHMENTS 2 37 26 HYDRAULIC CONTROL JOYSTICK 2 38 27 LOAD SUSPENSION 2 41 28 DECOMPRESSION OF THE HYDRAULIC ATTACHMENT CIRCUIT CS 2 41 29 WINDSCREEN WIPER CONTROL 2 41 3...

Page 43: ...2 19 31 31 32 32 36 36 1 31 31 33 33 35 16 15 15 38 24 13 12 22 21 20 3 3 2 30 29 36 36 38 38 38 39 25 13 12 17 18 19 14 11 10 9 7 6 8 5 4 3 2 3 1 1 647837 M1 A052020 MC 18 2 18 4 D K ST5 S1...

Page 44: ...ed position Release the lever to lock it MAINTENANCE Keep your seat clean to ensure it operates efficiently Clean the cushions using a suitable product Apply to a small hidden area first to check the...

Page 45: ...the engine and look for the cause possible leak request for regeneration of the particle filter etc NOTE This lamp comes on the moment the ignition key is in position I and remains lit until the engi...

Page 46: ...E FILTER WARNING INDICATOR LAMP If the indicator lamp comes on switch off the engine immediately and carry out the necessary repairs 3 MAINTENANCE PARTICLE FILTER MAINTENANCE INDICATOR LAMP If the ind...

Page 47: ...ION OIL TEMPERATURE FAULT INDICATOR If the indicator lamp comes on stop the engine immediately and look for the cause leak etc TRANSMISSION OIL PRESSURE FAULT INDICATOR If the indicator lamp comes on...

Page 48: ...INTENANCE 3 a Time to stationary regeneration of the particle filter h To reset this regeneration carry out the occasional maintenance 3 MAINTENANCE 4 a No error WITH ERROR CODE S 2 b Error scroll thr...

Page 49: ...gether with the dashboard indicator lamp IMPORTANT Disablingtheautomaticexhaustregenerationremainsafunctionthatisonlytobeusedincaseofnecessity confinedorunventilatedspace etc MANAGEMENTOFPARTICLEFILTE...

Page 50: ...y or soft surface etc Keep the top of the switch pressed down to enable the 4 drive wheels to rotate at the same speed The top red indicator lamp will come on F HAZARD WARNING LIGHTS OPTION Press the...

Page 51: ...IMPORTANT Intheeventofamalfunction consultyourdealer Foryourownsafety donotattempttoalterthehydraulicpressureinthesystem ANYMODIFICATIONWILLINVALIDATETHEWARRANTY The hydraulic controls must be used c...

Page 52: ...r To stop the lift truck the following sequence must be observed 1 Put the gear selector in neutral 2 Apply the parking brake 3 Remove the seat belt 4 Get out of the lift truck If the operator leaves...

Page 53: ...he fuses and relays 22 BATTERYCOVER Turn the thumb wheel 1 Remove the battery cover 2 18 12VSOCKET NOTE As an option there is a reading light for a 12 V socket 19 DOCUMENTCLIP 20 DOCUMENTSTORAGENET Ma...

Page 54: ...otating beacon light option F8 5A 12V with ignition on option 1 F9 3A Rear working lights option F10 3A Front working lights option F11 5A 12V with ignition on option 2 F12 15A Front rear windscreen w...

Page 55: ...12V permanent F53 Free Relay K1 Starter K2 Flashing unit option K5 Engine preheat K7 General power supply K13 Intermittent windscreen wiper option K14 Engine ECU Air intake management Fuel pump 2 31...

Page 56: ...SEAT HEIGHT ADJUSTMENT FIG B Raise the seat to the desired position until you hear the ratchet click If you raise the seat above the last notch stop the seat returns to the lowest position SEAT BACKRE...

Page 57: ...backrest pull the lever and position the backrest to find the desired position IMPORTANT Ifyoudonotsupportthebackrestwhenmakingadjustments itswingscompletelyforwards LONGITUDINAL ADJUSTMENT FIG H Adj...

Page 58: ...thehand Adjust the locking lever until you reach the position required This then locks and the seat will not shift into another position LUMBAR ADJUSTMENT FIG C This increases the comfort of the seat...

Page 59: ...height of the seat while monitoring the green area of the indicator lamp 2 SEAT BACKREST ANGLE ADJUSTMENT FIG C Press the left hand button then push or release pressure on the seat to find the desired...

Page 60: ...R ADJUSTMENT FIG F Turn the handle either left or right to adjust the height and depth to the desired position ADJUSTMENT OF THE ANGLE OF THE BACKREST FIG G Support the backrest pull the lever and til...

Page 61: ...C on lever B to select the attachment AUX 1 or AUX 2 The blue indicator lamp C1 coming on indicates activation of the attachment below B1 OPTIONAL 3RD HYDRAULIC LINE AUX 1 B2 OPTIONAL 3RD HYDRAULIC L...

Page 62: ...D B2 OPTIONAL 5TH HYDRAULIC LINE HYDRAULIC ATTACHMENT LOCKING WITHOUTADDITIONALHYDRAULICATTACHMENT B1 OPTIONAL 3RD HYDRAULIC LINE TILTABLE CARRIAGE B2 OPTIONAL 3RD HYDRAULIC LINE TILTABLE CARRIAGE 26...

Page 63: ...C2 OPTIONAL 3RD HYDRAULIC LINE AUX 1 TILTABLE CARRIAGE D1 OPTIONAL 4TH HYDRAULIC LINE AUX 2 D2 OPTIONAL 4TH HYDRAULIC LINE AUX 2 E D1 OPTIONAL 5TH HYDRAULIC LINE AUX 3 or HYDRAULIC ATTACHMENT LOCKING...

Page 64: ...DITIONS OF USE FORWARD REVERSESELECTOR Forwardgear Neutral Reversegear 4RM 2RM 14km h 24km h Permitted Permitted Impossible 2RM 4RM 24km h 14km h Permitted Permitted Permitted After minimum 2 seconds...

Page 65: ...IT CS The purpose of this option is to easily connect a hydraulic attachment 1 Sit in the seat 2 Switch off the engine 3 Turn the ignition back on 4 Use knobs C and D to decompress the hydraulic attac...

Page 66: ...ere is a guard for the main beam headlights 30 LIGHTING HORNANDINDICATORLIGHTCONTROL ROAD LIGHTS The road lights can be used without the ignition key A Off B Front and rear side lights C Dipped beam h...

Page 67: ...32 FRONTWORKLIGHTS NOTE As an option there is a guard for the front worklights 35 ROTATINGBEACONLIGHTORLEDFLASHINGLIGHT The magnetic rotating beacon light can be fitted by disconnecting plug A 34 REV...

Page 68: ...Press the latches A and slide the windows DOORRELEASEHANDLES Pull on the handle A to release and close the door 37 CABOPTION DOOROPENINGHANDLES InserttheignitionkeyintolockAtolockorunlock the cab Pul...

Page 69: ...EATINGVENTS 39 HEATERCONTROL A Temperature adjustment B Ventilation speed adjustment 42 WATERPROOFDOCUMENTHOLDER 40 CARRADIO 41 ENGINEIMMOBILISERSYSTEM 2 45 1 B A 647837 M1 A052020 MC 18 2 18 4 D K ST...

Page 70: ...C Pollution level 2 CONDITIONS FOR CONNECTION AND USE OF PREHEATING The preheat system should not be used for an external ambient temperature higher than 25 C It is essential that the power supply to...

Page 71: ...2 47 647837 M1 A052020 MC 18 2 18 4 D K ST5 S1...

Page 72: ...RTANT Thislifttruckisnotintendedforusewithatrailer This device is used only for slinging and lashing the lift truck 3 MAINTENANCE OCCASIONAL OPERATION IFNECESSARY CONSULTYOURDEALER 2 48 647837 M1 A052...

Page 73: ...3 MAINTENANCE 3 1 647837 M1 A052020 MC 18 2 18 4 D K ST5 S1...

Page 74: ...RICANTSANDFUEL 3 10 10H DAILYSERVICEOREVERY10HOURSOFSERVICE 3 12 50H WEEKLYSERVICEOREVERY50HOURSOFSERVICE 3 14 n500H PERIODICSERVICE EVERY500HOURSOFSERVICEOR1YEAR 3 20 o1000H PERIODICSERVICE EVERY1 00...

Page 75: ...NCEOPERATIONS YOUBENEFITFROMOURKNOW HOW Through its network MANITOU provides the user with Know how and competence The guarantee of high quality work Original replacement parts Help with preventive ma...

Page 76: ...THEOPERATORISAUTHORISEDTOCARRYOUTTHISMAINTENANCE These maintenance operations enable the operator to maintain the lift truck in a clean and safe condition MANDATORYFIRST500HOURSOR6MONTHSSERVICE IMPORT...

Page 77: ...ECK Exhaust gas recirculation cooler EGR 3 29 CHECK Condition of wiring harnesses and cables 3 29 CHECK Lights and signals 3 29 CHECK Warning indicators 3 29 CHECK Condition of the rear view mirrors 3...

Page 78: ...manifold 3 24 CHECK Fork wear 3 24 Engineservice consultyourdealer Consultyourdealer PERIODICSERVICE MAINTENANCESCHEDULE OR WHENDUE FIRST6MONTHS FIRST500HOURS 500H or1YEAR 1000H or2YEARS 1500H or3YEAR...

Page 79: ...URSOFSERVICEOR4YEARS ALSOPERFORMTHE500HOURAND1000HOURPERIODICMAINTENANCEOPERATIONS CHECK Wheel nut tightening torque 3 30 REPLACE Dry air filter safety cartridge 3 30 REPLACE Hydraulic oil 3 30 CLEAN...

Page 80: ...3 35 CLEAN Engine compartment 3 35 CLEAN Inside of the frame 3 35 REPLACE Wheels 3 36 REPLACE Battery 3 37 ADJUST Front headlights 3 37 OCCASIONALOPERATION TOW Lift truck 3 38 SLING Lift truck 3 39 TR...

Page 81: ...ERVICEOR2YEARS ALSOADDTHEFILTERCARTRIDGESFROMTHEPERIODICMAINTENANCEFOR500HOURSOFSERVICE DRY AIR FILTER CARTRIDGE Part no 959342 ENGINE HOUSING VENTILATION FILTER ENGINE Part no 940867 q2000H PERIODICS...

Page 82: ...RECOMMENDATION 40 C 30 20 10 0 10 20 30 40 50 C 0W30 0W40 5W30 5W40 10W30 ENGINE 7L MANITOUEVOLOGYOIL10W40APICJ4 15W40 20W50 40 C 30 20 10 0 10 20 30 40 50 C COOLING CIRCUIT XXL COOLANT 35 C 40 C 30 2...

Page 83: ...209L MANITOUEVOLOGYOIL10W40APICJ4 895837 895838 895839 895840 MANITOUISOVG46HYDRAULICOIL 545500 582297 546108 546109 GREASE PRODUCT PACKAGING PARTNO 400mL 400gr 1kg 5kg 20kg 50kg MANITOUBLACKMULTI PU...

Page 84: ...rs windows bodywork Driver s cab OCCASIONAL MAINTENANCE Engine housing and inside the frame OCCASIONAL MAINTENANCE to prevent leaks and build up of materials e g straw flour sawdust organic waste etc...

Page 85: ...ENTS AND CONTROLS The liquid must be at the MAX level on the expansion tank 1 If necessary add coolant LUBRICANTS AND FUEL through the filler hole 2 Check for leaks CLEAN Cyclonicpre filter OPTION The...

Page 86: ...f necessary Loosen screws 2 by two to three thread turns Swivel the alternator assembly so as to obtain the required belt tension Retighten the screws 2 CHECK Tyrepressures CHECK Wheelnuttightening IM...

Page 87: ...lignment of the lifting chains Then tighten locknut 2 and nut 3 Retighten the nut 1 CHECK Hydraulicoillevel Place the lift truck on level ground with the engine stopped the mast tilted backwards and l...

Page 88: ...Clean the filter cartridge from inside to outside using a compressed air jet max 2 bar maintaining a safe distance min 30 mm to avoid damaging the cartridge Use a damp clean lint free cloth to clean t...

Page 89: ...ND FUEL and remove the surplus REAR AXLE MC 2 1 Lubricatorsfortheswivelpins 2lubricators 2 Lubricators for the tie rods 4 lubricators 3 Rear axle oscillation lubricators 2 lubricators MC 4 4 Wheelmoto...

Page 90: ...oil is drained properly REPLACEMENT OF THE FILTER Clean the filter bracket with a clean lint free cloth Unscrew and recycle the engine oil filter 4 together with its seal Lightly grease the seal befo...

Page 91: ...3 19 647837 M1 A052020 MC 18 2 18 4 D K ST5 S1...

Page 92: ...llow the detailed instructions According to the results keep the analysis report or replace the hydraulic oil LUBRICATE Cabdoorlocks OPTION Unscrew the tip 1 of the opening control for the right hand...

Page 93: ...er with its seal Lightly grease the seal before refitting the new oil filter FILTER CARTRIDGES AND BELTS on its bracket Tighten the oil filter by hand pressure only and lock the filter in place by a q...

Page 94: ...ck it by a quarter turn Retighten the plug 2 Reconnect the wiring harness 1 After replacing the fuel pre filter replace the fuel filter REPLACE Fuelfilter Carefully clean the outside of the filter and...

Page 95: ...t tension Under normal pressure applied by the thumb 98 N belt movement A should be between 10 and 12 mm Retighten the screws 2 REPLACE Hydraulicreturnoilfiltercartridge Place the lift truck on level...

Page 96: ...abfanfilters OPTION INTERIOR CAB VENTILATION FILTER Remove the protective grid 1 Remove the cab ventilation filter 2 and replace it with a new one FILTER CARTRIDGES AND BELTS Refit the protective grid...

Page 97: ...3 25 647837 M1 A052020 MC 18 2 18 4 D K ST5 S1...

Page 98: ...p tug NOTE Following an accident the seat belt must be replaced CLEAN Fueltank Place the lift truck on level ground with the engine stopped IMPORTANT Whilecarryingouttheseoperations donotsmokeorworkne...

Page 99: ...h pre filtration the cartridge replacement interval must be reduced to 250 hours IMPORTANT Replacethecartridgeinacleanlocation Neveroperatethelifttruckwiththeairfilterremovedordamaged Switch off the e...

Page 100: ...remove the hose 2 and the hose 3 Remove the filler plug 5 to ensure correct drainage Let the cooling circuit drain entirely while ensuring that the ports do not get clogged Check the condition of the...

Page 101: ...essesandcables CHECK Lightsandsignals CHECK Warningindicators CHECK Conditionoftherear viewmirrors CHECK Structureoftheoverheadguardorthecab CHECK Framestructure CHECK Attachmentmountingsystem CHECK C...

Page 102: ...cloth Before fitting check the condition of the new safety cartridge FILTER CARTRIDGES AND BELTS Introduce the safety cartridge into the filter axis pressing on the edges and not the middle REPLACE H...

Page 103: ...sing all the hydraulic movements except the steering system and the service brakes Accelerate the engine at full speed for 1 minute then activate the steering system and the service brakes This operat...

Page 104: ...OURSOFSERVICEOR6YEARS ALSOPERFORMTHE500HOURAND1 000HOURPERIODICMAINTENANCEOPERATIONS CHECK Exhaustgasrecirculationsystem EGR CLEAN Exhaustparticlefilter DPF Engineservice consultyourdealer 3 32 647837...

Page 105: ...3 33 647837 M1 A052020 MC 18 2 18 4 D K ST5 S1...

Page 106: ...neration procedure Indicator lamp comes on The engine speed increases The indicator lamp comes on and confirms the start of the regeneration procedure The indicator lamp comes on as soon as the partic...

Page 107: ...b using a small brush vacuum cleaner and a cloth CLEAN Enginecompartment CLEAN Insideoftheframe IMPORTANT Donotuseawaterjetorhigh pressuresteam Open the engine cover 2 DESCRIPTION INSTRUMENTS AND CONT...

Page 108: ...ng movements and roll it to the side Slip the new wheel on the wheel hub Hand tighten the nuts grease them if necessary Remove the security block and lower the lift truck with the jack Tighten the whe...

Page 109: ...ity battery is available as an OPTION ADJUST Frontheadlights RECOMMENDED SETTING accordingtostandardECE 76 75676 761ECE20 Adjustment of 2 of the dipped beam harness relative to the horizontal axis of...

Page 110: ...r 2 DESCRIPTION INSTRUMENTS AND CONTROLS Unscrew the nuts 2 by two turns at the most UNLOCKING THE FRONT WHEEL BRAKES Open the battery access flap 3 Push button 4 Pump minimum of 20 times using the bu...

Page 111: ...truck parallel to the platform Stop the lift truck 1 OPERATING AND SAFETY INSTRUCTIONS DRIVING INSTRUCTIONS UNLADEN AND LADEN STOWING THE LIFT TRUCK Fix the chocks to the flatbed at the front and at t...

Page 112: ...3 40 647837 M1 A052020 MC 18 2 18 4 D K ST5 S1...

Page 113: ...4 OPTIONAL ADAPTABLE ATTACHMENTS FOR THE RANGE 4 1 647837 M1 A052020 MC 18 2 18 4 D K ST5 S1...

Page 114: ...4 2 647837 M1 A052020 MC 18 2 18 4 D K ST5 S1...

Page 115: ...4 OPTIONALADAPTABLEATTACHMENTSFORTHERANGE INTRODUCTION 5 TECHNICALSPECIFICATIONSOFATTACHMENTS 6 ATTACHMENTGUARDS 7 4 3 647837 M1 A052020 MC 18 2 18 4 D K ST5 S1...

Page 116: ...4 4 647837 M1 A052020 MC 18 2 18 4 D K ST5 S1...

Page 117: ...load chart should be kept in the places provided in the lift truck For standard attachments their use is governed by the instructions contained on this notice IMPORTANT Maximumloadsaredefinedbythecapa...

Page 118: ...acting lift TLL STANDARDISED SIDESHIFT CARRIAGE TDL25N L1260 PART NO 229814 Rated capacity kg Sideshift mm Width mm Weight kg STANDARDISED FORK PART NO 306169 315873 315874 Section 100x35x1070mm 100x...

Page 119: ...ATTACHMENTGUARDS FORK GUARD PART NO 227801 4 7 647837 M1 A052020 MC 18 2 18 4 D K ST5 S1...

Page 120: ...4 8 647837 M1 A052020 MC 18 2 18 4 D K ST5 S1...

Reviews: