Assembly Notes
1. The electrical steamer shall be steadily mounted in a secure place easy for operation and maintenance
(the steamer must not be obliquely placed).
2. Don’t mount the electrical steamer and power socket in any place that might become damp or get wet
with water.
3. Do confirm if the earth electrode of the power socket is effective.
4. To move the product to another place, lift it up from the handle hole or the bottom. Handle the product
with care.
5. The facilities and objects next to the electrical steamer must be insulated.
6. It is better to mount a switch in front of the socket of the electrical
steamer, to make it easy to disconnect the power supply when the
electrical steamer is not used.
7. While the electrical steamer is working, please don’t directly touch the
inside of the steamer, in order not to be scalded.
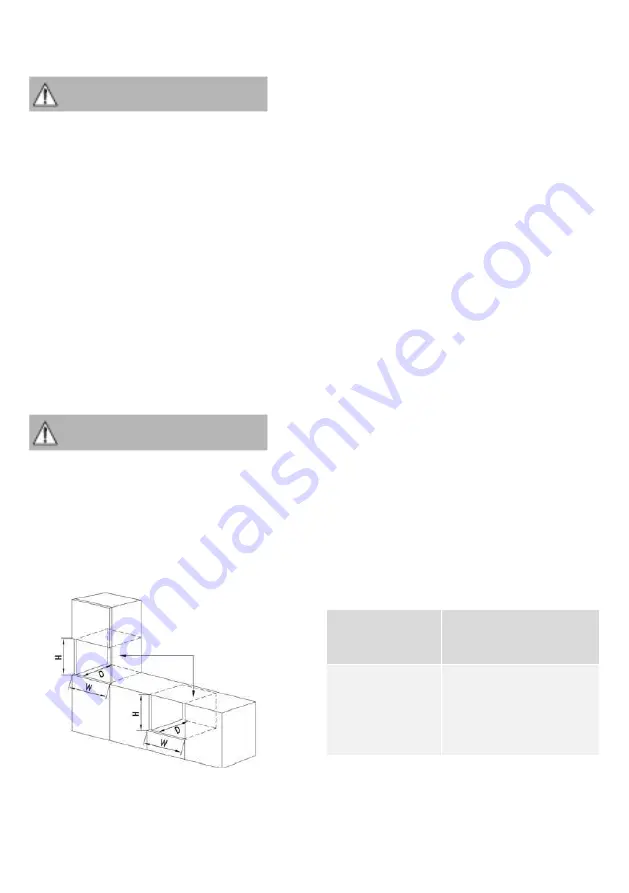
8. Mount the pre-buried electrical steamer inside the cupboard, which shall
have space for heat radiation, or else normal use of the steamer will be
affected. The cupboard shall not have a back plate. The heat radiation is
shown on the right picture:
Product Assembly Method
1. Put the machine near the mounting groove. Then, insert the power plug into the socket.
2. Lift the machine up from the bottom or the left and right clasp positions. Then, gently put the machine
down in the preleft holes in the cupboard. Next, push the machine so that it will be close to the front
panel of the cupboard in parallel, and completely embedded into the cupboard.
3. When the front door of the machine is opened, four screw holes can be seen on the rim. Fix the
machine in the cupboard with mounting screws. The machine can be fastened on the lower part of the
cupboard foundation or the upper part of the corner cabinet according to actual needs.
4. As to the detailed parameters for burying the machine in the cupboard, refer to the schematic
assembly drawing and the attached form.
Product Assembly Dimension
Type
(Electrical
Steamer)
Hole Size
MST-48CP
W564*H450*D550
(button for 5mm on
the upper part,
without buttoning on
the lower part)
6 Assembly Notes/Product Assembly Method
Please ensure certain
ventilation distance
No back plate on the back
Summary of Contents for MST-48CP
Page 1: ...INSTRUCTION MANUAL BUILT IN STEAM OVEN MODEL MST 48CP...
Page 2: ......


