background image

5 ENGLISH

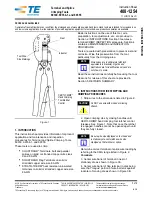
HAMMER SAFETY WARNINGS

1. 

Wear ear protectors.

 Exposure to noise can 

cause hearing loss.

2. 

Use auxiliary handle(s), if supplied with the 

tool.

 Loss of control can cause personal injury.

3. 

Hold power tool by insulated gripping sur

-

faces, when performing an operation where 

the cutting accessory may contact hidden wir

-

ing or its own cord.

 Cutting accessory contacting 

a "live" wire may make exposed metal parts of the 

power tool "live" and could give the operator an 

electric shock.

4. 

Wear a hard hat (safety helmet), safety glasses 

and/or face shield. Ordinary eye or sun glasses 

are NOT safety glasses. It is also highly recom

-

mended that you wear a dust mask and thickly 

padded gloves.

5. 

Be sure the bit is secured in place before 

operation.

6. 

Under normal operation, the tool is designed 

to produce vibration. The screws can come 

loose easily, causing a breakdown or accident. 

Check tightness of screws carefully before 

operation.

7. 

In cold weather or when the tool has not been 

used for a long time, let the tool warm up for 

a while by operating it under no load. This 

will loosen up the lubrication. Without proper 

warm-up, hammering operation is difficult.

8. 

Always be sure you have a firm footing.


Be sure no one is below when using the tool in 

high locations.

9. 

Hold the tool firmly with both hands.

10. 

Keep hands away from moving parts.

11. 

Do not leave the tool running. Operate the tool 

only when hand-held.

12. 

Do not point the tool at any one in the area 

when operating. The bit could fly out and 

injure someone seriously.

13. 

Do not touch the bit or parts close to the bit 

immediately after operation; they may be 

extremely hot and could burn your skin.

14. 

Do not operate the tool at no-load 

unnecessarily.

15. 

Some material contains chemicals which may 

be toxic. Take caution to prevent dust inhala

-

tion and skin contact. Follow material supplier 

safety data.

SAVE THESE INSTRUCTIONS.

WARNING:


DO NOT let comfort or famil

-

iarity with product (gained from repeated 

use) replace strict adherence to safety rules 

for the subject product.


MISUSE or failure to follow the safety rules 

stated in this instruction manual may cause 

serious personal injury.

FUNCTIONAL 

DESCRIPTION

CAUTION:


• 

Always be sure that the tool is switched off and 

unplugged before adjusting or checking function 

on the tool.

Switch action

► 

Fig.1:


1.

 Switch lever

CAUTION:


• 

Before plugging in the tool, always check to see 

that the tool is switched off.

• 

Switch can be locked in "ON" position for ease 

of operator comfort during extended use. Apply 

caution when locking tool in "ON" position and 

maintain firm grasp on tool.

To start the tool, push the switch lever "ON (I)" on the 

left side of the tool. To stop the tool, push the switch 

lever "OFF (O)" on the right side of the tool.

Speed change

► 

Fig.2:


1.

 Adjusting dial

The blows per minute can be adjusted just by turning 

the adjusting dial. This can be done even while the tool 

is running. The dial is marked 1 (lowest speed) to 5 (full 

speed). 

Refer to the table below for the relationship between 

the number settings on the adjusting dial and the blows 

per minute.

Number on adjusting dial

Blows per minute

5
4
3
2

1

1,900
1,700

1,450
1,200

950

CAUTION:


• 

The speed adjusting dial can be turned only as 

far as 5 and back to 1. Do not force it past 5 or 

1, or the speed adjusting function may no longer 

work.


For Model HM1213C only

NOTE:


• 

Blows at no load per minute becomes smaller 

than those on load in order to reduce vibration 

under no load, but this does not show trouble. 

Once operation starts with a bit against con

-

crete, blows per minute increase and get to the 

numbers as shown in the table. When tempera

-

ture is low and there is less fluidity in grease, 

the tool may not have this function even with the 

motor rotating.

Summary of Contents for HM1213C

Page 1: ...NUAL 4 UK 7 PL M ot Udarowy INSTRUKCJA OBS UGI 11 RO Ciocan demolator MANUAL DE INSTRUC IUNI 15 DE Stemmhammer BEDIENUNGSANLEITUNG 19 HU Bont kalap cs HASZN LATI K ZIK NYV 23 SK Demoli n kladivo N VOD...

Page 2: ...ON OFF 1 1 1 2 1 2 1 2 1 1 Fig 1 Fig 2 Fig 3 Fig 4 Fig 5 Fig 6 Fig 7 Fig 8 2...

Page 3: ...1 Fig 9 Fig 10 Fig 11 3...

Page 4: ...e to identify safety mea sures to protect the operator that are based on an estimation of exposure in the actual conditions of use taking account of all parts of the operating cycle such as the times...

Page 5: ...toxic Take caution to prevent dust inhala tion and skin contact Follow material supplier safety data SAVE THESE INSTRUCTIONS WARNING DO NOT let comfort or famil iarity with product gained from repeate...

Page 6: ...1 Releasing cover Bit angle Fig 9 1 Change ring Fig 10 The bit can be secured at 12 different angles To change the bit angle slide the change ring forward then turn the change ring to change the bit a...

Page 7: ...C HM1203C 950 1900 1 576 10 8 9 7 II EPTA Procedure 01 2003 EN60745 HM1213C LpA 75 A LWA 95 A K 2 53 A HM1203C LpA 81 A LWA 95 A K 2 1 A EN60745 HM1213C ah CHeq 8 0 2 K 1 5 2 HM1203C ah CHeq 16 5 2 K...

Page 8: ...8 1 2 3 4 5 6 7 8 9 10 11 12 13 14 15 1 1 ON I OFF O 2 1 1 5 5 4 3 2 1 1900 1700 1450 1200 950...

Page 9: ...9 1 5 1 5 HM1213C 3 1 2 8 4 1 2 360 5 1 2 6 1 7 8 1 9 1 10 12 11...

Page 10: ...10 Makita Makita SDS MAX SDS MAX SDS MAX SDS MAX...

Page 11: ...obrabianego elementu OSTRZE ENIE W oparciu o szacowane nara enie w rzeczywistych warunkach u ytkowa nia nale y okre li rodki bezpiecze stwa w celu zapewnienia ochrony operatora uwzgl dniaj c wszystkie...

Page 12: ...yka ko c wki ani znajduj cych si w jej s siedztwie element w Mog one by bardzo gor ce gro c poparzeniem sk ry 14 Nie nale y bez potrzeby uruchamia narz dzia bez obci enia 15 Niekt re materia y zawiera...

Page 13: ...on i nasmaruj Wsu ko c wk do uchwytu narz dzia Obr ko c wk i wci nij a wskoczy na swoje miejsce Rys 6 1 Os ona Je eli ko c wki nie mo na wcisn nale y j wyci gn Poci gn kilka razy w d os on uchwytu Nas...

Page 14: ...zgodnych z ich przeznaczeniem W razie potrzeby wszelkiej pomocy i szczeg owych informacji na temat niniejszych akcesori w udziel Pa stwu lokalne Centra Serwisowe Makita Punktak SDS MAX Przecinak SDS M...

Page 15: ...rat AVERTIZARE Asigura i v c identifica i m surile de siguran pentru a proteja operatorul acestea fiind bazate pe o estimare a expunerii n condi ii reale de utilizare lu nd n considerare toate p r ile...

Page 16: ...ul i evita i contactul cu pielea Respecta i instruc i unile de siguran ale furnizorului P STRA I ACESTE INSTRUC IUNI AVERTIZARE NU permite i comodit ii i familiariz rii cu produsul ob inute prin utili...

Page 17: ...rare Dac burghiul nu poate fi mpins n untru scoate i burghiul Trage i n jos de c teva ori man onul de eliberare Apoi reintroduce i burghiul Roti i burghiul i mpinge i l p n c nd se cupleaz Fig 7 Dup i...

Page 18: ...tru care au fost concepute Dac ave i nevoie de asisten sau de mai multe detalii referitoare la aceste accesorii adresa i v centrului local de service Makita Dalt pi SDS MAX Dalt ngust SDS MAX Dalt lat...

Page 19: ...Elektrowerkzeugs kann je nach der Benutzungsweise des Werkzeugs und speziell je nach der Art des bear beiteten Werkst cks von dem den angegebenen Wert en abweichen WARNUNG Identifizieren Sie Sicherhe...

Page 20: ...Sie das Werkzeug nicht unbeaufsich tigt laufen Arbeiten Sie nur mit ihm wenn Sie es in der Hand halten 12 Zeigen Sie mit dem Werkzeug w hrend des Betriebs nicht auf Personen in Ihrer Umgebung Der Ein...

Page 21: ...en Sie anschlie end die Befestigungsmutter fest an Der Seitengriff l sst sich auch in der hinteren Kerbe anbringen L sen Sie die Befestigungsmutter und erweitern Sie die Basis des Seitengriffs Schiebe...

Page 22: ...teile von Makita durchge f hrt werden SONDERZUBEH R VORSICHT F r Ihr Werkzeug Makita das in dieser Anleitung beschrieben ist empfehlen wir fol gende Zubeh rteile und Aufs tze zu verwen den Bei der Ver...

Page 23: ...a kez el v delm t szolg l munkav delmi l p seket melyek az adott munkafelt telek melletti vibr ci s hat s becs lt m rt k n alapulnak figyelembe v ve a munkaciklus elemeit mint p ld ul a g p le ll t s...

Page 24: ...elleni s rint s elleni v delemr l K vesse az anyag sz ll t j nak biztons gi utas t sait RIZZE MEG EZEKET AZ UTAS T SOKAT FIGYELMEZTET S NE HAGYJA hogy a term k t bbsz ri haszn lat b l ered k nyelem s...

Page 25: ...ism t a v s szersz mot Ford tsa el a v s szersz mot s nyomja be am g nem r gz l bra7 A behelyez s ut n mindig ellen rizze hogy a v s szer sz m biztosan a hely n van gy hogy megpr b lja azt kih zni A s...

Page 26: ...ja csup n annak kifejezett rendeltet s re Ha b rmilyen seg ts gre vagy tov bbi inform ci kra van sz ks ge ezekkel a tartoz kokkal kapcsolatban keresse fel a helyi Makita Szervizk zpontot F r sz r SDS...

Page 27: ...sprac van ho obrobku VAROVANIE Nezabudnite ozna i bezpe nostn opatrenia s cie om chr ni obsluhu a to tie ktor sa zakladaj na odhade vystavenia inkom v r mci re lnych podmienok pou vania ber c do vahy...

Page 28: ...e ktor m u by jedovat D vajte pozor abyste ich nevdychovali alebo sa ich nedot kali Pre tajte si bezpe nostn materi lov listy dod vate a TIETO POKYNY USCHOVAJTE VAROVANIE NIKDY nepripustite aby pohodl...

Page 29: ...vac kryt potiahnite nadol nieko ko kr t Potom hrot znovu zalo te Oto te hrotom a potla te ho k m nezapadne Obr 7 Po vsunut v dy potiahnut m za vrt k skontrolujte i je spr vne zaisten Pri vyberan hrotu...

Page 30: ...na ely pre ne stanoven Ak potrebujete bli ie inform cie t kaj ce sa tohoto pr slu enstva obr te sa na va e miestne servisn stredisko firmy Makita V tac hrot SDS MAX Ploch sek SDS MAX Sekacie dl to SD...

Page 31: ...h hodnot y li it v z vislosti na zp sobech pou it n ad VAROV N Nezapome te stanovit bezpe nostn opat en na ochranu obsluhy podle odhadu expozice ve skute n ch podm nk ch pou it Vezm te p itom v vahu v...

Page 32: ...er mohou b t jedovat D vejte pozor abyste je nevdechovali nebo se jich nedot kali P e t te si bezpe nostn materi lov listy dodavatele TYTO POKYNY USCHOVEJTE VAROV N NEDOVOLTE aby pohodl nost nebo poci...

Page 33: ...r t zat hn te sm rem dol Pot pracovn n stroj zasu te znovu Ot ejte pracov n m n strojem a tla te na n j a se zajist na m st Obr 7 Po instalaci se pokusem o vyta en v dy p esv d te zda je pracovn n str...

Page 34: ...e pou vat pouze pro jejich stanoven ely Pot ebujete li bli informace ohledn tohoto p slu en stv obra te se na va e m stn servisn st edisko firmy Makita Sek pi at SDS MAX Sek ploch SDS MAX Sek irok SDS...

Page 35: ...35...

Page 36: ...www makita com Makita Europe N V Makita Corporation 3 11 8 Sumiyoshi cho Anjo Aichi 446 8502 Japan Jan Baptist Vinkstraat 2 3070 Kortenberg Belgium 884887F979 EN UK PL RO DE HU SK CS 20181219...

Reviews: