P 7/ 11
Fig. 9
R
epair
[3] DISASSEMBLY/ASSEMBLY
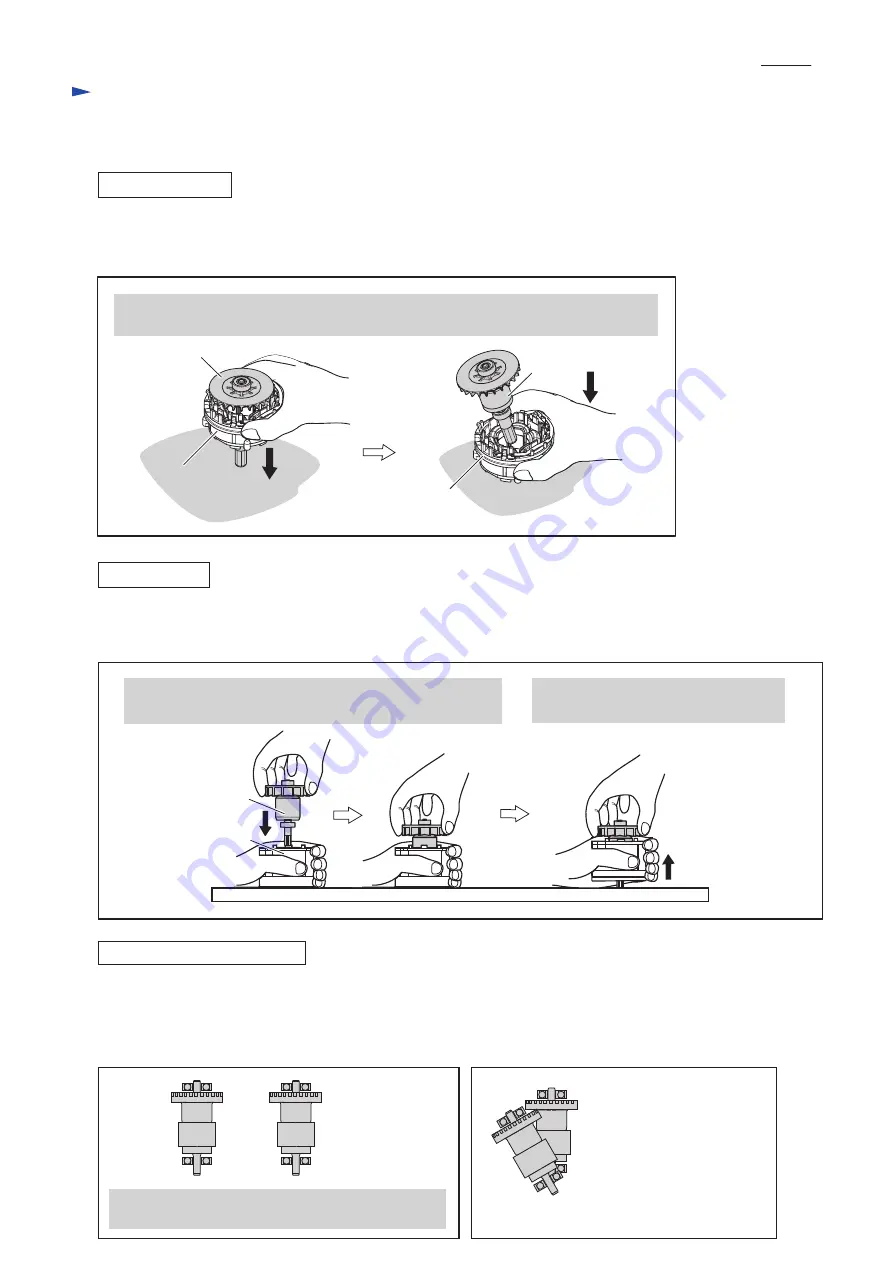
[3] -4. Rotor
DISASSEMBLING
ASSEMBLING
(1) After removing Housing set R, separate Motor section from Oil unit section. (See
Fig. 3
)
(2) Separate Rotor from Stator as drawn in
Fig. 9
.
Put Motor section on a workbench so that the drive end of Rotor touches the workbench.
Then separate Stator from Rotor by pressing it down towards the workbench.
Rotor
Stator
Rotor
Stator
Assemble Rotor as drawn in
Fig. 10
.
Note
: Be careful not to pinch your finger between Rotor’s fan and Stator.
Fig. 10
1. Holding Stator on the workbench, slowly insert Rotor into
Stator until Rotor’s drive end reaches the workbench.
2. When the drive end of Rotor reaches
the workbench, lift up Stator slowly.
Rotor
Stator
Caution for Handling of Rotor
When handling or storing multiple Rotors, be sure to keep a proper distance between Rotors as shown in
Fig. 11
Because Rotor is a strong magnet, failure to follow this instruction could result in:
Finger injury caused by pinching between Rotors pulling each other.
Magnetic loss of Rotors or damage on the magnet portion of Rotor. (
Fig. 12
)
Fig. 11
Fig. 12
* Magnetic loss of Rotors
* Damage on the magnet
portion of Rotor
The Rotors has to be put, keeping so enough distance,
that they are out of their magnetic forces each other.


