


43
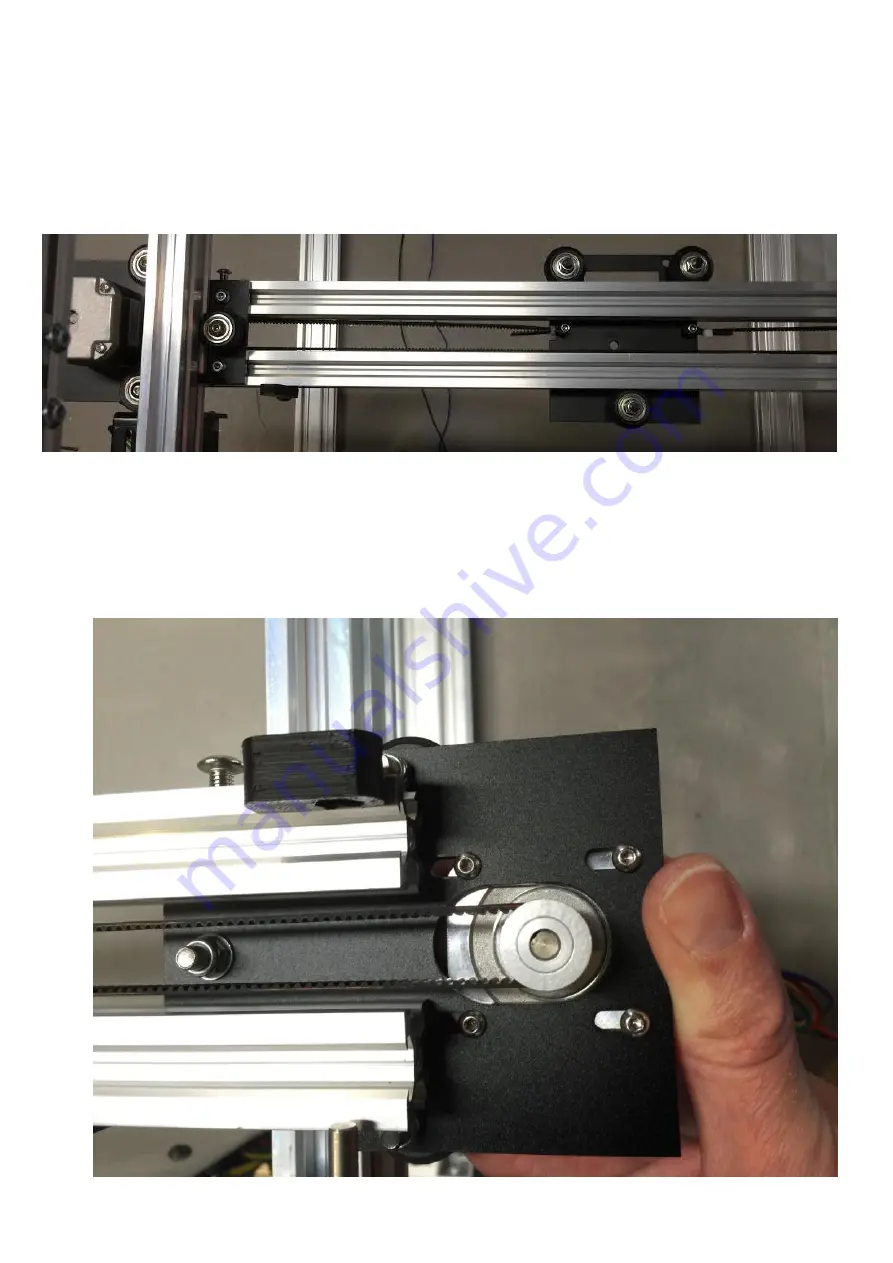
Next get the rest of the belt, loop one end over and use a zip tie to secure it, install
that loop onto one of the M3x16mm bolts on the X Carriage, Run the other side of
the belt through the idler then over to the other side of the printer and go around the
gt2 gear on the motor and back to the other M3x16mm bolt. (Make sure you X
motor is pulled as far to the center of the printer as possible) then loop the other end
and install a zip tie before installing it on the other m3x16mm bolt. Install M3 Lock
nuts on the M3x16mm bolts (use needle nose pliers to tighten the Nylon Lock Nuts.
At this time you can also adjust the Eccentric Spacer on the X carriage so all 3
wheels contact the Aluminum Extrusion.
Now pull the X motor to the Right of the printer to tension the belt then tighten down
the 4 M3x10mm bolts that hold the motor to the X motor bracket
Summary of Contents for Pegasus 12
Page 1: ...Updated 6 19 17 ...
Page 5: ...5 ...
Page 6: ...6 ...
Page 19: ...19 Installl the two Z motors into the Z mounts using 4 M3x6mm bolts on each motor ...
Page 41: ...41 Belts 4 x Zip Ties 2 x M3x25mm Bolts 2 x M3 Nylon Lock Nut 1 x GT2 Belt ...
Page 47: ...47 For the Endstops follow the endstop guide by clicking on the Picture below ...
Page 48: ...48 This page intentionally left blank ...
Page 49: ...49 Optional LCD 1 x Wood LCD Mount 4 x M3x25mm Bolt 4 x M3 Lock nuts 1 x LCD Interface ...
Page 52: ...52 Then install the LCD using the 3 bolts ...
Page 63: ...63 Next plug in the Z Motors Now plug in the Y Motor ...
Page 69: ...This page intentionally left blank ...
Page 70: ...This page intentionally left blank ...
Page 71: ...This page intentionally left blank ...
Page 72: ......