background image

MCC-35


51 

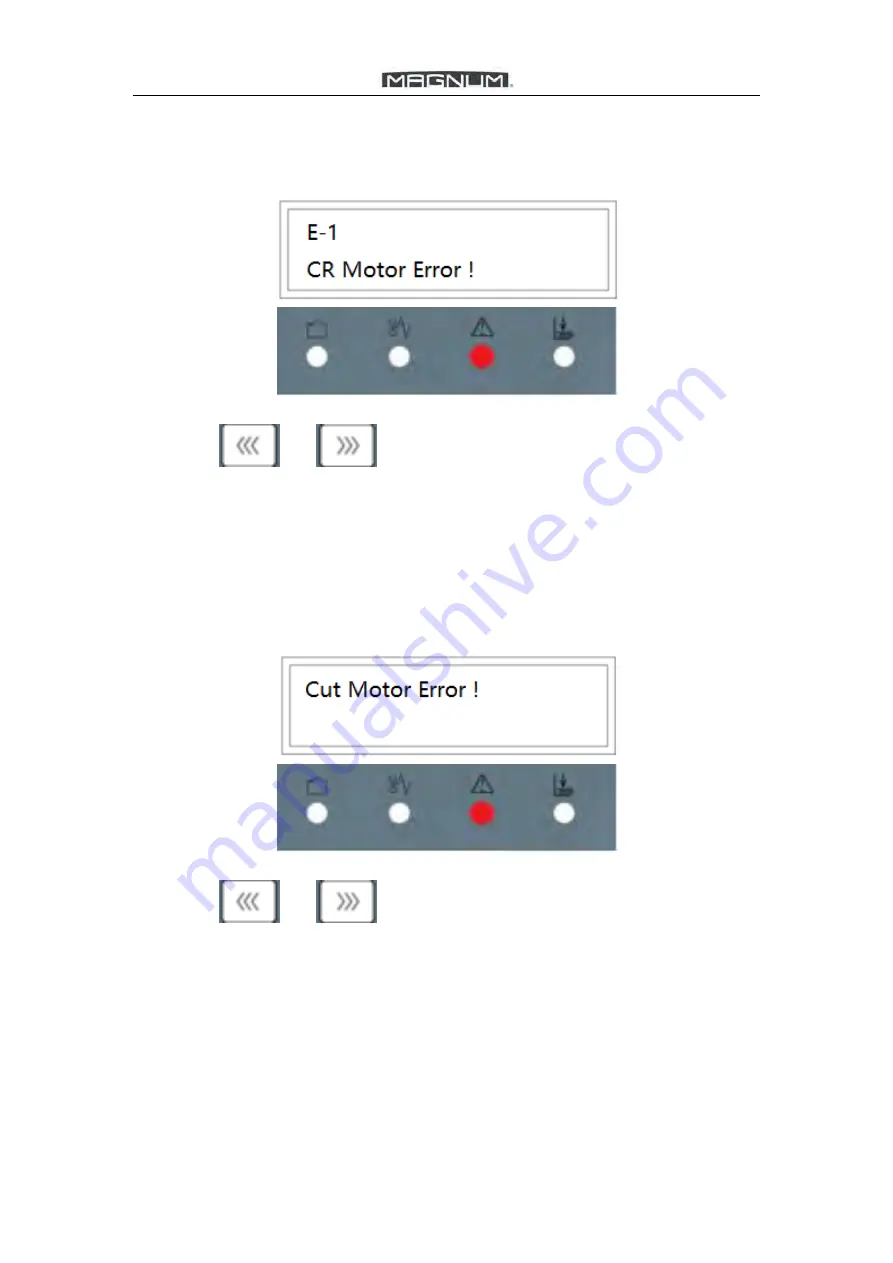
7.4 Show Error E-1 

E-1 Crease Motor Error.

1. Restart the machine.

2. Press

or 

to drive the jammed paper out. 

3. Check if the paper is out of the spec. (100gsm~350gsm). As for crease die,

the spec. is 100~300gsm.

4. Check if CR depth is too deep and adjust it referred to 

5.7.3

.

7.5 Show Error E-2 

E-2 Cut Motor Error.

1. Restart the machine.

2. Press

or 

to drive the jammed paper out. 

3. Check if the paper is out of the spec. (100gsm~350gsm). As for crease die,

the spec. is 100~300gsm.

Summary of Contents for MCC-35

Page 1: ...anual Magnum MCC 35 The Magnum has been designed to be user friendly however we strongly recommend you take a few minutes to read through this manual to ensure correct operation Keep this manual safe...

Page 2: ...5 3 2 1 Main Ready Screen 13 5 3 2 2 Cut Data Screen 13 5 3 2 3 Crease Data Screen 14 5 3 2 4 Total Sheets Screen 14 5 3 2 5 Total Crease Cut QTY Screen 14 5 3 2 6 Software Version Serial Number 14 5...

Page 3: ...5 5 1 Setting Side Guides 28 5 5 2 Position Slitters and Deflecting Rollers 28 5 5 3 Set Outfeed Tray 29 5 5 4 Set Crease Data 29 5 6 Only Trim Sheet Sides 29 5 6 1 Place Slitters 29 5 6 2 Set Cut Da...

Page 4: ...48 7 1 Show warning C 1 48 7 2 Show warning C 2 49 7 3 Show warning C 3 50 7 4 Show Error E 1 51 7 5 Show Error E 2 51 7 6 Image Compensation 52 Chapter 8 Maintenance 53 8 1 User Maintenance 53 8 1 1...

Page 5: ...manual only applies to MCC 35 Before using the machine please read the instruction manual carefully first Please keep the manual properly so that consulting it at any time in the future Any question...

Page 6: ...0 2 0 4mm First Cut 3 2 15mm Last Cut 5 15mm Gutter Cut 3 15mm Slit Slitters 4 Side Trim 3 2 38mm Gutter Slit 8mm Accuracy for Slitting 0 3mm Crease Max Qty for Crease per Sheet 32 Crease Depth Adjus...

Page 7: ...ical components Power supply AC input Voltage Frequency is AC220V 50 60Hz If the voltage or frequency are not in the range the machine may not be used normally or even may cause unrecoverable damage P...

Page 8: ...e sure all safety covers are in place The top covers have an interlock switch which will disable the unit if removed Do open or close the cover slowly Do contact the local maintenance center before yo...

Page 9: ...chine while running Don t put heavy matter on machine or shock it Don t put the side guide under the feeding system 2 3 Cautions Be careful of any metal or flammable thing in internal machine or it ma...

Page 10: ...heets 3 Card Collector Collect finished business card 4 Top Cover Protection 5 Key Pad Operate the machine 6 Loading Table Loading Paper 7 Machine Body Machine main working part 8 Side Cover Interchan...

Page 11: ...tter 1 Slit the side edge of paper 5 Slitter 2 Slit with fixed gutter gutter is 8 mm or 3 8 inch 6 Slitter 3 lit with fixed gutter gutter is 8 mm or 3 8 inch 7 Slitter 4 Slit the other side edge of pa...

Page 12: ...f yes open the package to check if there is any damage on the machine and take photos for each step when the logistics worker is there whichare evidences for later communications 2 If no open the pack...

Page 13: ...he outfeed tray onto machine and place the business card collector on the proper position As well as the deflector 4 2 2 Extension Table Installation Fix the extension table as per following picture D...

Page 14: ...MCC 35 10 4 2 3 Power Socket and Switch AC input Voltage Frequency is AC220V 50 60Hz Cautions Don t operate machine with wet hand switch O is Off I is On Socket Fuse 3 15A...

Page 15: ...crease motor locks it lighten and return a error report E 1 CR Motor Error 9 INDICATOR PAPER JAMMED If the paper is jammed inside the machine it lights and returns an error report C 2 Jam at infeed o...

Page 16: ...ece 5 Press Test Key to run one for checking if feeding is skewed and cards are good 6 If skewed adjust the side guides referred to5 4 2 If feeding is ok but finished pieces are not ok 7 Use the compe...

Page 17: ...ta crease data total sheets crease cut qty software version serial number 5 3 2 1 Main Ready Screen 5 3 2 2 Cut Data Screen Scan all the 32 cut data from 1 to 32 by pressing Page Down Key There are 8...

Page 18: ...4 Total Sheets Screen Machine has finished 123 sheets up to now which is exclusive of those jammed when machine shows Warning or Error 5 3 2 5 Total Crease Cut QTY Screen 5 3 2 6 Software Version Seri...

Page 19: ...ressing Mode Key without any changes 5 3 3 1 Recall Factory Template Press Mode Key once to enter factory template screen Press Page Up Key or Page Down Key to scan all factory templates And then pres...

Page 20: ...off referred to 5 3 5 The default state is off When restart machine it will remember the latest available state 5 3 3 4 Smart Input Screen Smart input is a quick job creating function And it is a step...

Page 21: ...increase the ratio by 0 1 or press Decrease Key to decrease the ratio by 0 1 And press Enter to take effect 5 3 3 8 Horizontal Shift Screen The function is aimed to settle image shift caused by printi...

Page 22: ...the value by 0 1mm or press Increase Key to increase the value by 0 1mm And press Enter to take effect Note All the Image compensation functions 5 3 3 7 5 3 3 10 range is limited by First Cut 3 2 15m...

Page 23: ...ake effect The default state is low When restart machine the speed is low 5 3 3 14 Crease Slit Screen This functions to select if the slit drive motor works or not when running template without slitti...

Page 24: ...size SAR3 thickness 300gsm Crease in the middle Lead trim 30mm Gutter cut 10mm Since 331SCC is middle feed type so side trim is the same And the Gutter slit is fixed 8mm The card width is also manual...

Page 25: ...m 3 2 to 15 The lead trim 30 will be divided into two cuts 15 wide 5 3 4 2 2 Input Card Length Gutter Input value 200 and press Enter to confirm Input value 10 and press Enter to confirm The Gutter Cu...

Page 26: ...t will show Tail Trim Err Press any key returning to Ready screen 5 3 5 Register Mark Setting The register mark is much better for machine to position the images since that the register mark and image...

Page 27: ...han 3 12 L 12mm W 3mm 3 All area above the mark should be blank because other color may affect the mark reader 4 The register mark reference point is the top edge of the mark 1 5 3 5 2 How to use a Re...

Page 28: ...job just press Stop to go back to Ready Screen Note The Register Mark is only used for user template rather than factory template 5 4 Hardware Setting 5 4 1 Side Guide Setting 1 Release the two screws...

Page 29: ...ide guide moving direction 5 4 2 Skew Adjustment 1 If side guide position is ok the feeding is skewed Release the two screws circled in red as per following picture making sure the screws can move fre...

Page 30: ...ding angle 5 4 3 Slitters Setting 5 4 3 1 Remove the Gauge The gauge is two different sizes spec 85 90 mm or 3 5 5 5 inch 1 Release the grub screw fixing the slitter 2 Remove the two plastic head scre...

Page 31: ...ighten the grub screws to fix the slitters Note 1 If the image shifts in X slitting direction moving to the gauge releasing the plastic head screws and grub screws as per the ruler to offset 2 Side tr...

Page 32: ...ng Rollers Remove the gauge and move the slitter to sides Use the Slitter 2 and Slitter 3 to hold the paper edges The distance between paper edge and slitter blade is about 5mm And move the deflecting...

Page 33: ...heet sides slitter 2 and slitter 3 will be used for trimming But they have a limit for trim width 3 6 or over 15 mm If side trim is 7 14 mm or less than 3mm paper piece has some risks going into slitt...

Page 34: ...he pad is new it is essential to perforate the pad for some times without paper to make some trace on it Or it is not easy to perforate through paper sheet 5 7 3 Crease Depth Adjustment Crease depth i...

Page 35: ...is not balance on both sides To adjust the Depth Open the top cover and you will see following picture Adjust screws clockwise crease depth becomes shallow adjust screws anticlockwise crease depth bec...

Page 36: ...MCC 35 32 Chapter 6 CUTTING FORMAT 6 1 Metric Version 6 1 1 A3 90 48...

Page 37: ...MCC 35 33 6 1 2 A3 90 50...

Page 38: ...MCC 35 34 6 1 3 A3 90 54...

Page 39: ...MCC 35 35 6 1 4 SRA3 90 48...

Page 40: ...MCC 35 36 6 1 5 SRA3 90 50...

Page 41: ...MCC 35 37 6 1 6 SRA3 90 54...

Page 42: ...MCC 35 38 6 1 7 SRA3 85 210...

Page 43: ...MCC 35 39 6 1 8 SRA3 85 210 C1...

Page 44: ...MCC 35 40 6 1 9 SRA3 90 210...

Page 45: ...MCC 35 41 6 1 10 SRA3 90 210 C1...

Page 46: ...MCC 35 42 6 1 11 SRA3 A3 C1...

Page 47: ...MCC 35 43 6 1 12 SRA3 A3 C2...

Page 48: ...MCC 35 44 6 2 Imperial Version 6 2 1 DIG 3 5 2...

Page 49: ...MCC 35 45 6 2 2 DIG 3 5 5...

Page 50: ...MCC 35 46 6 2 3 DIG 3 5 8...

Page 51: ...MCC 35 47 6 2 4 DIG 5 8...

Page 52: ...MCC 35 48 Chapter 7 TROUBLE SHOOTING 7 1 Show warning C 1 C 1 Top Cover Open Please check top cover is closed well...

Page 53: ...er Jam at Infeed Roller 1 Press or to drive the jammed paper out 2 Check if the paper is out of the spec 100gsm 350gsm 3 Remove the gauge to check if there is paper piece covering the sensor 4 Clean t...

Page 54: ...r Jam at Outfeed Roller 1 Press or to drive the jammed paper out 2 Check if the paper is out of the spec 100gsm 350gsm 3 Remove the gauge to check if there is paper piece covering the sensor 4 Clean t...

Page 55: ...is out of the spec 100gsm 350gsm As for crease die the spec is 100 300gsm 4 Check if CR depth is too deep and adjust it referred to 5 7 3 7 5 Show Error E 2 E 2 Cut Motor Error 1 Restart the machine...

Page 56: ...sheet 2 Press Mode Key to INC DEC Ratio Screen Increase the Ratio data by pressing and it will increase by 0 1 each time and run one sheet to check until the color edge is nearly the same 3 If the co...

Page 57: ...llers Clean rollers with wet cloth when rollers are obviously seen dust on them 8 1 2 Clean Sensors Clean Sensors with air gun or soft cloth while machine used for long time 8 2 Technician Maintenance...

Page 58: ...and tear this does not cover film jams misfeeds or other operator related errors which would be chargeable Your MCC 35 is covered against manufacturing defects it does not cover against any damages c...

Reviews: