


www.ultramagicard.com
AVALON and AVALON DUO Printer USER MANUAL
Page 16 of 31
Security:
Print Overcoat:
When enabled, a
thin transparent layer
of Overcoat will be
applied to the card design at the
end of the printing
process
. This overcoat
protects
the printed image
from
fading and scratching
. Applying overcoat to a card design
does not add any more cost to the printing process, and it is
enabled by default
. If it is disabled you will be
warned
about removing the protective layer, the only benefit of
disabling Overcoat is a minor increase in print cycle speed
but it is
not recommended
due to the
loss of protection
.
When
Print Overcoat
is
enabled
, the areas of the card that are protected by overcoat can be configured by clicking on the
‘Overcoat Options’
button.
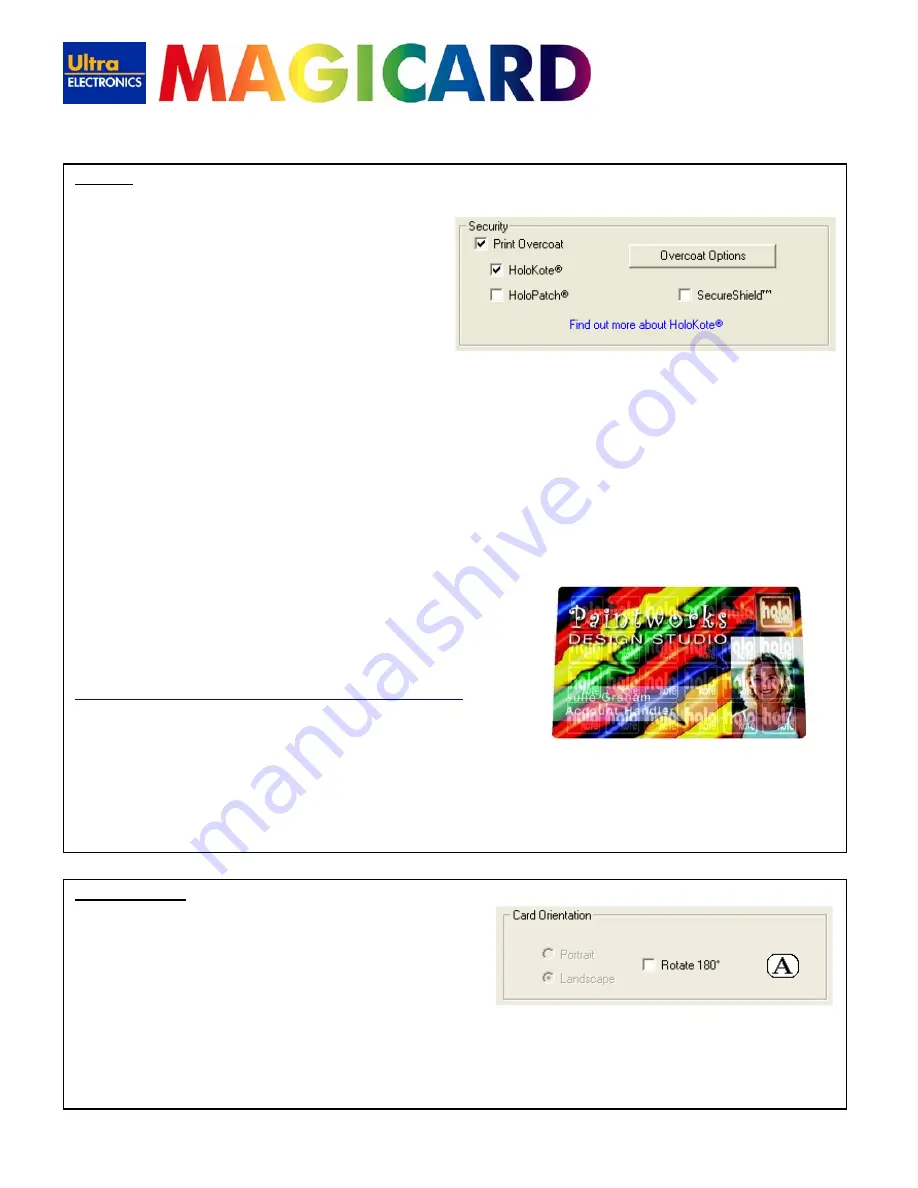
HoloKote™:
When enabled, an
anti-copying watermark
is printed
across the entire card surface in a 4 x 6 grid (24 evenly spaced icons
that are 158 x 149 pixels in size). This watermark becomes visible when the card is viewed at an angle.
The patented
HoloKote™ anti-forgery
card protection
eliminates
the threat from
fake IDs
and is
standard
on all Avalon printers.
There
is
no additional cost
involved in printing
HoloKote
cards
.
HoloPatch™:
This option is
not
available in the Card Back tab.
HoloPatch should only be enabled when you are printing on special HoloPatch cards - these have a blank holographic foil
patch in the top right corner of the card. When enabled, one of the HoloKotesecurity logos is highlighted by the highly
reflective gold 'super-diffuser' patch, making the logo clearly visible under all lighting conditions. HoloKote™ with
HoloPatch™ has a similar appearance to credit card hologram patches.
An example of a card with HoloKote™ + HoloPatch™ enabled:
To learn more about these security features please visit the
Magicard website:
http://www.ultramagicard.com/products-advantages-security.html
SecureShield™:
This option is
not
available in the Card Back tab.
Warning: this option should only be enabled if you use a laminator in conjunction with your regular printer, if you
do not use a laminator then you should leave this option disabled.
SecureShield
will perform in a similar way to
HoloKote
in that it will print a
4 x 6
grid of graphic icons onto the card, but
unlike HoloKote it will
not
print the
overcoat
between the graphics, this is done so that the HoloKote watermark is clearly
visible through the laminate film and so that the laminator film on the Sicura can
stick
to the printed card more effectively.
Card Orientation:
Landscape/Portrait:
These options will be disabled if the
Application Determines
Orientation
selection is ticked in the
Printer Tab
.
If your software application is one of the few that does not provide
the user with options to determine page orientation (
landscape or
portrait
) when printing. – untick the
Application Determines
Orientation
box and choose your desired orientation here in the
Card
Front
or
Card
Back
tabs.
(Tip: the orientation options can usually be found in the ‘page setup’ or ‘badge design’ sections of you software application)
Rotate 180°:
When selected, the card design will be
rotated by 180°
when printed onto the card. This option is deselected by default.


