


4
Programming Guide
Installer Quick Menu
Zone Programming
Delays & Passwords
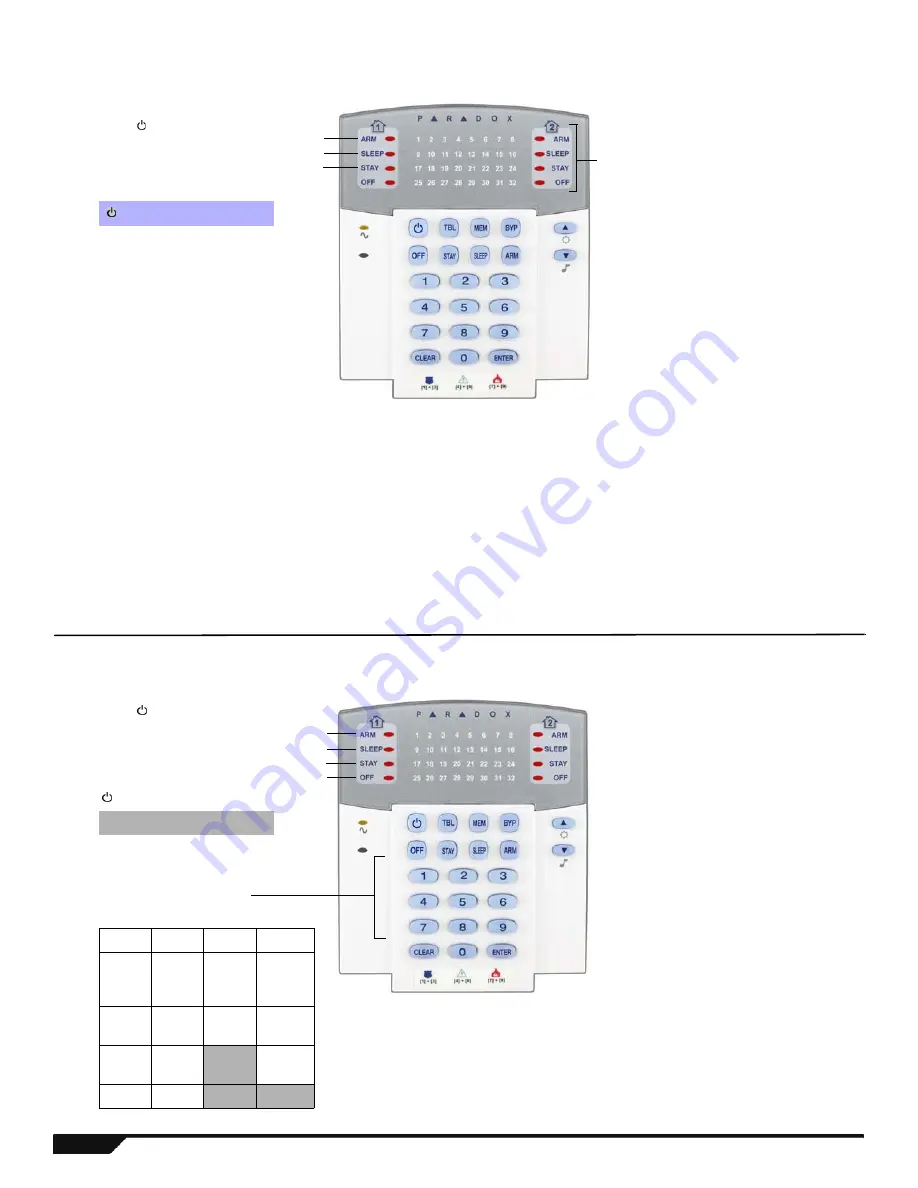
Step 1: Press
[ ]
Step 2: Enter Installer or Maintenance
Code (default: 0000/1111)
Step 3: Select a menu:
[ ] Zone Programming
[
TBL
] Delays & Passwords
[
MEM
] Communicator
[
BYP
] PGM
Step 4: Enter the desired 2-digit zone
(01-32)*
Step 5: Open/close cover, or press
[
ENTER
]
for a hardwire/keypad zone
Step 6: Enter 2-digit zone type (see
below)
Step 7: Press
[1]
and/or
[2]
to assign the
zone to a partition. Press
[
ENTER
]
Zone Types
(Step 6)
00
=
Zone Disabled (default)
08
= Instant
16
= 24Hr Burglary
01
= Entry Delay 1
09
= Instant/Stay
17
= 24Hr Hold-up
02
=
Entry Delay 2
10 =
Instant/Stay/Sleep
18
= 24Hr Gas
03
=
Entry Delay 1/Stay/Sleep
11
= Instant Fire
19
= 24Hr Heat
04
=
Entry Delay 2/Stay/Sleep
12
= Delayed Fire
20
= 24Hr Water
05
= Follow
13
= Instant Fire Silent
21
= 24Hr Freeze
06
= Follow/Stay
14
= Delayed Fire Silent
07
= Follow/Stay/Sleep
15
= 24Hr Buzzer
Step 1: Press
[ ]
Step 2: Enter Installer or Maintenance
Code (default: 0000/1111)
Step 3: Select a menu:
[ ] Zone Programming
[
TBL
] Delays & Passwords
[
MEM
] Communicator
[
BYP
] PGM
Step 4: Select the desired setting by
pressing the corresponding key
[1]
to
[4]
[5]
[7] & [8]
[9]
Step 5: 3-digits
000 to
255
HH:MM*
Code
Tel.# +
[
ENTER
]
Step 6:
YYYY
Confirm
Code
Panel ID
Step 7:
MM
PC
Password
Step 8:
DD
Step 5
Step 6
Step 7
Notes
* The keypad shows the first zone by
flashing its corresponding numerical
LED. When a numerical LED is lit, (not
flashing), the zone is already
programmed.
† If you select a zone that is already
programmed, the status LEDs will
indicate the signal strength of the
selected wireless zone module (1 LED
lit = weak signal, 4 LEDs lit = strong
signal). Also, No LEDs lit = keypad or
panel hardwire zone).
Entry Delay 1 Entry Delay 2 Exit Delay
Bell Cutoff Time & Date Walk Test†
Inst. Code
Mainte.Code Winload Prg
Entry Delay 1 Entry Delay 2 Exit Delay
Bell Cutoff Time & Date Walk Test†
Inst.Code Mainte.Code WinLoad Prg
Notes
* If the hour is between 01 and 12,
select
[1]
for 24Hr format,
[2]
for AM, or
[3]
for PM setting. If the hour is above
12, the system will automatically select
the 24Hr format.
† Press
[6]
in the Delays & Passwords
menu to toggle the Walk Test on and off.
Step 5
Step 6
Step 7
Step 8
Signal Strength LEDs†


