background image

6ZLWFKWKH:L)LWR21SRVLWLRQ,QVLGHWKH:L)LQHWZRUNVWKH:,),6';;;;VKRXOGDSSHDURQWKH

    list.

&OLFNRQWKH:,),6';;;;DQGHQWHU\RXUSDVVZRUGGHIDXOW

4. The word “Connected” will appear under the SSID name of which is an indication that the Android

    Device is connected to the WIFISD.

8.4. Android User Login

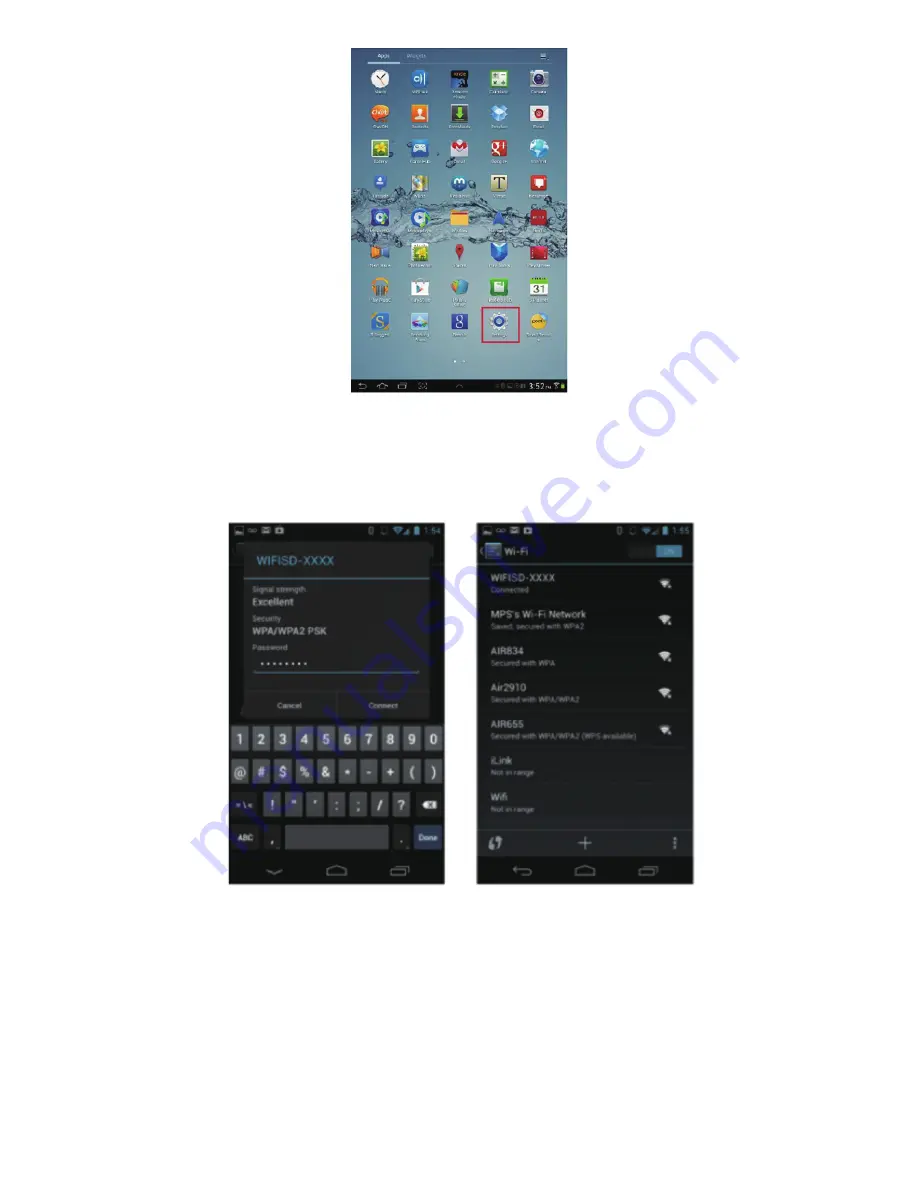
1. Click on the WiFiStor icon to launch the app as seen on the image below.

18

Summary of Contents for Mobile Wi-Fi Pocket Drive

Page 1: ...Mobile Wi Fi Pocket Drive User s Manual www macally com ...

Page 2: ...t to you that if you purchase a product directly from us or from any of our authorized resellers that it will not contain defects which are a result of faulty manufacturer workmanship or materials This warranty subsists for 1 year from the date of purchase Subject to any rights you have under the Australian Consumer Law we will not be liable for defects which are a result of damage or loss caused ...

Page 3: ...c or Windows PC Computer User 15 8 WIFISD Connection with iOS and Android Devices 15 8 1 iOS Devices 15 8 2 iOS User Login 16 8 3 Android Devices 17 8 4 Android User Login 18 9 Using WiFiStor in iOS and Android Devices 20 9 1 iOS Device 20 9 2 Android Device 21 9 3 Setting Up Internet Wi Fi Access Point 23 9 3 1 Wi Fi Setting Interface 23 9 3 2 Modify Device Name 24 9 3 3 Security 24 9 3 4 Interne...

Page 4: ...tions iOS and Android 39 9 10 Copying Transferring File to My Device iOS and Android 41 9 11 Copying Transferring File to My WiFiDisk iOS and Android 43 9 12 Delete Erasing a Single or Multiple Files iOS and Android 45 9 13 Upload Download History and Status 46 9 14 Close WiFiStor App 46 9 14 1 iOS 46 9 14 2 Android 46 9 15 Uninstall WiFiStor App iOS 47 9 15 1 iOS 47 9 15 2 Android 47 10 WIFISD Co...

Page 5: ...unction 55 11 2 Context Menu 56 11 3 Keyboard Shortcuts 58 11 4 Drag and Drop 59 11 5 Information 59 11 5 1 Device Information 59 11 5 2 Storage Information 59 11 5 3 Network Information 60 11 6 Settings 60 11 6 1 User Settings 60 11 6 2 Disk Settings 60 11 7 Network Settings 61 11 7 1 Host Name 61 11 7 2 Wi Fi LAN 62 11 7 3 DHCP Server 63 11 7 4 Internet Settings 63 11 8 Network Services 64 11 8 ...

Page 6: ...11 9 System Settings 65 11 9 1 Time Settings 65 11 9 2 Backup Settings 66 11 9 3 Firmware Upgrade 67 11 9 4 Resetting to factory defaults 69 5 ...

Page 7: ...uct Features s L L VWRUDJH WHFKQRORJ DOORZV LQVWDQW VWUHDPLQJ RI PXVLF YLGHR DQG SKRWR VKDULQJ XS WR XVHUV s LUHOHVV VWUHDPLQJ IURP LQWHUQDO VWRUDJH WR SSOH L26 DQG RRJOH QGURLG SKRQHV DQG WDEOHWV s RPSDWLEOH ZLWK ODVK GULYH 86 KDUG GLVN GULYH DQG 6 FDUGV s 6XSSRUWV 6 0DF 17 6 LQGRZV DQG 7 IRUPDW LQ WKH 6 FDUG RU 86 GULYH s RUNV ZLWK E J Q ZLUHOHVV URXWHUV s RUNV DV D ZLUHOHVV DFFHVV SRLQW s 6XSSR...

Page 8: ...ce Battery Capacity Operating temperature Internet Connection PC Operating System Requirements Windows Mac PP PP PP 802 10 b g n 72Mbps at 20MHz 150Mbps at 40MHz Micro USB 2 0 for data transfer and charging 2600mAh The normal operating temperature of the device is between 5 and 35 Degrees Celsius 3 9LVWD LQGRZV LQGRZV 26 DQG ODWHU 7 ...

Page 9: ...nds to take effect ON Wi Fi Pocket Drive Mode Approx 45 seconds to boot up OFF USB SD Reader Mode Approx 6 seconds to shut down Micro USB USB recharging port SD reader to a computer USB Host 86 VWRUDJH ODVK GULYH RU KDUG GULYH 3RZHU RXWSXW WR FKDUJH PRELOH GHYLFHV Internet Green LED Connected to internet Battery Green LED Red Low battery Flashing Green Charging Solid Green Drive on Off Battery ful...

Page 10: ...actory settings such as WiFi network name WiFi password Admin password IP address etc while WIFISD is powered on in Wireless mode use a paper clip to press Reset button for 5 seconds Then let WIFISD reboot automatically to restore to default settings Below is default factory settings LEDs Battery LED LED Off Battery full or Drive off UHHQ RORU On Drive on Slowly flashing Battery charging Flashing ...

Page 11: ...timedia files into the SD card Flash drive or USB external hard drive and use them with WIFISD respectively QVHUW D 6 FDUG ZLWK PLQLPXP FDSDFLW IXOO LQWR WKH 6 VORW RI 6 XQWLO RX IHHO WKH FOLFN If you have small miniSD and microSD cards please use a SD card adaptor then insert it into the SD slot of WIFISD First turn off WIFISD then connect it into any USB port in your computer with included Micro...

Page 12: ...LD ILOHV VXFK DV PRYLH PS DQG SKRWRV LQWR 86 KDUG GULYH LVFRQ nect USB external hard drive from your computer plug USB hard drive into the USB type A port of WIFISD press power button for 2 seconds to turn on WIFISD Use it as a Wi Fi pocket drive Note A 3 5 USB external hard drive must be powered by its own AC adaptor A 2 5 USB hard drive might be powered by WIFISD however it will drain WIFISD int...

Page 13: ...ter user Connect your USB external hard drive to a Mac Computer R WR 0DF 26 SSOLFDWLRQV 8WLOLWLHV ODXQFK LVN 8WLOLW VHOHFW QHZ 86 GLVN OLVWHG FOLFN 3DUWLWLRQ choose 1 Partition and the following formats Mac OS Extended Journaled or case sensitive click Apply to start the formatting process When disk formatting is completed the drive will mount on the desktop User may create folders per file type i...

Page 14: ...WIFISD into the computer s USB port A full charge will take approximately 3 to 5 hours depending on the output current of USB power source and other factors During charging the battery LED will be flashing you can turn Wi Fi drive on and use it When the battery is fully charged the battery LED turns off you can keep the Wi Fi drive connected to charger or remove it to take it on the go 7 WiFiStor ...

Page 15: ...cess WIFISD storage wirelessly to stream music video and photos simultaneously 7 1 For iOS user Please go to App Store search for the keyword WiFiStor or Macally select WiFiStor app and install it into iOS devices Please note iOS 5 0 and above is required 7 2 For Android user Please go to Play Store search for the keyword WiFiStor or Macally select WiFiStor app and install it into your devices 14 ...

Page 16: ...desktop to run 8 WIFISD Connection with iOS and Android Devices 8 1 iPhone iPad iPod touch 1 Turn on the WIFISD Wait for a few minutes to complete the initialization process The blue Wi Fi LED on the device should remain solid indicating that the initialization process has been completed 2 Click on the Settings icon on the iOS device desktop as seen on the screenshot OLFN RQ L L QVLGH WKH L L 1HWZ...

Page 17: ...play 8 2 iOS User Login 1 Click on the WiFiStor icon to launch the app as seen on the image 2 Enter the Admin password that you assigned during the configuration process blank by default The password is only required during the first login The device remembers the password and there is no need to enter it again the second time you login 16 ...

Page 18: ...FISD 8 3 Android devices 1 Turn on the WIFISD Wait for a few minutes to complete the initialization process The blue Wi Fi LED on the device should remain solid indicating that the initialization process has been completed 2 Click on the Settings icon on your desktop as seen on the screenshot 17 ...

Page 19: ...H list OLFN RQ WKH 6 DQG HQWHU RXU SDVVZRUG GHIDXOW 4 The word Connected will appear under the SSID name of which is an indication that the Android Device is connected to the WIFISD 8 4 Android User Login 1 Click on the WiFiStor icon to launch the app as seen on the image below 18 ...

Page 20: ...ss default blank The password is only required during the first login The device remembers the password and there is no need to enter it again the second time you login 3 Once the password has been entered correctly you will be automatically connected into the WiFiStor menu 19 ...

Page 21: ... WiFiStor menu My Device is the iOS device that you are using to access the WIFISD Few buttons that can be found inside the Main Screen as listed below My Device Main Screen View By default the Documents folder Music folder Photos Folder Movies folders and iPhone Photos folder are available to easily organize your files inside the My Device 20 ...

Page 22: ...n Screen as listed below Home Button back to the main screen View Button change to List or Thumbnail view Settings Button change the WIFISD configuration Back Button back to previous screen Manage Button to choose one or more files My WiFiDisk the WIFISD Storage My Device the device that you are using to access the WIFISD or the Local Storage e g iPad iPhone iPod touch Status Button to view the Tr...

Page 23: ...ments folder Music folder Photos Folder Videos folders and SDCard folder are available to easily organize your files inside the My Device WiFiStor Main Screen View Home Button back to the main screen View Button change to List or Thumbnail view 22 ...

Page 24: ...are using to access the WIFISD or the Local Storage Status Button to view the Transfer status list About information now playing music and exit the app My WifiDisk the WIFISD Storage 9 3 Setting Up Internet Wi Fi Access Point 9 3 1 Wi Fi Setting Interface Click on to change the Wi Fi Disk configuration This feature only appears when switched to the My WiFiDisk 23 ...

Page 25: ... name if you want to change Wi Fi network name After input the new device name the Set button appears click on the Set button to save the new device name 9 3 3 Security Under WiFiSD Settings the security options appear The Wi Fi Disk supports the following security 24 ...

Page 26: ...ettings you will find the Internet Access The WIFISD supports the Wireless Access only which means it connects to your existing wireless router or Access Point wirelessly and allows your phone tablet and computer to connect to internet through WIFISD as an internet pass through Below please find the picture showing the wireless access All available Wi Fi Network would be listed select your previou...

Page 27: ...ection and surf via iOS or Android web browser 9 4 Playing Music Tip It is highly recommended to create a folder or folders where to copy all your media files into the WIFISD for ease of use and file organization The Music or Audio files can be played regardless if you are inside the My WiFiDisk or My Device Simply locate the music or audio file that you would like to play Click on the file and yo...

Page 28: ...ying the music or audio file Click again the will pause stop playing the music When clicked it will exit the music player interface for android device and iPhone Five play modes a Play current song the music ends after playing current song b Repeat current song the player will always play the current song and it will only stop playing when the button is clicked c Shuffle all songs the music or the...

Page 29: ... iOS Tip It is highly recommended to create a folder or folders where to copy all your movie files into the WIFIHDD for ease of use and file organization The movie or video files can be played regardless if you are inside the My WiFiDisk or My Device Simply locate the movie or video file that you would like to play Click on the file and your movie will automatically play as seen on the screenshot ...

Page 30: ...ss and hold to fast forward the movie while playing 7 When clicked it will start playing or resume playing the movie 8 When clicked it will pause the movie from playing 9 5 2 Android Tip It is highly recommended to create a folder or folders where to copy all your movie files into the WIFISD for ease of use and file organization The movie or video files can be played regardless if you are inside t...

Page 31: ...rs where to copy all your pictures into the WIFISD for simple use and file organization Note The WIFISD currently supports jpg tiff gif and bmp images The supported images can be viewed as thumbnails or as a list as seen on the screenshot below Any images that are not supported can be viewed as a generic thumbnail or icon Click on any pictures or images and it will automatically play Afterwards th...

Page 32: ...ow s OLFN WKH EXWWRQ WR VWRS WKH VOLGHVKRZ IURP SOD LQJ DQG SUHVV DJDLQ WR FRQWLQXH SOD LQJ s OLFN WKH EXWWRQ WR UHVWDUW RU WR UHSOD WKH VOLGHVKRZ s OLFN WKH EXWWRQ WR SOD WKH VOLGHVKRZ RQFH DQG LW ZLOO VWRS DW WKH ODVW LPDJH RU SKRWR s OLFN WKH EXWWRQ WR UHWXUQ IURP WKH SUHYLRXV VFUHHQ Background music can be added while playing the slideshow Click the button as seen on the screenshot below 31 ...

Page 33: ...o play as the background music Click on the to return to the slideshow as seen on the screenshot below s 5HSHDW EXWWRQ WKH EDFNJURXQG PXVLF ZLOO FRQWLQXH SOD LQJ WKH VDPH PXVLF ZKHQ LW LV VZLWFKHG RQ default this option is switched off 9 6 2 Android Tip It is highly recommended to create a folder or folders where to copy all your pictures into the 32 ...

Page 34: ...w Any images that are not supported can be viewed as a generic thumbnail or icon Click on any pictures or images and it will automatically play Afterwards the menu bar shall appear as shown on the picture below Thumbnail view List view There are a few functions that are available to control the slideshow You can swipe your index finger across the screen to manually view the pictures or images or c...

Page 35: ...RU SKRWR s OLFN WKH EXWWRQ WR UHWXUQ IURP WKH SUHYLRXV VFUHHQ Background music can be added while playing the slideshow Click the button as seen on the screenshot below s 6WRS RQWLQXH SOD LQJ EXWWRQ WR VWRS RU FRQWLQXH SOD LQJ WKH EDFNJURXQG PXVLF s 6HOHFW EXWWRQ VHDUFK DQG ORFDWH WKH ILOH RU ILOHV WKDW RX ZRXOG OLNH WR SOD DV WKH EDFNJURXQG PXVLF Click on the to return to the slideshow as seen on...

Page 36: ...lt this option is switched off 9 7 Sharing photos 9 7 1 iOS There are few options to share photos image to your friends and family by email saving to the device Photo Album and upload to Facebook Note Internet connection is required to share photos images via email or accessing any social media network 35 ...

Page 37: ...en selected the selected photo image will be saved into the Photo Album of the device 3 Upload to Facebook when selected you will be directed to the Facebook login screen The Face book app must be installed on your device Facebook login and password is required 9 7 2 Android Sharing photos images using your Android device will vary depending on the apps installed on your device Note Internet conne...

Page 38: ...vailable to share your photos images 1 Share button when selected a list of app installed on your Android will appear as seen on the screen shot below You may select from the list which app to launch 2 Save Photo button when selected the selected photo image will be saved into the device Photo DOOHU 9 8 Opening viewing documents 9 8 1 iOS 37 ...

Page 39: ...automatically open the supported file Click the button to return from the previous screen or click the button to send the file via email as seen on the screenshot below Note Internet connection is required to send emails Click the E Mail button the default email app will launch automatically and the selected document will be sent as an attachment 38 ...

Page 40: ...the file that you wish to open view This will automatically open the file using the default viewer or the installed app on your Android device as seen on the screenshot Note Internet connection is required to send emails 9 9 Copy Delete Download Upload functions You may click on the button at any time to share delete download and upload files As seen on the screenshots below the will appear at the...

Page 41: ...their functions Click once all the files will be selected The icon will turn into yellow color and a check mark will appear on every file Click once again all the files will be unselected The check marks are invisible Tip You may select a single or multiple files by clicking on the thumbnail As well you may click and 40 ...

Page 42: ...as the list of files that were copied transferred successfully When clicked any selected files will be deleted 9 10 Copying transferring file to My Device Once you get connected into the WiFiStor you can copy transfer a single or multiple files into the local storage My Device 1 Click on 2 Use your index finger to select one or more files You may use the to select all files to be copied transferre...

Page 43: ...creenshot below The folder name can be minimum 1 character in length and maximum of 26 characters Click the Cancel button to exit 5 Click on the Confirm button to start copying transferring files as seen on the screenshot below Note Successfully copied transferred files will be listed below inside the Successful Transfers window as seen on the left screenshot Click on the Clear button to remove or...

Page 44: ...n to the previous screen Once done click on the to exit 9 11 Copying transferring file to WIFISD Make sure you are in the My Device 1 Click on 2 Use your index finger to select one or more files You may use the to select all files to be copied transferred 43 ...

Page 45: ...OGHU VLPSO click on the New Folder button Enter the new folder name inside the box and click the Create button as seen on the screenshot below The folder name can be minimum 1 character in length and maximum of 26 characters Click the Cancel button to exit 5 Click on the Confirm button to start copying transferring files as seen on the screenshot below into the WIFISD 44 ...

Page 46: ...ased whether you are in My Device or in My WiFiDisk 1 To delete files click on the 2 Use your index finger to select a single or multiple files You may click on the to select all files to delete erase 3 Click on the to delete or erase the selected file or files A warning message will appear on the screen to confirm file deletion as seen on the screenshot below Click OK to continue deleting files 4...

Page 47: ...hone iPad devices simply press the Home key on your Apple Device To close the app click on the Home key twice and the list of app will appear at the bottom of your device Click and hold the application icon until the minus sign appears at the top corner of the app icon Click on the minus sign to remove the app as seen on the screenshot below 9 14 2 Android To exit from using the WiFiStor App Andro...

Page 48: ...le device 9 15 2 Android To uninstall the WiFiStor app from your Android mobile devices see the instructions below Note Uninstalling app on the Android devices will vary Please consult your mobile device manual prior to removing any application 1 Click on the Settings icon from your desktop R LQWR WKH DSSOLFDWLRQ PDQDJHU 3 Locate and select the WiFiStor app 4 Click on the Uninstall button 5 A warn...

Page 49: ...fety please change your password after successful connection Once you have successfully connected to WIFISD you may now run the WiFiStor for Windows to search for your device and complete the configuration process With our included WiFiStor for Windows you don t need to install any software simply double click on below icon to start it The Wi Fi Finder allows you to easily search your WIFISD 10 1 ...

Page 50: ... WIFISD on the list of devices connected in your network click on the Refresh button to update the device list Select the WIFISD on the list and then click on the Log In button to enter the web Interface 10 1 2 My Storage 49 ...

Page 51: ...il the Wireless LED stops flashing Enable the Wi Fi feature on your Mac and open the WIFISD wireless Net ZRUN RQQHFWLRQ 6HOHFW WKH 6 ZLUHOHVV FRQQHFWLRQ 0DF GHIDXOW ZLUHOHVV 66 DQG password 12345678 Once you have successfully connected to WIFISD you may now run the WiFiStor for Mac to search for your device and complete the configuration process With our included WiFiStor for Mac you don t need to...

Page 52: ... appears After input the correctly user name admin and password blank by default you may access the WiFiSD by samba You may operate all files and directories on WIFISD by samba such as create edit delete copy move rename Furthermore you can transfer the data between Mac and the WIFISD such as upload the data from Mac into the WIFISD or download the data from the WIFISD into Mac 10 3 WIFIHDD Config...

Page 53: ...will guide you through the step by step process on configuring the WiFiDisk as seen on the screenshot above You may cancel this process by FOLFNLQJ RQ WKH q r DW WKH WRS ULJKW FRUQHU RI WKH ZLQGRZ I RX FDQFHO WKH L DUG LW ZLOO NHHS WKH factory default settings of your WIFISD Click on the Next button to continue Internet Setting through another connection with an available network You can choose in...

Page 54: ...ddress s VHOHFWLQJ 3 WKH KRVW ZLOO SURYLGH DQ DXWRPDWLF 3 DGGUHVV WR FRQQHFW WR WKH LQWHUQHW s VHOHFWLQJ 0DQXDO RX KDYH WR PDQXDOO DVVLJQ DQ 3 DGGUHVV WR FRQQHFW WR WKH LQWHUQHW OLFN RQ WKH q r EXWWRQ LI RX ZLVK WR FDQFHO DQG H LW WKLV ZLQGRZ Note If you cannot connect with another network ask your network administrator for assistance Click on the Save button to continue the process The next step ...

Page 55: ...ask of 255 255 255 0 The IP address can be changed Click on the Next button to change the admin default password Click on the Next button once the password has been modified You may click on the Skip button to keep the default password After finishing the startup wizard the system will start rebooting This process will take 2 minutes see picture below 11 Using WiFiStor in Windows PC and Mac Our bu...

Page 56: ...he user to change the admin password Provides information of the internal hard disk drive Networking Settings allow the user to make modifications and changes to Host Name Wi Fi and LAN DHCP Server and Internet Allows the users to enable and disable the Win File Services Allows the user to make modifications and changes to the Time Settings Create System Backup Firmware Upgrade and Resetting to th...

Page 57: ...opy file or files and paste them into another folder Move button to move a file or files from one location to another Open Download button to open or download a file or files into a specific location If the software installed on your computer supports a specific file type this file will automatically open Otherwise it will ask you to download the file into a specific location Downloading a folder ...

Page 58: ... Rename the folder as seen on the screenshot below 3 Selecting multiple files and right click on the mouse will allow the user to either Copy Cut or Delete files as seen on the screenshot below 4 Right clicking at the bottom of the window as seen below will allow the user to either Paste Create or Upload file or files 57 ...

Page 59: ...k on the blank area inside the window and a pop up menu will appear Select Create Enter the folder name inside the Create Folder window and click on Save Rename Command Right click on the folder or the file name and select Rename This allows the user to make changes on the folder or file name Click on the Save after the name has been changed Upload Command Right click the empty area inside the win...

Page 60: ...t in Web Management Interface simply click and hold on the file inside the main window and drag it to any folders available inside the Folders tree 11 5 Information Provides detail information regarding the hardware condition network status and storage information 11 5 1 Device Information Information about CPU Model and Hostname 11 5 2 Storage Information Information about capacity and the volume...

Page 61: ...cters to maximum 32 characters in length Click on the Save button the password has been changed 7KH GHIDXOW 8VHU 1DPH LV DGPLQ DQG WKH SDVVZRUG LV EODQN E GHIDXOW OLFN RQ WKH q r WR FDQFHO DQG exit 11 6 2 Disk Settings Click on the Disk thumbnail This window provides information regarding the internal hard drive as seen on the screenshot below It provides detailed information including firmware ve...

Page 62: ...rnal hard disk drive total and available capacity OLFN RQ WKH q r WR H LW 11 7 Network Settings 11 7 1 Host Name The Hostname is a name that is assigned to a device connected to a computer network It must begin with a letter and followed by a combination of letters and numbers Length must be between 2 and 8 characters 61 ...

Page 63: ...t setting is set to Auto There are 13 available channels to choose from s 0RGHV 7KH GHIDXOW VHWWLQJ LV E J Q RX FDQ DOVR PDQXDOO VHW WKH PRGHV WR 0ESV 802 11b 54Mbps 802 11g and 150Mbps 802 11n s 6HFXULW The None WPA PSK WPA2 PSK Mixed WPA WPA2 PSK default are available s 3DVVZRUG WPA PSK WPA2 PSK Mixed WPA PSK WPA2 PSK Minimum 8 Maximum 63 characters s 3 GGUHVV The default IP address is set to 10...

Page 64: ... option is enabled This option can be disabled if needed and the IP address can be manually assigned OLFN WKH q6DYHr EXWWRQ DIWHU PDNLQJ DQ FKDQJHV OLFN RQ WKH q r WR H LW DQG FDQFHO Click the DHCP List button and it will provide a list of all the computers and devices connected to your WiFiDisk Device Please see the screenshot below 11 7 4 Internet Settings through another connection with an avai...

Page 65: ...ress Select either DHCP or Manually assign an IP address s VHOHFWLQJ 3 WKH KRVW ZLOO SURYLGH DQ DXWRPDWLF 3 DGGUHVV WR FRQQHFW WR WKH internet s VHOHFWLQJ 0DQXDO RX KDYH WR PDQXDOO DVVLJQ DQ 3 DGGUHVV WR FRQQHFW WR WKH internet Note If you cannot connect with another network ask your network administrator for assistance 11 8 Network Services Windows sharing and network services are available to ac...

Page 66: ...lly synchronize with an Internet Time Server This will automatically update the time when the WiFiDisk is connected to the internet The Time Sync Frequency can be set to every day every 2 days every 3 days up to every 7 days The automatic time synchronization can be switched off and apply the PC time instead Applying the PC time will automatically adjust the time and date based on the PC time See ...

Page 67: ...ote that this process will not create a backup of the WIFISD Simply click on the Save button to create the backup This process will create a bin gz or bin file of which can be used to restore the current settings of the WIFISD Click the Save button to save the backup file on your computer as seen on the screenshot below 66 ...

Page 68: ... on the screenshot below Click default the Save button to restore A warning message will appear as seen on the screenshot below The device will reboot automatically once the restore process has been completed and will return to login screen 11 9 3 Firmware Upgrade The device firmware can be upgraded by following the simple steps below 67 ...

Page 69: ...irmware file on your computer and then click on the Open button as seen on the screenshot below 3 The latest firmware update file will appear at the bottom of the folder Click on the Save button to continue updating the firmware Note If you select wrong file format to upgrade there is a warning message ap peared 68 ...

Page 70: ... Resetting to factory defaults will reset all your customized settings or whatever changes you made back to its original settings Simply click on the round button after the Restore to Factory Default Settings Click on the Save button to continue The Warning Message window will appear The WIFISD will automatically reboot once the restoring to the factory default settings have been completed See the...

Page 71: ...Note This process will reset the Wi Fi SSID and the password including the admin password 70 ...

Reviews: