background image

Selecting a PC Host Serial Port

In order to operate as a PC MIDI Interface, the BiPort requires connec-
tion to a PC serial port.  PC serial ports are also known as “COM” ports.
The COM port configuration for each computer varies.  Most computers
have one or two COM ports, and some are configured to have 4 or more.
Windows knows these COM ports as “COM1”,  “COM2”,  “COM3”,
“COM4” and so on.  Serial ports are usually male (pins sticking out) DB-
type connectors, and can have either 9 or 25 pins.  Sometimes a COM
port will not actually be present at the rear of your computer; it may
instead be used internally by a modem or other device.

The COM ports on the back of your computer might be labeled 1 and 2,
or A and B.  If not, you should check your computer manual to verify the
actual configuration.  If you have a modem in your system, you should
check to see what COM port it is using.  A simple way to do this is to go
to the Control Panel, open the Modems icon, and click Properties.  

NOTE:  Usually odd numbered COM ports share the same
IRQ as COM1, and even numbered COM ports share the
same IRQ as COM2.  All COM ports use different I/O
addresses.  

Although the IRQ and I/O address (also referred to as Input/Output
range) are fairly standard, you may view these settings within Windows
by going to the Control Panel, opening System, and clicking Device
Manager.  Open the Ports list by clicking the plus sign, click the Com
port, click Properties, and then click Resources.

Try to select a COM port for BiPort use that does not use the same IRQ
as some other installed device.  Also, select a COM port that is not being
used by a mouse or modem.

Selecting a Mac Host Serial Port

In order to operate as a Mac MIDI Interface, the BiPort requires connec-
tion to one of the Mac serial ports.  The BiPort may be connected to
either a modem or printer port of the Mac.  Either port may be used -
just be sure the MIDI program you are using is set to use the same port
you have your BiPort 2x4s connected to. 

16

Summary of Contents for Biport 2x4

Page 1: ...nnection 15 Selecting a PC Host Serial Port 16 Selecting a Mac Host Serial Port 16 About the Serial Cables 17 Diagnostics Software 17 PC Diagnostics Application 17 Mac Diagnostics Application 19 Test...

Page 2: ...Bits 32 Menus 33 Configuring Applications to Use BiPort 2x4 35 SMPTE MIDI Time Code Tutorial 36 What is SMPTE Time Code 36 What is MIDI Time Code MTC 37 About Frame Rates 37 What Frame Rate and Setti...

Page 3: ...off and on the user is encouraged to try to correct the interference by one or more of the following measures 1 reorient or relocate the receiving antenna 2 increase the separation between the equipm...

Page 4: ...hannels of MIDI output and 32 channels of MIDI input Large high performance data buffers ensure full MIDI throughput with no data loss Built in SMPTE Time Code reader writer regenerator supports all s...

Page 5: ...ion are included with your BiPort 2x4s To install these programs read this manu al and carefully follow the installation procedures If you have any questions comments or suggestions about BiPort 2x4s...

Page 6: ...TE writer sets the Write Offset time 5 Locked and Writing LEDs The Locked LED indicates SMPTE reader regenerator status the Writing LED indicates SMPTE writer status 6 Format button Manually selects t...

Page 7: ...or MIDI Output channels B C and D 2nd 3rd and 4th outputs of 4 Theory of Operation The BiPort 2x4s may act as a stand alone SMPTE reader writer regener ator or MIDI SMPTE Interface to a host computer...

Page 8: ...r the BiPort may be com manded into Interface Mode by that host computer by launching a MIDI application that utilizes the BiPort driver When it does it will indicate the host type by lighting either...

Page 9: ...rt offset and User Bits The power on defaults for these parameters are 30 fps 01 00 00 00 and 00 00 00 00 respectively Important Powering down the BiPort 2x4s will reset all internally stored values t...

Page 10: ...Powering down the BiPort 2x4s will reset all internally stored values to their factory defaults The SMPTE Reader is capable of decoding User Bits from the incoming SMPTE stream The most current User B...

Page 11: ...e the BiPort transparent to the Mac the Mac may communicate directly with a modem or printer that is attached to the Mac Thru port on the back panel of the BiPort NOTE The Mac Thru function does not w...

Page 12: ...Typical Stand Alone Setup Fig 1 1 MIDI Hardware Sequencer MIDI Out MIDI In Tape In Tape Out D A C B B A Mac PC MIDI Interface with SMPTE BiPort 2x4sTM SMPTE Out In 12...

Page 13: ...used to manually configure and control the BiPort Before connecting each piece of equipment it is a good idea to verify that each piece is powered down After all connections are made apply power to ea...

Page 14: ...MIDI Out MIDI In Master Keyboard Master Keyboard MIDI Sound Module 1 MIDI Out MIDI In MIDI Sound Module 2 Modem or Printer Mac Only Mac or PC Serial Port on PC Modem or Printer Port on Mac 1 MIDI In M...

Page 15: ...iPort 2x4s may be left attached to a computer that is turned off However the BiPort 2x4s should always be powered up before the computer The BiPort to Host serial cable should not be connected or disc...

Page 16: ...this is to go to the Control Panel open the Modems icon and click Properties NOTE Usually odd numbered COM ports share the same IRQ as COM1 and even numbered COM ports share the same IRQ as COM2 All...

Page 17: ...esting the BiPort to PC connection Note The PC diagnostic program may be run from either the true DOS prompt or from a DOS box in Windows It will not operate on a Mac computer To run the program inser...

Page 18: ...In jack to the SMPTE Out jack using a single standard male to male 1 4 phone cable This cable will be used to loop back and verify SMPTE data Move the cursor down to the Run Tests line and press Enter...

Page 19: ...gnostic test for Macintosh computers Running the test is almost identical to running the test for the PC as described on pages 18 20 in your BiPort manual The Diagnostic test page will show you the De...

Page 20: ...serial port and it is enabled You should disable the infrared function via the BIOS CMOS Setup of your computer s motherboard 2 Internal Buffers Test This test verifies the BiPort to host connection...

Page 21: ...ted to COM1 on your computer and have IRQ 4 set in BI24DIAG EXE but it fails the Receive Interrupt Test you could have an internal modem connected COM1 or another odd numbered COM port using the same...

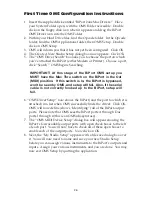
Page 22: ...es find one or more PnP devices select No the device isn t in the list and select Next The BiPort 2x4s is not PnP and will never show up in this list 5 Windows then asks if you would like it to search...

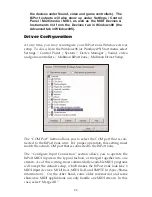
Page 23: ...2x4s 8 When the next dialog appears click on Finish Windows will copy and install the Windows driver files 9 Next you will be prompted for the BiPort 2x4s setup The driver COM Port setting defaults to...

Page 24: ...ver Setup The COM Port listbox allows you to select the COM port that is con nected to the BiPort 2x4s unit For proper operation this setting must match the actual COM port that is connected to the Bi...

Page 25: ...site and you will find a link to it on the drivers page of the Midiman website To Install the BiPort on your Mac first attach one side of the supplied Mac serial cable or any standard Mac serial cable...

Page 26: ...If this switch is In the BiPort is bypassed won t be seen by OMS and setup will fail Also if the serial cable is not correctly hooked up to the BiPort setup will fail 6 OMS Driver Setup now shows the...

Page 27: ...BiPort 2x4s are both Windows and Macintosh Remote Control software that enable you to configure and control the BiPort 2x4s SMPTE functions from your computer The software enables you to set user bits...

Page 28: ...suggest you read the section SMPTE MIDI Time Code Tutorial before reading this section just to familiarize yourself with some basic ideas and terminolo gy SMPTE Setup The primary screen of the BiPort...

Page 29: ...ces File Load Config Retrieve a previously saved SMPTE configuration A factory configu ration is included during program installation If the Save current con figuration before loading new one box is c...

Page 30: ...y of their work On the other hand if you are irri tated by the confirmation dialog and don t want to be re asked each time you choose to exit the program uncheck this selection Exit Quit the program I...

Page 31: ...t flywheel and write start time offset as well as start and stop SMPTE writing Different Remote Control software settings may be saved to disk as a Setting and recalled or reloaded at a later time To...

Page 32: ...ritten and has no effect on SMPTE reading When reading SMPTE programs or prod ucts will normally display this frame rate as 30 non drop since they usually cannot tell the difference between 30 non dro...

Page 33: ...Control mode It is accessible when using the BiPort diagnostics and can be used to close the diagnos tics when you are through Clicking the square in the left corner of the diagnostic box will also c...

Page 34: ...user bit values and will remain in the clipboard while moving from file to file within the application The Hardware Menu Clicking on Current Status will display the OMS version that is in use plus th...

Page 35: ...re Inputs BiPort 24s Input A BiPort 24s Input B BiPort 24s Sync Status NOTE If the inputs are set up in the driver to be merged you will see only one BiPort MIDI input device BiPort 24s In A B S Outpu...

Page 36: ...E is a time coding standard which was developed in 1967 by the Society of Motion Picture and Television Engineers SMPTE to be used in video editing SMPTE attaches a unique time stamp 80 bits of infor...

Page 37: ...e is constructed that time value is two frames old and it would seem that any synchronized application would always be two frames behind Fortunately most sequencer programs add two frames to the recei...

Page 38: ...eo have different frame rates While in Europe and all PAL countries black and white and color video have the same frame rate of 25 frames per second What Frame Rate and Settings Should You Use The fol...

Page 39: ...ay read the User Bits there as well The BiPort 2x4s is capable of reading and writing SMPTE User Bit groups U1 through U8 The values of the User Bits output during writ ing may be set with the Remote...

Page 40: ...o a specific number of seconds These programs will automatically sync up to an incoming MTC source for that pre roll amount and then start playing Flywheeling Due to the nature of magnetic tape someti...

Page 41: ...pre roll before your sequence starts at 01 00 00 00 3 Optionally you may now set the User Bits User Bits are not a mandatory requirement and if you don t need to set them the BiPort 2x4s will default...

Page 42: ...enerating time code 10 Continue recording several minutes of SMPTE stripe Naturally you will need a stripe that is longer than the piece you are going to sync It is safer to record a stripe that is to...

Page 43: ...eaming in from this port and sync to it Others such as Master Tracks require you to designate which input port MTC is coming in on If this is the case make sure that you designate BiPort 2x4s SMPTE In...

Page 44: ...install the MIDI loopback cable or the ports you ve physically looped back have not been properly speci fied in the diagnostic program This test transmits MIDI data out one port and then verifies that...

Page 45: ...izer Make sure that external MIDI device is properly set up and connected to the BiPort SOLUTION 3 The driver may be disabled Go to Settings Control Panel System Device Manager then open up the list u...

Page 46: ...entially data recorded to tape If your recorder uses noise reduction such as DBX or Dolby when writing or reading SMPTE the data may be corrupted and the results may be unacceptable We recommend that...

Page 47: ...best to be in front of the computer in which you are installing the BiPort 2x4s when attempting to reach Midiman Technical Support for help Have the computer powered up with the BiPort 2x4s Drivers an...

Page 48: ...fee The customer will have the option to pay this fee and have the unit repaired and returned or not pay this fee and have the unit returned unrepaired The remedy for breach of this limited warranty...

Reviews: