


TS254SW 17
OPERATION
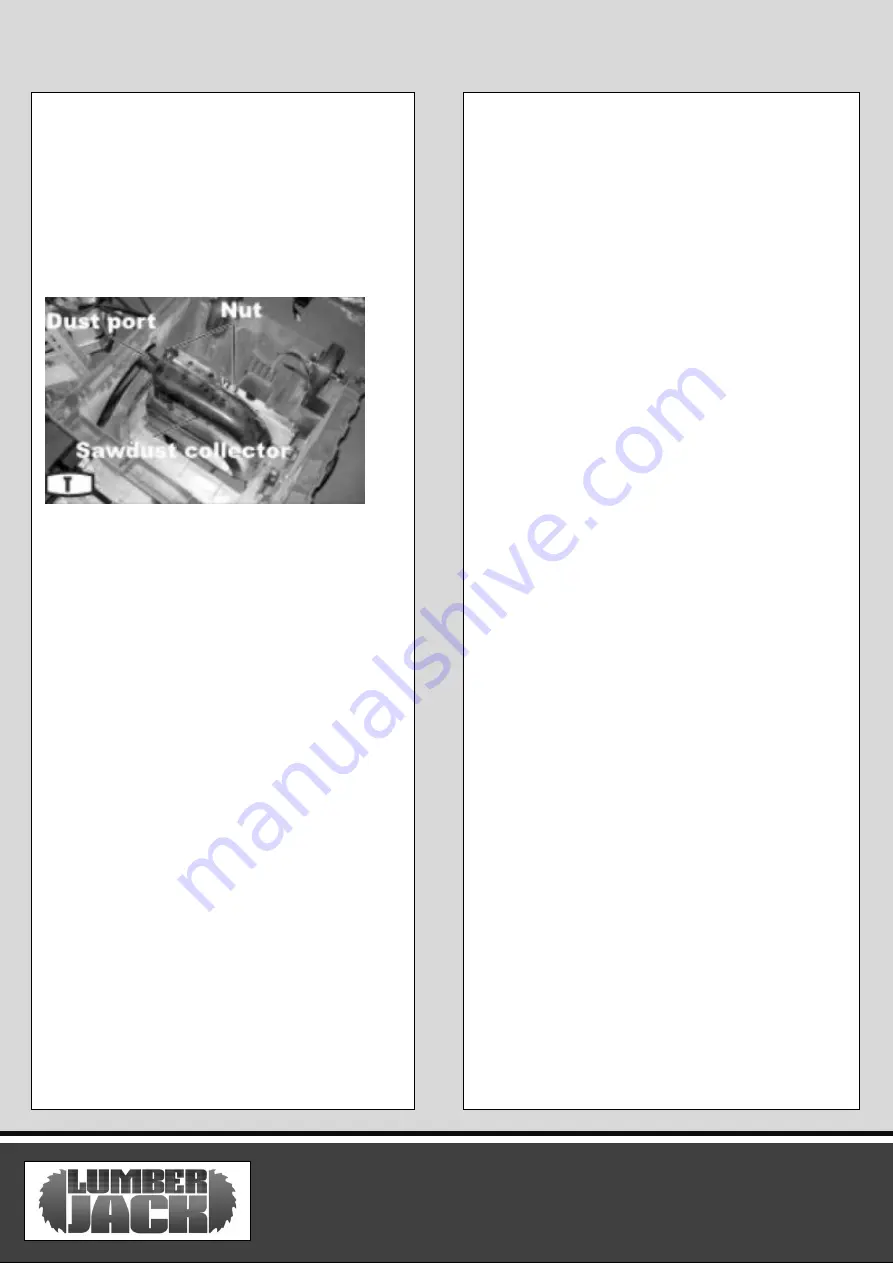
Sawdust collection
This table saw is equipped with a removable sawdust
collector. A dust collection system (sold separately)
can be attached to the dust port to help remove
sawdust from the work area. To remove the sawdust
collector, simply loosen two nuts and remove the
collector from the saw.
Application cutting tips
1. Make sure the kerf is made on the scrap side of
the measuring line.
2. Cut the wood with the finished side up.
3. Always have a proper support for the wood as it
comes out of the blade.
4. Make a test cut for important cuts.
5. Always use the correct blade depth setting. The
top of the blade teeth should clear the top of the
material being cut by 1/8”(3mm) to 1/4”(6mm).
6. Inspect the work-piece for knots or nails before
beginning a cut.
7. Always use clean, sharp, properly-set blades.
Never make a cut with a dull blade.
8. When making a cut, use steady, even pressure.
Never force a cut.
9. DO NOT cut wet or warped lumber.
10. Always hold your work-piece firmly with both
hands or use a push stick or push block.
Summary of Contents for TS254SW
Page 9: ...TS254SW 07 PRODUCT FEATURES ...
Page 30: ...TS254SW 28 Parts Diagram ...
Page 32: ...TS254SW 30 Parts Diagram ...
Page 33: ......
Page 34: ......


