Setup Your Printer
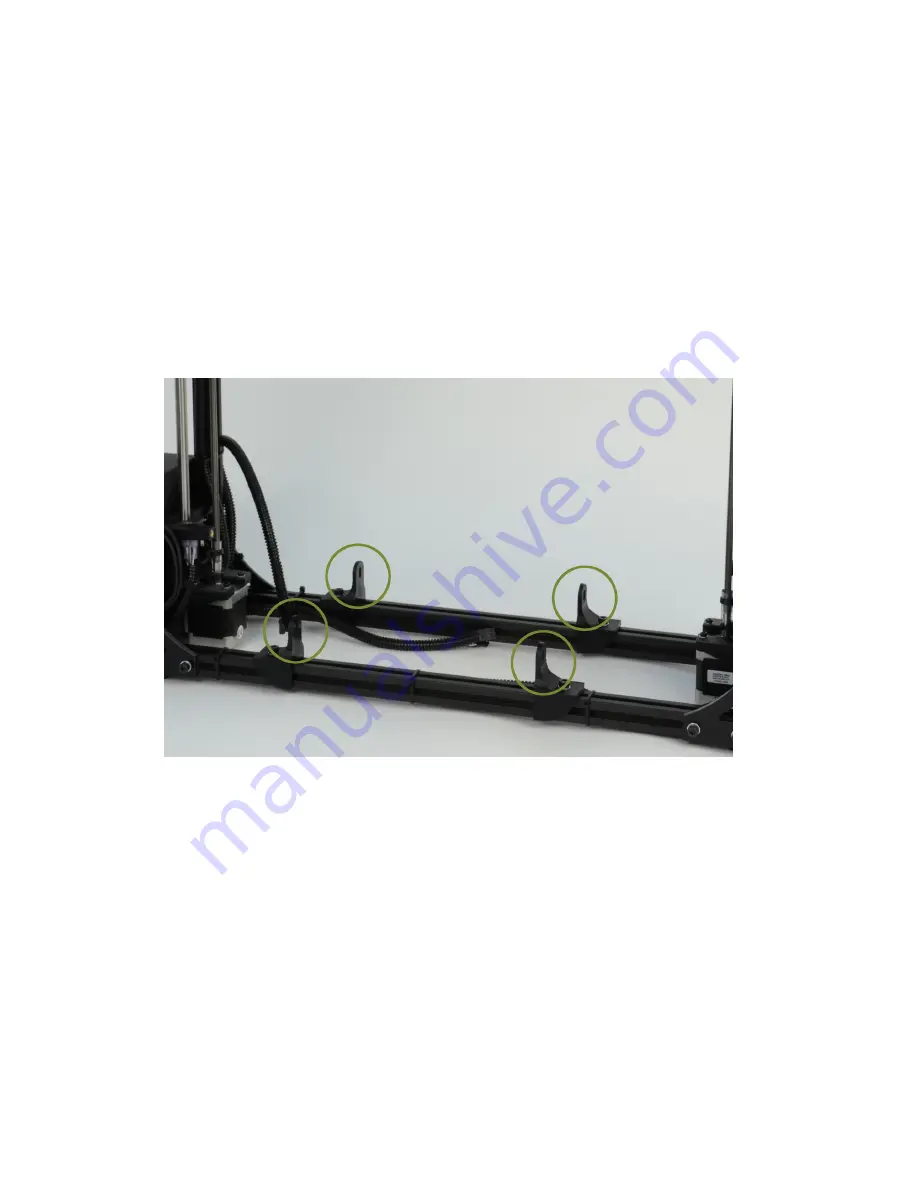
3. On the TAZ frame locate the four Y axis mount brackets shown in Fig.
1.4 (pg. 18). With the print surface facing up and the stepper motor
end of the Y axis facing back, slide the Y axis assembly in between
the Y axis mount brackets. The four Y axis mount brackets will line
up with the Y axis bolt holes on the Y axis assembly. Thread the four
Y axis bolts through the brackets, into the Y axis assembly (Fig. 1.5,
page 19). Before completely tightening the Y axis bolts make sure the
Y axis aluminum bars are pushed down against the TAZ frame lower
bars. While pushing on the black Y axis square extrusions tighten
the four Y axis bolts. The printer can now be set flat on the table.
Figure 1.4: Locate the four Y axis mounts on the frame
18
Summary of Contents for TAZ 3.0
Page 1: ...TAZ 3 0 User Manual Aleph Objects Inc...
Page 5: ...CONTENTS Index 155 Glossary 159 v...
Page 10: ......
Page 11: ...WARNINGS Safety Information...
Page 14: ......
Page 15: ...Setup Your Printer...
Page 27: ...1 1 HARDWARE SETUP Figure 1 14 Power and USB receptacles Figure 1 15 Power supply 27...
Page 30: ...Setup Your Printer Figure 1 19 Filament Guide Mount Figure 1 20 Filament Guide Setting 30...
Page 31: ...1 1 HARDWARE SETUP Figure 1 21 Axes movement directions Figure 1 22 End stop locations 31...
Page 33: ...Loading Filament...
Page 36: ......
Page 37: ...3D Printer Software...
Page 47: ...Your First 3D Print...
Page 55: ...4 5 Z PRINT HEIGHT Figure 4 5 Nozzle height Figure 4 6 Z end stop trigger 55...
Page 58: ......
Page 59: ...Slic3r...
Page 131: ...Printing with the Graphic LCD...
Page 138: ...Printing with the Graphic LCD GLCD Controller Menu Diagram Figure 6 4 Configuration Menu 138...
Page 139: ...Maintaining Your 3D Printer...
Page 143: ...Advanced Usage...
Page 148: ......
Page 149: ...Hardware and Software Source Code...
Page 151: ...3D Printer Support...
Page 153: ...Contact Information...
Page 161: ......
Page 162: ...Colophon Created with 100 Free Libre Software GNU Linux L A TEX Memoir...


