65
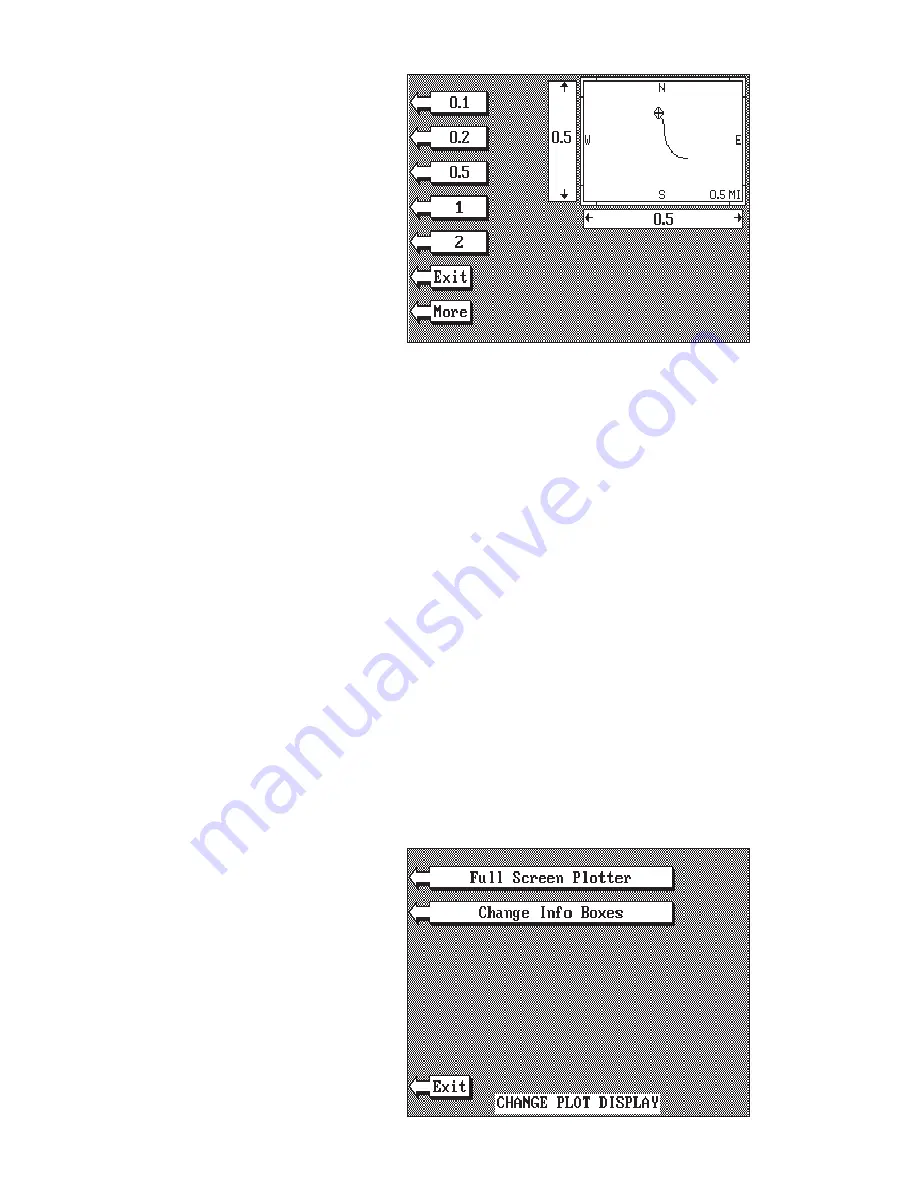
SET RANGE
Use the "Set Range" menu to
change the plotter’s range or
distance across the plotter’s
display. The range is 1 statute
mile when the LMS-350A is
turned on for the first time. The
available plotter ranges are .1,
.2, .5, 1, 2, 5, 10, 20, 50, and
100 miles. This lets you “zoom
in” to see small variations in
your course or “zoom out” to
see your starting position, present position, track, course, and destination.
ICON ON/OFF
Pressing this key turns on the icons that you placed on the screen using
the EVENT MARKER key. For more information on this feature, see the
Event Marker section. This also turns on all of the waypoint icons, also.
ALARMS
Press this key for the alarms menu. For more information on the alarms,
see the ALARMS section.
CHANGE PLOTTER DISPLAY
When the LMS-350A is first turned on, (or after a preset), the plotter
screen has a column of digital displays on the left side of the screen. These
displays can be changed or erased completely. This gives you a full-
screen plotter.
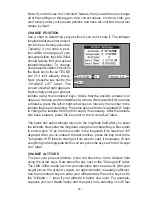
To change the plotter display, press the MENU key while the plotter is
displayed. Now press the key next to the "Change Plotter Display" label.
The menu shown below appears. To change to a full-screen plotter
display, press the key next to
the "Full Screen Plotter" key. A
plotter similiar to the one shown
at the top of the next page
appears.
To change digital display boxes,
press the key next to the
"Change Info Boxes". A screen
similar to the one on the next
page appears.
Summary of Contents for LMS-350A
Page 1: ...INSTALLATION AND OPERATION INSTRUCTIONS LMS 350A ...
Page 4: ......
Page 49: ...45 GROUP H GROUP I GROUP M GROUP L GROUP O GROUP N GROUP K GROUP J ...
Page 50: ...46 GROUP P GROUP Q GROUP U GROUP T GROUP V GROUP S GROUP R ...
Page 52: ...48 WINDOW 13 WINDOW 12 WINDOW 15 WINDOW 14 WINDOW 11 WINDOW 10 WINDOW 9 WINDOW 8 ...
Page 53: ...49 WINDOW 21 WINDOW 20 WINDOW 19 WINDOW 18 WINDOW 17 WINDOW 16 ...
Page 92: ...89 This page intentionally left blank ...
Page 93: ...90 LITHO IN U S A 988 0133 01 ...


