55
GETTING STARTED
Initialization - Power On
In order for the LMS-350A to lock onto the satellites, it must first find them.
If you simply turn the unit on and wait, the unit will find the satellites by itself
in 15 minutes or less. This is called “Cold Start.” If you let it find the
satellites, the time display will probably be wrong, since it will be showing
UTC time or the time at Greenwich, England. However, all other naviga-
tion displays, including the position display will be correct. (You can set the
time to your local time.) To speed up the satellite acquisition process, you
can initialize the LMS-350A or “tell it where it is” the first time it’s turned
on. This initialization process is usually done only once and requires the
following data:
1. Present position in latitude/longitude
2. Elevation above sea level (altitude)
3. Today’s date and time
The unit usually only takes a few minutes or less to find the satellites once
it’s been initialized by the user.
After the power cable and GPS antenna module are installed, press the
ON key, then press the GPS key. Next, press the MENU key. Now press
the key next to the “Change GPS Settings” label. Finally, press the key
next to the “SET LAT, LON, ALT, TIME, DATE” label. The screen shown
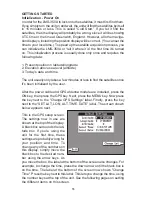
below appears next.
This is the GPS setup screen.
The settings now in use are
shown at the top of the display.
A black box surrounds the lati-
tude box. If you’re using the
unit for the first time, these
settings are probably wrong for
your position and time. To
change any of the numbers on
this display, simply move the
black box to the desired num-
ber using the arrow keys. As
you move the box , the label at the bottom of the screen also changes. For
example, to change the time, press the down arrow until the black box is
on the time. The label at the bottom of the screen now shows "Change
Time". Press the key next to this label. This lets you change the time, using
the number keys at the top of the unit. See the following pages on setting
the different items on this screen.
Summary of Contents for LMS-350A
Page 1: ...INSTALLATION AND OPERATION INSTRUCTIONS LMS 350A ...
Page 4: ......
Page 49: ...45 GROUP H GROUP I GROUP M GROUP L GROUP O GROUP N GROUP K GROUP J ...
Page 50: ...46 GROUP P GROUP Q GROUP U GROUP T GROUP V GROUP S GROUP R ...
Page 52: ...48 WINDOW 13 WINDOW 12 WINDOW 15 WINDOW 14 WINDOW 11 WINDOW 10 WINDOW 9 WINDOW 8 ...
Page 53: ...49 WINDOW 21 WINDOW 20 WINDOW 19 WINDOW 18 WINDOW 17 WINDOW 16 ...
Page 92: ...89 This page intentionally left blank ...
Page 93: ...90 LITHO IN U S A 988 0133 01 ...


