


Chapter
4
MMI
Menu
9
4
4
M
M
M
M
I
I
M
M
e
e
n
n
u
u
D
D
i
i
s
s
p
p
l
l
a
a
y
y
S
S
c
c
r
r
e
e
e
e
n
n
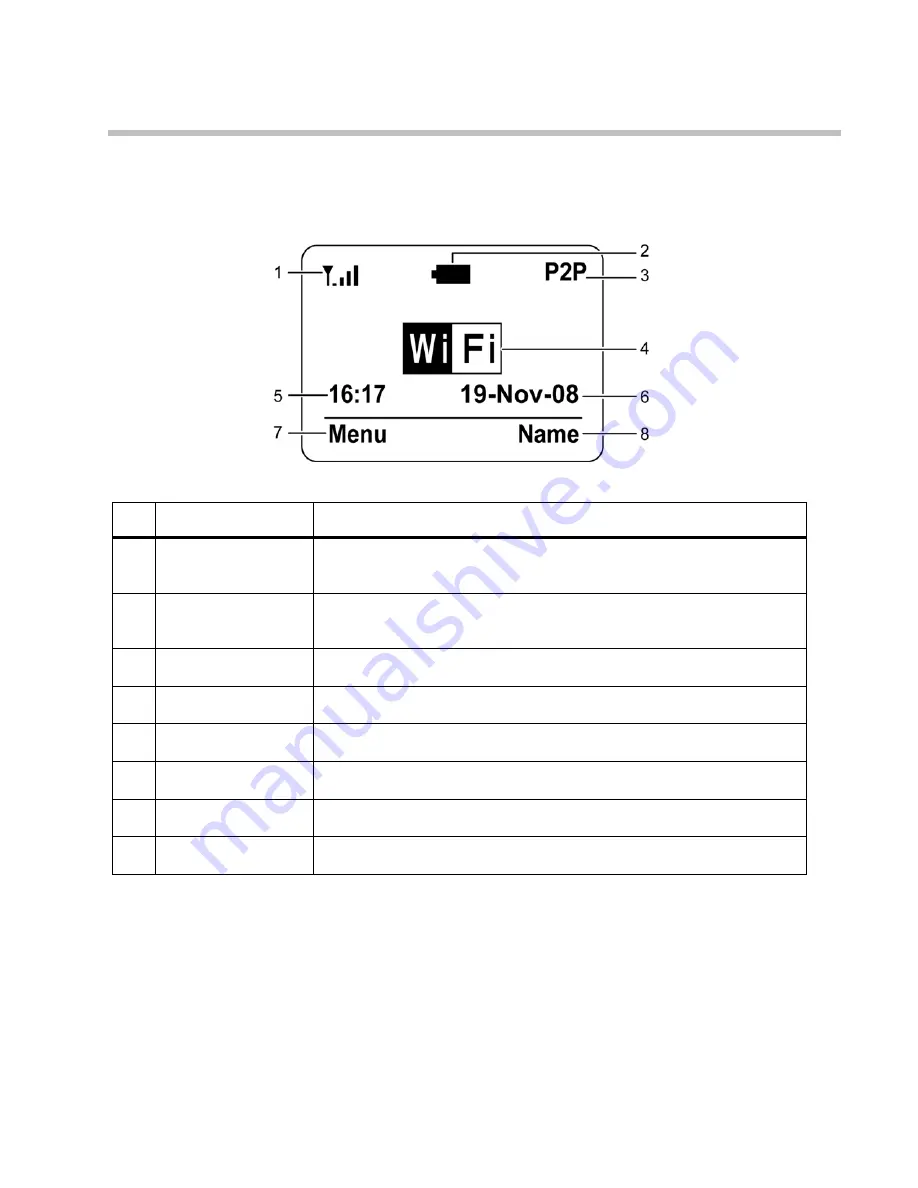
The
illustration
below
shows
an
overview
of
the
layout
of
the
display
screen
and
its
icons.
The
display
screen
elements
are
described
in
the
table
below:
No.
Indicator
Description
1
WiFi
signal
Displays
the
WiFi
signal
strength.
The
presence
of
five
bars
()
indicates
the
strongest
signal
and
the
presence
of
a
single
bar
indicates
the
weakest
signal.
2
Battery
charging
level
The
presence
of
all
the
five
bars
indicates
that
the
battery
is
fully
charged
or
has
100%
charge.
Charging
is
indicated
by
a
moving
charging
bar.
3
Connection
mode
Displays
the
current
connection
mode.
4
Connection
Status
Displays
the
connection
status.
5
Time
Displays
the
time.
6
Date
Displays
the
date.
7
Menu
soft
key
Press
the
right
soft
key
to
activate
Menu.
Displayed
commands
vary.
8
Name
Soft
key
Press
the
left
soft
key
to
activate
Phonebook.
Displayed
commands
vary.


