


Appendix
—
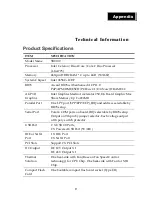
Technical
Information
11
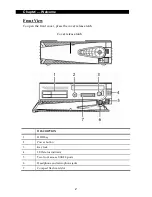
F
F
r
r
e
e
q
q
u
u
e
e
n
n
t
t
l
l
y
y
A
A
s
s
k
k
e
e
d
d
Q
Q
u
u
e
e
s
s
t
t
i
i
o
o
n
n
s
s
(
(
F
F
A
A
Q
Q
)
)
Question
1:
Why
does
the
system
appear
unstable
after
updating
BIOS?
Answer:
Load
optimized
defaults
(or
load
SETUP
Default)
after
flashing
BIOS.
If
the
system
remains
unstable,
clear
CMOS
to
solve
the
problem.
Question
2:
How
do
I
clear
CMOS?
Answer:
To
clear
CMOS,
do
the
following:
1.
Turn
off
power
and
switch
off
the
power
adapter.
2.
Remove
the
jumper
from
clear
CMOS
2
‐
3
PIN
and
insert
the
jumper
to
clear
CMOS
1
‐
2
PIN.
3.
Remove
the
jumper
from
clear
CMOS
1
‐
2
PIN
and
re
‐
insert
the
jumper
to
clear
CMOS
2
‐
3
PIN.
4.
Switch
on
the
power
again.
5.
Press
Delete
to
enter
CMOS
setting
and
load
optimized
defaults.
6.
Save
changes
and
reboot
the
system.
Question
3:
How
to
use
the
Boot
Menu?
Answer:
To
use
the
Boot
Menu,
do
the
following:
1.
Press
F9
to
enter
the
Boot
Menu.
2.
Select
the
Boot
device
from
the
Boot
Menu.
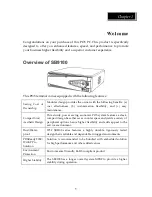
Summary of Contents for SB9100 Series
Page 1: ...SB9100 User Manual...
Page 2: ......