


SCH Collectors Installation & Operation Manual
SCH Collectors Installation & Operation Manual
26
3
Roof Attachment Installation
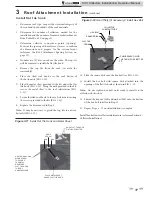
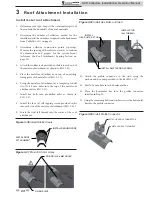
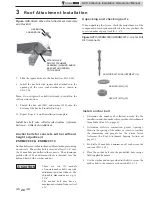
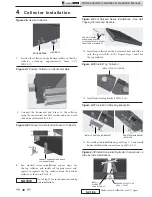
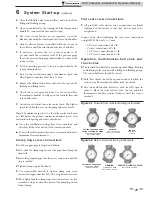
Figure 3-36 Attach Wave Roof Attachment Assembly
and Hex Bolt
HEX BOLT
SQUARE DISK
ATTACH WAVE
ROOF ATTACHMENT
ASSEMBLY (WASHER, ANGLE
BRACKET AND SCREW)
TO THE ROOF
7. Slide the square disk onto the hex bolt (see FIG. 3-36).
8. Install the hex bolt with square disk attached into the
opening of the wave roof attachment as shown in
FIG.
3-36.
Note:
Do not tighten hex bolt until ready to install on the
collector substructure.
9. Thread the hex nut (M8) and washer (M8) onto the
bottom of the hex bolt installed in Step 8.
10. Repeat Steps 4 - 9 until installation is complete.
Install hex bolt onto collector substructure (reference
Section 4 - Collector Installation)
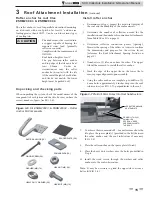
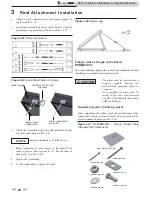
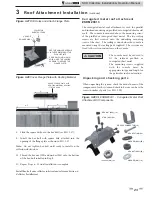
Anchor bolts for concrete with or without
height adjustment
#SRM20009 & #SRM20010
Anchor bolts are used for inclined and freestanding mounting
on concrete. The anchor bolt is inserted at least 2 1/4" into
the 10 mm hole pre-drilled in the concrete. The aluminum
profile with a 10.5 mm clearance hole is threaded over the
bolt and fixed with a washer and nut.
• There are two (2) models
of concrete anchor bolts, one with
adjustment and one without. The
adjustable dimensions are up to
2
3/4".
• The anchor bolt may have a
maximum deviation from vertical
of
5°.
CAUTION
ANCHOR BOLT W/ADJUSTMENT (1X)
WASHER (M10) (3X)
HEX NUT (M10) (3X)
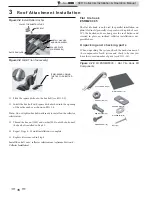
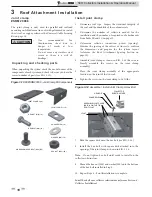
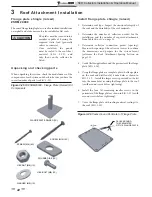
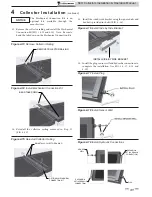
Unpacking and checking parts
When unpacking the system, check the model names of the
components of each system and check to be sure you have the
correct number of parts (see FIG. 3-37).
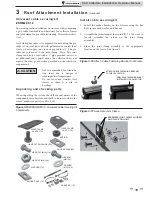
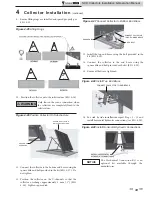
Install anchor bolt
1. Determine the number of collectors needed for the
installation and the number of required roof attachments
from Table 3B or 3C on page 11.
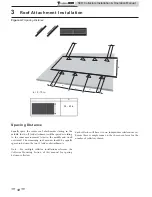
2. Determine collector connection points (spacing).
Measure the spacing of the rafters or trusses to confirm
the dimensions and prepare for the system layout
(reference the Roof Attachment Spacing Section on
page
12).
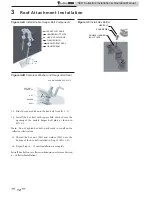
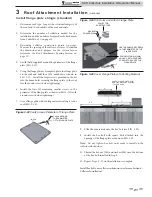
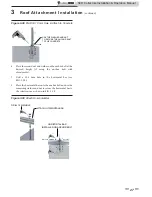
3. Pre-drill a 10 mm hole a minimum of 3 inches into the
concrete (FIG. 3-38).
4. Place the anchor bolt into the pre-drilled hole using a
field supplied hammer.
5. Use the washer and nut provided in the kit to secure the
anchor bolt to the concrete as shown in FIG. 3-38.
Figure 3-37 Kit #SRM20009 & #SRM20010 - Anchor Bolt
Kit Components


