background image

Playback

34


You may not be able to play back discs recorded in 

other DVD recorders. 


This DVD recorder can only play DVD-Video discs 

marked with the same region code as printed on its 

rear panel (example of region code:   ), or all-region 

discs which are labeled with the icon 

ALL

. If you try 

to play discs with different region code(s), a message 

saying ‘Invalid Region Code’ will appear on screen.

Playback: Step by Step

Follow the steps to start playing back media files. For 

some types of files, there are extra features available and 

instructions are provided after this section.

Step 1.

 Place a disc in the DVD recorder

Press   

OPEN/CLOSE 

to open the disc tray

Carefully 

place the disc on the tray with the label side facing up, 

then press   

OPEN/CLOSE

.

Step 2.

 Start playback

For DVD-Video, VCD/SVCD and audio CD

, playback 

will start automatically. If not, press 

PLAY

 to begin 

playback.

For DVD-Video disc, a menu might appear when the disc 

is in playback mode.

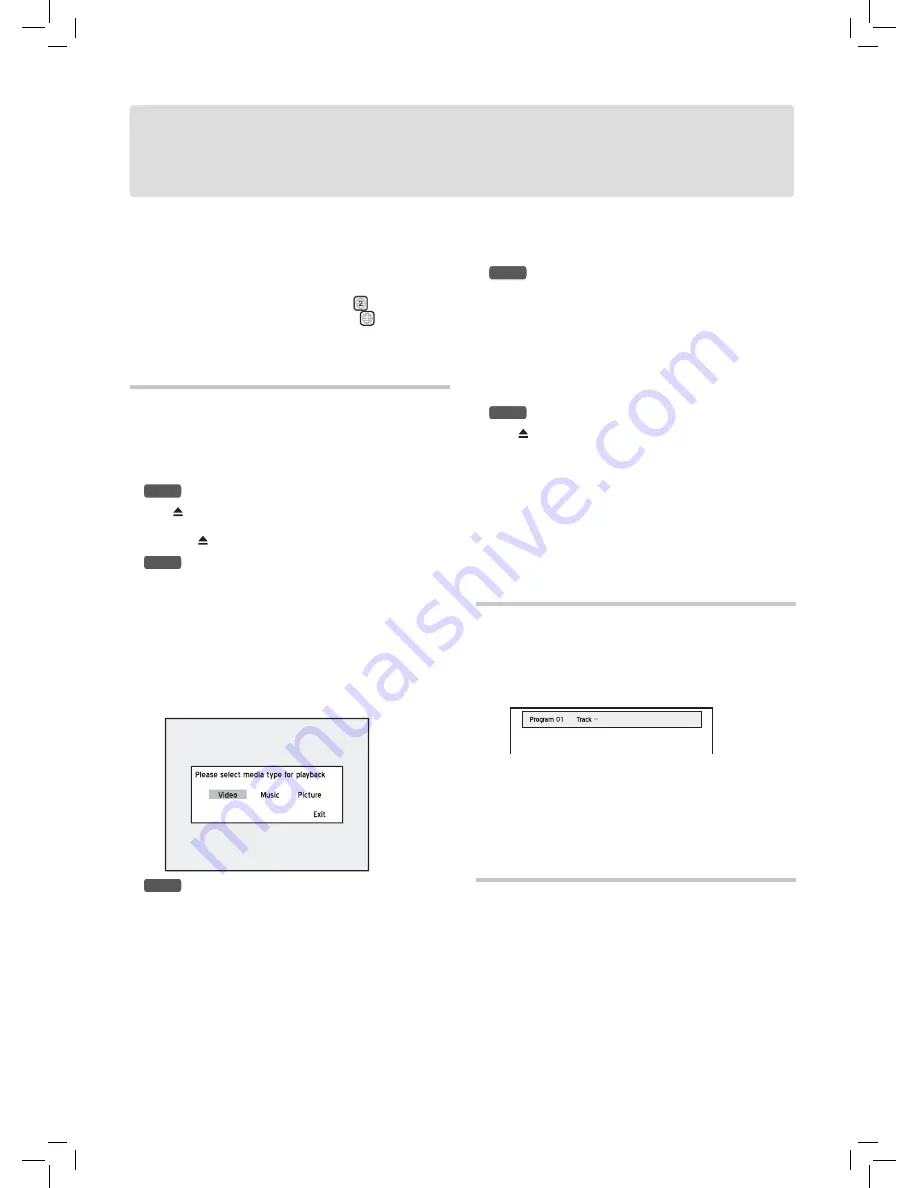
For video/music/picture files recorded on discs

, a 

dialogue box will appear. Select the type of the file you are 

going to play. If there are no video/music/picture files on 

the disc, the related button(s) will be disabled.

Playback_06_01

Step 3.

 Change the item you want to play

For DVD-Video disc, press 



 to select, then press 

ENTER

If the titles and chapters are numbered, press 

number buttons (0-9) to select a menu item and confirm 

with 

ENTER

.

For audio CD, music files, audio files and VCD/SVCD 

disc, 

press 


PREVIOUS

 or 


NEXT

 to select your 

desired track/file. 

For music and video files recorded on discs, you can also 

press 

ALBUM 

 or 

ALBUM 

 to select a folder which 

contains the desired file.

For picture files recorded on discs,

 see ‘

Playing 

Picture File

’.

Step 4.

 Stop playback

For DVD-Video disc/VCD/SVCD disc, and video file.. 

Press 


STOP

 to stop playback at a marked stop.  

Press 


PLAY

 to resume playback from a marked stop.  

Press 


STOP

 again to bring the playback to a full stop.

For audio CD and music file, ...

Press


STOP

 to stop playback. 

Press


PLAY

 to resume playback.

Step 5.

 Remove the disc

Press   

OPEN/CLOSE

.


 For DVD-Video, you can bring up the DVD menu by 

pressing 

MENU

 on the remote control.


  In some cases, the disc recorded on other recorders 

need to be finalized before it can be played back on 

this DVD recorder.


 This DVD recorder supports music files in .mp3 and 

.wma formats.

Programmed Playback for 

Audio CD


1.

    During the playback of a audio CD, press 

EDIT

 to 

bring up the editing bar.


2.

     Press number buttons (

0-9

) to enter the number of track 

you would like to play.


3.

    When completed, press 


PLAY

 to start the pro-

grammed playback. 

Press 


STOP

 to stop playback. 

Press 


PLAY

 to resume playback.

Playing Picture File


1.

    Follow the general operation procedure in 

‘Playback: 

Step by Step’ 

to start the playback of a disc containing 

picture files.


2.

    When playback starts, a tool bar appears on the screen. 

Press 

or

to go to previous or next picture. Press 

 

repeatedly to rotate the picture clockwise or press 

 

to rotate the picture counterclockwise.

Summary of Contents for DD-A100 Series

Page 1: ...n enhance the source resolution to either 720p or 1080i delivering improved near high definition image quality when connected to a TV via HDMI cable The HDMI interface of this DVD recorder features HD...

Page 2: ...ct during lightning storms or when it is not used for long periods of time 13 CART Use only cart stand tripod bracket or table speci ed by the manufacturer or sold with the product When a cart is used...

Page 3: ...AT THE USER SWITCH THE CONNECTION TO THE STAN DARD DEFINITION OUTPUT IF THERE ARE QUESTIONS REGARDING OUR TV SET COMPATIBILITY WITH THIS MODEL 525P AND 625P DVD PLAYER PLEASE CONTACT OUR CUSTOMER SERV...

Page 4: ...g On Screen Input Keypad 27 Using On Screen Input Keypad 27 Recording Recording Step by Step 28 Recording from TV 29 Recording from External Devices 29 One Touch Recording 29 Inserting Chapter Mark du...

Page 5: ...5...

Page 6: ...n DVD Video or DVD VR format and nalized or with JPEG MP3 WMA MPEG 4 les Playback of a DVD R double layer disc is supported by select models only DVD R RW DVD R DL Double Layer Video CD VCD CDs for vi...

Page 7: ...k the disc types listed below If you try to play back these discs excessive noise may cause damage to your speakers When placing an unplayable disc on the disc tray a message showing Invalid Disc will...

Page 8: ...e are Timer Programs set for recording 4 OPEN CLOSE button Opens or closes the disc tray 5 Disc tray Holds discs securely during recording or playback If during power off mode the disc tray is still l...

Page 9: ...a receiver having a digital input jack 4 AV INPUT VIDEO AUDIO L R jacks Connects the outputs of external equipment via composite video audio cables 5 COMP OUT COMPONENT jacks Connects the inputs of e...

Page 10: ...re track chapter 12 F R button Press to reverse playback 13 STOP button Press to stop playback or recording 14 POWER button Press to switch on or off the recorder 15 SOURCE button Press to select sign...

Page 11: ...jack of this recorder to a TV via a VCR may cause a viewing problem when playing a copyright protected disc The same viewing problem may also occur when connecting the recorder to an integrated TV Vid...

Page 12: ...stem Setup p 14 Setting HDMI p 18 Option 1 Using Composite Cable Use the audio red and white ends of a composite cable to connect the AUDIO OUT jack on the DVD recorder to the AUDIO IN jack on the tel...

Page 13: ...to change TV s input source check the instruction manual provided by your TV manufacturer Connecting to External Devices Connecting to VCR V8 Cam corder DVD Player Connects the AV OUTPUT jack on the c...

Page 14: ...example the procedure for setting the language of subtitle is written as Go through Language Subtitle First Level Option Second Level Option Third Level Option Description Notice System Video Output...

Page 15: ...Audio Multiple Languages Language to be adopted for the spoken language Available options vary depending on model types and discs being played Subtitle Multiple Languages Your preferred language for s...

Page 16: ...it Stream The mode decoded encoded of MPEG signal transmitted from the digital output jack of the DVD recorder Select PCM when your ampli er does not have an integrated MPEG audio decoder Select Bit S...

Page 17: ...ress ENTER 5 A pop up window titled Daylight Saving will then appear Press to make selection suitable for your time zone then press ENTER 6 If you select Auto or On a pop up window will appear See ste...

Page 18: ...n the Scan Channel function is activated the TV channels are scanned and stored in a speci c or der If your TV content provider changes the channel listing or if you are reinstalling this DVD recorder...

Page 19: ...L Box Started_SystemSetup_07_05 The picture is shown with black bars at the top and bottom 2 If you select 4 3 Pan 4 3 Pan Scan Started_SystemSetup_07_04 The picture is zoomed to ll the screen vertica...

Page 20: ...organize your TV channel list You can activate Channel Editor using the following paths Path 1 Using Setup Menu 1 Press SETUP to display the Setup menu 2 Go through TV Turner Utilities Edit Channel Pa...

Page 21: ...an enter up to 10 characters for a name On Screen Input Keypad p 27 4 When completed press to select Finish then press ENTER Enabling Disabling TV Channels You can temporarily remove unwanted channel...

Page 22: ...nline sources Setting up VCR Plus System As channel numbers may vary depending on where you live it is suggested that you build up a matching channel list when you rst set up the DVD recorder This ste...

Page 23: ...you are watching TV Image from your selected channel will be shown If you are watching DVD Video or VCD Image of the disc being played will be shown If you are listening to an audio CD The display wi...

Page 24: ...to insert number and press ENTER to con rm your input before going to next setting 7 The Timer Program information will appear Press ENTER to exit the Timer Record setting Using Easy Guider Record Bef...

Page 25: ...nel dialogue box will then appear if the DVD recorder fails to nd information of a corresponding channel Press to enter the channel number shown on your TV then press ENTER EasyAccess_EasyGuider_04_05...

Page 26: ...VR Required No DVD RW Data le Not required DVD VR Not required Quick preparation is a technology of formatting which saves much time compared to traditional Full Preparation method It creates a tempo...

Page 27: ...rs one by one in a backward direction Clear to delete all characters shown on the entry bar Cancel to discard changes and returning to the previous page Finish to saving the settings and exiting the s...

Page 28: ...select Quick Preparation or Full Prepara tion then press ENTER Recording_01_03 Step 4 Start recording For Example to record from TV you need to select a channel rst Press TV MODE to select TV as the...

Page 29: ...your DV may not be fully supported by the unit If you still experience problem using the DV Link for recording please connect your DV via S Video or composite cables to this DVD recorder The DVD reco...

Page 30: ...t extra chapter marks in addition to those created by system default setting 1 Press SOURCE repeatedly to select the signal source 2 Press RECORD to start recording 3 During recording press EDIT to in...

Page 31: ...System p 22 Introducing Timer Record Menu Press TIMER to display the Timer Record menu If your model supports the VCR Plus system you can press on a highlighted program to switch between the Date Tim...

Page 32: ...go to Timer Record menu highlight the bin icon located in the rst column of the entry you want to delete then press ENTER VCR Plus Mode Select Models Only Timer_01_02 Storage capacity available on the...

Page 33: ...to go to the sub menu Press to select then press ENTER to con rm your selection 4 Follow step 6 8 in Setting Timer Program Date Time Mode to complete the setting If you want to return to the Date Tim...

Page 34: ...with ENTER For audio CD music les audio les and VCD SVCD disc press PREVIOUS or NEXT to select your desired track le For music and video les recorded on discs you can also press ALBUM or ALBUM to sele...

Page 35: ...ge and to pan through the enlarged image 1 Select Zoom Picture Control then press ENTER A control pad will appear Playback_08_03 Introducing Navigation Menu During playback press NAVI button on the re...

Page 36: ...les To perform the function when playing video les titles press to select Search then press ENTER to go to the sub menu To search by title chapter number 1 Select Title Chapter then press ENTER Playb...

Page 37: ...rent categories of information will be shown depending on the media type A B Repeat 1 Select A B Repeat then press ENTER 2 When playback reaches the beginning of your desired ses sion press to select...

Page 38: ...with one of these extensions but in format other than MicroDVD and SubRip are not supported by this DVD recorder Bitmap based subtitles such as idx sub are not supported by this DVD recorder Playing...

Page 39: ...de of your DVD recorder Playback_07_01 The code seen above serves as an example only 3 When completed press SETUP to exit the Setup menu 4 Go to the DivX website and enter the recorder s registration...

Page 40: ...t the playing Then press EDIT to display the Edit menu Playback Step by Step p 34 Naming a Title 1 On the Edit menu select Rename then press EN TER The on screen input keypad will be displayed Editing...

Page 41: ...ext time 1 On the Edit menu press to select Overwrite then press ENTER to switch on or off the Overwrite function 2 To exit the setting select Exit then press ENTER 3 If you switch on the function a p...

Page 42: ...e external device is copyright protected you need to connect the device directly to your TV No image but a pop up window warning that the HDCP connection is failed appears on the TV screen Select Mode...

Page 43: ...equired to be nalized Discs recorded with copy once material cannot be played on non CPRM compat ible players The recorder starts playing the disc automatically DVD Video disc features an auto playbac...

Page 44: ...ions Rear Panel RF Input Coaxial x 1 RF Output Coaxial x 1 Video Input Cinch yellow x 1 Video Output Cinch yellow x 1 Audio L R Input Cinch white red x 1 Audio L R Output Cinch white red x 1 Component...

Page 45: ...ode Dolby Digital 2 channel Audio Format Supported Playback Playable Formats MP3 WMA protected WMA and WMA lossless are not supported LPCM Dolby Digital 2 channel Dolby Digital 5 1 channel digital out...

Page 46: ...ng The Just Fit mode is available for timer recording only Timer Recording Frequency Recording Frequency Suitable Applications Advanced Option Recording result Once To record program broadcast during...

Page 47: ...a DVD Video Contents can be recorded only once to a DVD R and will have the same format as a DVD Video DVD RW DVD RW is a recordable and rewritable disc that is the same size as a DVD Video DVD RW has...

Page 48: ...C Playback Control A special feature on a Video CD or Super VCD that enables interactive use Progressive Scan Progressive Scan mode differs from the Interlaced Scan mode in how a video image is update...

Page 49: ...Gigastorage GSC503H01 8 0x 30 OPTODISC OPTODISC CR8 8 0x 31 Mitsubishi MCC 004 16 0x 32 TDK TDK 003 16 0x 33 RICOH RICOHJPN R03 16 0x 34 Philips PHILIPS C16 16 0x 35 MAXELL MAXELL 003 16 0x 36 CMC CM...

Page 50: ...KMZ01 8 0x 20 MJC MJC ME 8 0x 21 POSTECH POSG06 8 0x 22 Lead Data LEADDA S03 8 0x 23 DST Dvsn 8 8 0x 24 DAXON DAXON0 08S 8 0x 25 Gigastorage GSC004 8 0x 26 Gigastorage GSC003 8 0x 27 NANYA NAN YA A01...

Page 51: ...folding line...

Page 52: ...folding line...

Page 53: ...for resale the Refurbished Product For a period of ninety 90 days from the date of purchase the Refurbished Product Parts and Labor Warranty Period if Lite On determines that the Refurbished Product...

Page 54: ...IES OF MERCHANTABILITY AND FITNESS FOR A PARTICULAR PURPOSE OR ANY OTHER WARRANTY WITH RESPECT TO THE QUALITY ACCURACY OR FREEDOM FROM ERROR OF THE OPERATION USE AND FUNCTION OF THE PRODUCT IF LITE ON...

Page 55: ......

Page 56: ...824 0079 French Service e mail dc_support liteonit com Europe Lite On IT BV Meerenakkerplein 16 5652 BJ EINDHOVEN The Netherlands Tel 31 40 2508000 Fax 31 40 2508092 Service e mail dceu_support liteon...

Reviews: