25
/
27
10)
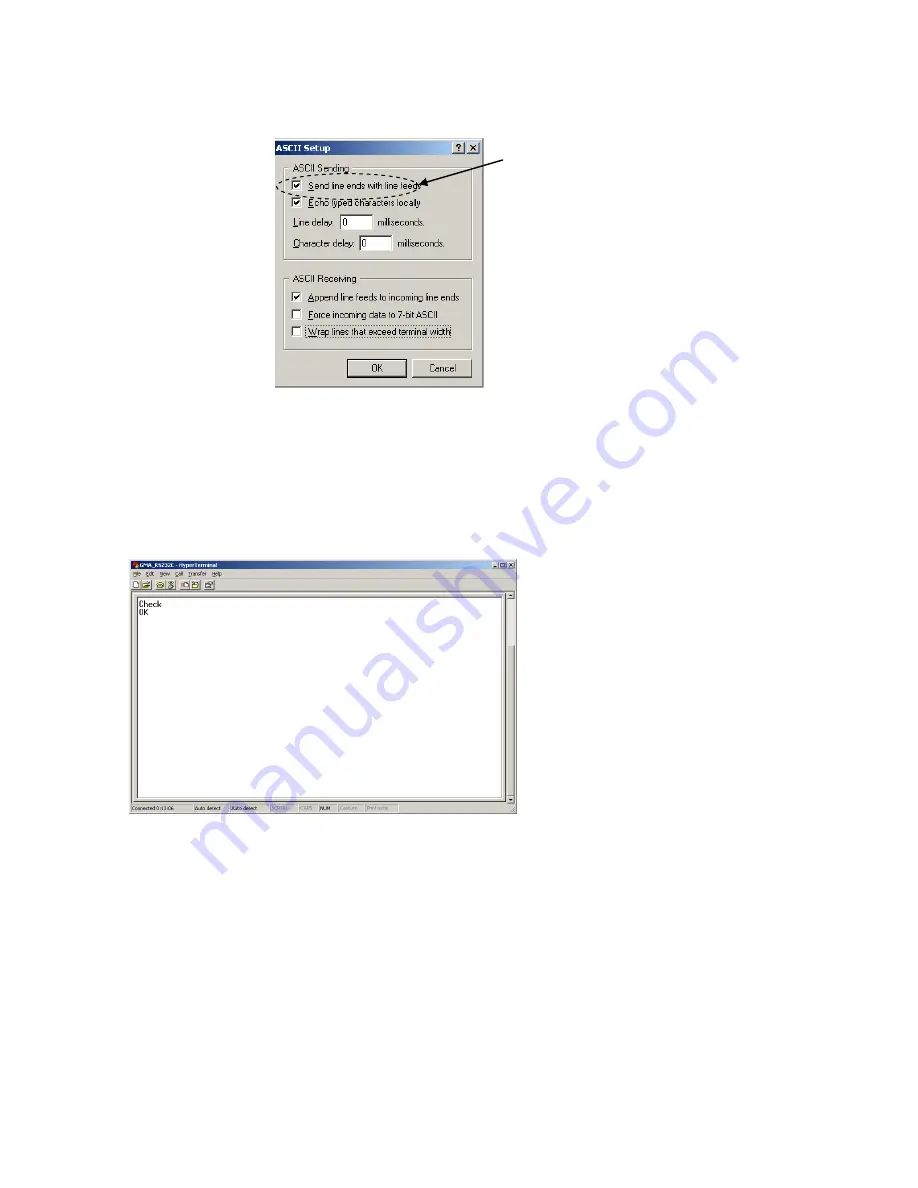
When the next picture appears, select each items as follows.(
☑
,
☑
, 0, 0,
☑
, blank, blank)
Then click the “OK” button.
11)
The screen display will return to the screen of paragraph 9.
Then click the OK button.
12)
End of setup.
Confirm the connection of the camera, then enter “check” on the screen below and send it out.
If “OK” is displayed on the screen, communication processing has been completed.
13) Select “Start”→ “Programs”→”Accessories”→”Communications”→”Hyper Terminal” →”(
*
1) ”, when
to launch the Hyper terminal again with the same settings after having exited the above screen.
*
1………The name which was entered at paragraph 3.
※
When using WindowsXP(64bit), it may
come to “NG” right after “OK” is displayed.
In that case, uncheck the “Send line ends with
line feeds” checkbox of above paragraph 10.
※


